Jump to content


  • Brinyte T28 Artemis Hunting Flashlight Review


    Introduction


    Despite living in an age of rapid scientific and technological advancement, there is actually very little innovation going on. Companies focus more on marketing than research and development and "new" products seem more like copies of each other than developed and designed with the needs of the consumer in mind.


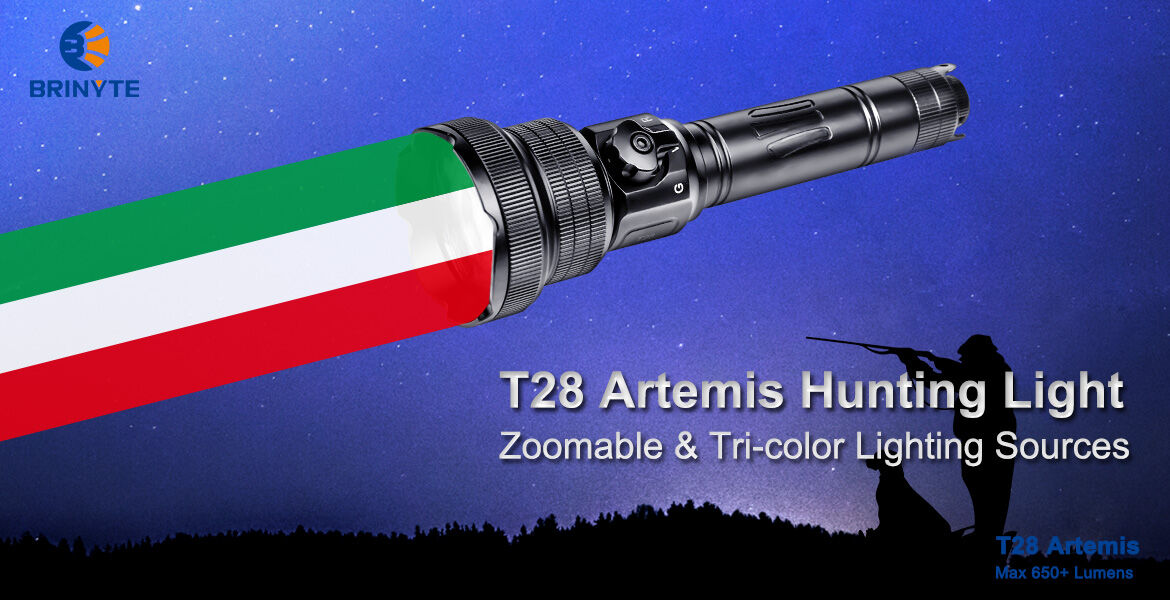
    As a reviewer I enjoy seeing products with true innovation, products that were developed with some actual thought in the design process. Such is the Brinyte T28 Artemis that Brinyte sent me to review.


    The Brinyte T28 Artemis is a hunting light and its design and function are specifically tailored for the job. With an interface that is intuitive and easy to use -with or without gloves- and a triple light source (white, red, and green) without the need to carry extra filters, the Brinyte T28 Artemis is the most complete hunting light anyone could wish for.


    large.1_93138451-bf38-45b3-9c27-a474bb554c3f_1024x1024@2x.jpg


    Does that mean it is perfect? Well, nothing is and I do not expect this light to be the exception. But let's delve into the review and find out if Brinyte did justice to Artemis, the ancient Greek goddess of hunting.


    Unboxing


    I received the review sample in a plain cardboard box, but that is not what the consumer gets, as the  Brinyte T28 Artemis normally comes in a nice retail package.


    large.20200915_120707.jpg large.119597089_324916358837388_7489827838965865856_n.png


    Inside the box there is a comprehensive instruction manual, laid out on 3 cards, which are held together with a nice hook and lanyard.


    large.20200915_121515.jpg


    large.20200915_121541.jpg large.20200915_121559.jpg


    There are also some spare o-rings and a USB type-A to type-C charging cable, which is long enough to comfortably set the battery on a table while charging it and not have it hanging from the socket, as might be the case with the cables some other manufacturers provide.


    large.20200915_121638.jpg


    As this is a light that can be mounted on a riffle with the appropriate mount (not included), a remote switch is included in the box. The remote switch replaces the tail cap of the light, has a spiral cable and includes a button to power on or off and separate buttons for increasing or decreasing brightness.


    large.20200915_121726.jpg large.20200915_121731.jpg


    The back of the switch has an adhesive-backed Velcro patch, so the switch can be mounted and removed freely.


    large.20200915_121749.jpg


    The cable has a stress relief, to avoid damage from movement. The conducting spring is not particularly thick, but it should be sufficient, since the battery is only subjected to modest power draw.


    large.20200915_121758.jpg large.20200915_121814.jpg


    Last but not least, the star of the show, the light itself. A lanyard comes pre-attached to the tail of the light. The lanyard is of nice quality but I would prefer it to be adjustable and have a sturdier tying end.


    The aesthetics of the light are nice and seem to be permeated by a faint military air, in a modern way. The anodization is flawless and there are no sharp edges anywhere.


    large.20200915_122235.jpg large.20200915_122316.jpg


    large.20200915_122410.jpg large.20200915_122400.jpg 


    The light can tail stand, but I would not trust it as the head is a lot wider than the tail. Headstands are a lot safer, and the crenellated bezel ensures you can see if the light is on. 


    large.20200915_122540.jpg large.20200915_122809.jpg


    The battery ships safely inside the light casing, with one of its terminals insulated by a tab.


    large.20200915_122841.jpg


    The battery is a 21700 Brinyte branded and claims a capacity of 5000mAh. It has a USB C port near the positive terminal and can be directly charged with the provided cable and a charger.


    large.20200915_123142.jpg large.20200915_123157.jpg      

    The Brinyte T28 Artemis features a spring on the driver end as well as the tail cap. This ensures the light will not turn off if bumped, as pressure is applied on both ends of the battery. The springs are similar to the one on the remote switch, nice quality but not thick.


    large.20200915_123058.jpg large.20200915_122850.jpg


    This is how the light looks with the remote switch installed.


    large.20200915_123730.jpg


    Quality


    There is not much to say about the quality of the Brinyte T28 Artemis. The fit and finish is as good as I have seen in any production light. The anodization is flawless and the controls are responsive and sturdy.


    The threads are nicely cut and even though thicker springs are always nice to have, if the light is not drawing much current they do not make an important difference.


    large.20200915_122011.jpg


    The lanyard could (and should) be adjustable and with a thicker tying end, but that is not a major complaint as it is replaceable.


    Specifications


    The features and technical parameters of the Brinyte T28 Artemis, as found on the manufacturer's website, are the following:


    FEATURING

    ·         Powered by one 21700 rechargeable Li-ion battery

    ·         Brinyte patented tri-color lighting sources switch design

    ·         Rotating head to zoom in and out the beam

    ·         Tail stepless dimmer switch design, easy to meet any brightness requirements

    ·         Threaded lens for more effective concentrating effect

    ·         Regulated power supply maintains constant brightness

    ·         Overcharge, over-discharge and overheat protection

    ·         Reverse polarity protection prevents damage from improper battery installation

    ·         Aircraft-grade high strength aluminum AL-6061-T6 with premium Type III military hard-anodized anti-abrasive finish


    TECHNICAL PARAMETERS

    ANSI/NEMA FL1

    Turbo(White)

    Turbo(Red)

    Turbo(Green)

    Output(Flood/Spot)

    650+/360+Lumens

    140+/55+Lumens

    130+/70+Lumens

    Max Runtime

    135mins

    220mins

    270mins

    Beam Distance

    525+m/572+yds

    255+m/277+yds

    340+m/370+yds

    Intensity

    69600+cd

    16480+cd

    29160+cd

    Impact Resistant

    1m/1.09yds

    Protection Proof

    IP66

    Working Voltage

    3.0-4.2V

    Dimension

    182~196mm(Length) x 25.4mm(Body Dia) x 54mm(Head Dia)

    Net Weight

    200g/7.05oz (excluding battery)


    Unfortunately, I do not have the equipment to measure the brightness of the light to compare to the claims. The weight is a bit more than claimed though, at 216.2g. The battery weight is 73.6g.


    The only point where I will have to strongly disagree with the specifications claimed is the "regulated power supply which maintains constant brightness". That is not the actual case as the driver is not a buck/boost driver and the brightness decreased as the voltage of the battery diminished. It would have been much better if the light actually featured a driver that maintained constant brightness until the voltage protection kicked in.


    User Interface


    The user interface is where the Brinyte T28 Artemis truly shines - pun intended. The light turns on with a 1.5 second depress of the tail switch. This ensures that accidental activation is unlikely. Nevertheless, it is not impossible, as it could happen in a backpack, so I would like to have seen a more secure lockout option. A momentary depress of the same switch will turn the light off.


    The brightness level is controlled by twisting the same switch, like a volume dial. It controls the brightness in a step-less way, from 2% to 100%. Step-less rotary control is my preferred user interface in any light, as it is the most intuitive way to accurately dial in the exact amount of light needed, something that can be important in hunting.


    A green LED next to the button confirms the light is working normally, which is a nice touch. Its brightness is low enough so it is not distracting.


    The button / dial is large enough to use with thick gloves, which is essential for hunting and verifies that a lot of thought went into design of the Brinyte T28 Artemis.


    large.20200915_122820.jpg


    large.3_88e514f9-b22f-4951-a5f4-ad1a189e0775_1024x1024@2x.jpglarge.7d863143d8b4bc916fba03ad9293f5bf_1024x1024@2x.gif


    The remote switch also has on / off and dimmer functions. On / off is controlled by a momentary depression of the central switch. + and - control the brightness.


    large.20200915_123721.jpg


    The sturdy, military styled selector at the front is the means to select the LED used. The Brinyte T28 Artemis has 3 LEDs inside, and this selector actually moves the one needed to the centre, behind the lens. That is a very clever design, as other hunting lights have to either rely on add-on coloured filters or separate reflectors / optics for each colour LED, limiting the optic size available to each LED and / or increasing the size of the light.


    The unique design of the Brinyte T28 Artemis that moves the required LED in place, allowing for the use of a single, large optic, is optimal.


    large.20200915_122240.jpg


    large.20200915_122248.jpg large.20200915_122257.jpg


    large.8d95e4168a11238eaa39ffed571833ef_1024x1024@2x.gif


    But not only is the Brinyte T28 Artemis a step-less rotary control light with 3 separate LEDs, it is also a zoomie. So, twisting the head will zoom in the light, focusing the beam and increasing the throw distance.


    large.b87fb4e3b67ceee3ea407e10f62e4a6c_1024x1024@2x.gif


    The controls of the Brinyte T28 Artemis combine to create the most comprehensive, intuitive, easy to use and complete user interface I have seen to date.


    Beam-shots


    The Brinyte T28 Artemis uses a Fresnel lens. This will provide the nice, uniform beam of a conventional spherical lens, at a fraction of the size and weight.


    large.20200915_122551.jpg large.20200915_125622.jpg


    Behind the lens, are 3 LEDs, a white in the middle, flanked by a red and a green LED. The relevant selector with mechanically move the selected LED at the centre, behind the lens and connect it to the driver. 


    large.20200915_122133.jpg


    large.20200915_122148.jpg large.20200915_122202.jpg


    In that way the Brinyte T28 Artemis can produce white, red or green light, using the full size of the lens.


    large.20200915_123300.jpg


    large.20200915_123310.jpg large.20200915_123318.jpg


    The beam in full flood is not very floody. As the light is meant for hunting, it will be used from middle to long distances, so it makes complete sense that it is calibrated for those distances.


    large.20200915_123352.jpg


    large.20200915_123410.jpg large.20200915_123355.jpg


    In full zoom, the beam is very concentrated.


    large.20200915_123503.jpg


    large.20200915_123509.jpg large.20200915_123506.jpg


    Here are the same, on a flat white surface. In full flood the Fresnel lens creates a very uniform beam, with a defining circle around it. The LED itself can be just spotted in the centre.


    large.20200915_124703.jpg


    large.20200915_124723.jpg large.20200915_124714.jpg


    In full zoom, some artefacts are visible, but that does not show in the real world, at long distances, where the full zoom would be used.


    large.20200915_124615.jpg


    large.20200915_124624.jpg large.20200915_124620.jpg


    Here is a short video, using the Brinyte T28 Artemis outside.


    Driver


    The driver of the Brinyte T28 Artemis uses PWM to control the brightness, even at full brightness. That is to be expected and the PWM was not visible to my eyes.


    large.20200915_124835.jpg large.20200915_124858.jpg


    large.20200915_125012.jpg large.20200915_125036.jpg


    large.20200915_124923.jpg large.20200915_124947.jpg


    The shortcoming of the driver that needs to be addressed is the fact that it is not regulated, meaning the brightness of the light is dependant on the battery voltage. As the battery charge is used up and the voltage drops, the light becomes dimmer.


    Tint


    The tint of the white LED in the Brinyte T28 Artemis seems to be an above the BBL, cool CCT. Here it is compared to some other lights. From left to right we have the Brinyte T28 Artemis, the Olight S2R Baton II, the Sunwayman V20C and the Fireflies E07 Ti/Cu.


    large.20200915_131158.jpg


    The beam-shots are with the Brinyte T28 Artemis in full flood, in mid zoom and in full zoom.


    large.20200915_131231.jpg large.20200915_131316.jpg


    large.20200915_131340.jpg


    And here is how the colours compare to the white lights.


    large.20200915_131436.jpg large.20200915_131447.jpg


    large.20200915_131455.jpg


    large.20200915_131358.jpg large.20200915_131411.jpg


    large.20200915_131421.jpg


    Charging and Runtimes


    To charge the Brinyte T28 Artemis, you have to take out the battery and plug it into your own charger, using the provided cable. A red indicator light in the centre of the positive terminal will signal the charging. It will turn blue when the charging is completed.


    The battery is a Brinyte branded 21700 lithium-ion with a claimed capacity of 5000mAh, which I actually measured to be 5040mAh, so right on the money.


    large.20200915_135244.jpg large.20200915_163625.jpg


    Voltage protection kicked in when the battery voltage dropped to 2.68V. Charging it from that level, took 3 hours, 56 minutes and 25 seconds. The charging terminated when the battery reached 4.19V.


    The maximum current drawn from the charger was 1.4248A, so your charger must be capable to provide at least that. If not, the battery will still be charged, but charging will take longer.


    large.1638314877_BrinyteT28Artemis-1080p.png


    The runtimes specified and measured are in the table below. The ones measured are by far greater than the specified values. It is apparent that the specified runtimes refer to where the light produced is bright enough to be usable in hunting. As the driver is not actually regulated, the brightness will drop with the voltage of the battery, so the light, after a point, will not be bright enough to be usable. I hope Brinyte will address the issue and make a new version with a buck / boost driver, as this is my only grievance with this light.


    large.Runtime.png


    The light may have gotten dimmer as the voltage of the battery dropped but there was no visible step down due to thermal regulation. That is to be expected from a 650lm light of this size. The highest temperature measured during the run-time tests was 45.6C.


    Current Draw


    The current drawn from the battery of the Brinyte T28 Artemis was measured in all configurations using a digital clamp meter. The calibration for both the tail and the remote switches was done first. 


    large.1702646919_01ZeroTailSwitch.jpg large.540065919_01aZeroRemoteSwitch.jpg


    Then the parasitic drain was measured, which is very low.


    large.333813856_02ParasiticTailSwitch.jpg large.284153315_02aParasiticRemoteSwitch.jpg


    Here are the measurements for the lowest and highest settings, using the white LED, for both switches.


    large.1400011661_03WhiteLowTailSwitch.jpg large.1218503138_03aWhiteLowRemoteSwitch.jpg


    large.525882999_04WhiteHighTailSwitch.jpg large.292122287_04aWhiteHighRemoteSwitch.jpg


    Here are the measurements for the lowest and highest settings, using the red LED, for both switches.


    large.1588575623_07RedLowTailSwitch.jpg large.1359602009_07aRedLowRemoteSwitch.jpg


    large.628002823_08RedHighTailSwitch.jpglarge.1218315894_08aRegHighRemoteSwitch.jpg


    Here are the measurements for the lowest and highest settings, using the green LED, for both switches.


    large.1519875881_05GreenLowTailSwitch.jpg large.23457675_05aGreenLowRemoteSwitch.jpg


    large.124421584_06GreenHighTailSwitch.jpg large.1146227328_06aGreenHighRemoteSwitch.jpg


    The table below contains all the measurements, in Amps.


    large.Drain.png


    Conclusion


    The Brinyte T28 Artemis is a very well designed and executed hunting flashlight. It features white, red and green LEDs, a step-less rotary control and a zoom function with a Fresnel lens. Its IP rating of IP66 ensures protection from dust and powerful water jets, which is as much as anyone can expect from a zoomie and good enough for all hunting conditions.


    The light is solidly built, with good fit and finish and a flawless anodization. I wish the logo on the tube would align with something on the head of the light, but that is actually surprising expensive to ensure and definitely not worth the increase in price it would cause.


    The user interface is the most complete, comprehensive and easy it could be and designed to be used with thick gloves, if needed.


    large.T28-1_1024x1024@2x.jpg

    My only grievance is that the driver is not actually regulated and brightness is directly dependant on battery voltage. It would be so much more useful and nice if the light could actually maintain constant brightness, regardless of the battery level.


    The cost of the Brinyte T28 Artemis comes to $145.50 which is justified for the build quality and multitude of features. It would be even more so, with a better, fully regulated driver.


    Let's list the Pros and Cons of the Brinyte T28 Artemis:


    large_Up.png

    Pros

    + Extremely intuitive and complete user interface

    + High quality fit and finish

    + Flawless anodization

    + 3 separate LEDs for white, red and green, moved into place at the centre behind the lens by a mechanical selector

    + Fresnel lens

    + Step-less rotary control

    + Zoom function

    + Remote switch for power and brightness control included

    + IP66

    + 21700 USB C rechargeable battery with 5040mAh actual capacity


    large_Down.png

    Cons

    - Despite claims for a regulated driver that provides constant brightness, the brightness was actually dependent on battery voltage

    - Accidental activation is unlikely, but not impossible

    - The included lanyard should be adjustable and have a sturdier tying end


    Thanks to Brinyte for providing the light for review

    large.brinyte.png

    Polymeros Achaniotis 24/09/2020

    Συντελεστές Review
    Reviewers: Polymeros Achaniotis
    Photographers: Polymeros Achaniotis
    Editing: TheLab.gr Team
    Αξιολόγηση
    Χαρακτηριστικά:9.50
    Χρηστικότητα:9.50
    Ποιότητα:8
    Επιδόσεις:7
    Γραφικά:Select
    Ήχος:Select
    Gameplay:Select
    Αντοχή στο Χρόνο:Select
    Απόδοση/Τιμή:8
    Editor's ChoiceNo
    Innovation AwardYes
    Design AwardNo
    Value for MoneyNo

    • Like 20
    • Confused 1
    • Wow 2

    User Feedback

    Recommended Comments

    Παιδια νομιζα οτι μπηκα σε αλλο σαιτ του Σωτηρη του βλαχου απο την κρητη που εχει καναλι στο you tube για προιοντα απο το bangood. αλλα στο the lab ειμαι νομιζω 

    Link to comment
    Share on other sites

    Εγώ πάλι από τη μεριά μου, θα χαιρετίσω αυτή τη νέα προσπάθεια και δεν μιλάω για το γλωσσικό αλλά για το "νέον" του θέματος!

    Μου άρεσε η παρουσίαση η οποία χωρίς να είναι φλύαρη,  κάλυψε ότι θα μπορούσε να ενδιαφέρει τον υποψήφιο χρήστη / αγοραστή, μη παραλείποντας ακόμα και τις μικρές λεπτομέρειες όπως ας πούμε την αναβάθμιση της χρηστικής αξιοπιστίας των διπλών ελατηρίων!

    Από ότι φαίνεται, πράγματι έχει καταναλωθεί φαιά ουσία στην σχεδίαση του φακού και δεν διακρίνω κάποια προσπάθεια "εκλογίκευσης" του κόστους με "φτηνές τσιγκουνιές".

    Πρωτοποριακή η ιδέα για το "κυλιόμενο" LED και εδώ θα ήθελα να ρωτήσω αν  ζεσταίνεται το LED.

    Ρωτάω γιατί φαντάζομαι ότι στο σύστημα ψύξης του, αυτός ο μηχανισμός εναλλαγής των LEDs θα έχει επιβάλει κάποιους περιορισμούς στην βέλτιστη δυνατή απαγωγή της θερμότητας.

    Δύο πράγματα μου έλειψαν το ένα είναι η επαλήθευση των τιμών φωτεινότητας για την οποία εύχομαι ταχείαν και κυρίως "ανώδυνη",  αναβάθμιση του εξοπλισμού και το άλλο, μια ξενάγηση στα εσώτερα του φακού (driver, μηχανισμός εναλλαγής LEDs,  κλπ) για την απουσία της οποίας -γνωρίζοντας το ερευνητικό "μικρόβιο" του reviewer-  επαφίεμαι στις αποφάσεις του !  :)

    Πολύμερε, από εμένα ένα Μπράβο, είναι το λιγότερο που αισθάνομαι να ταιριάζει -έστω και από μακριά-  για το κόπο σου και το πολύ καλό  αποτέλεσμά του! 

    Εύχομαι αυτές οι αναζωογονητικές "παρεκκλίσεις"  σε "άγνωστα" τεχνολογικά "νερά" να γίνουν συχνότερες !

    Άντε και σε άλλα με υγεία !  :T: 

    • Like 3
    Link to comment
    Share on other sites

    Σε ευχαριστώ για τα ενθαρυντικά λόγια Στέλιο.


    Με την ευκαιρία θα απαντήσω και σε μερικά ερωτήματα.


    Γιατί στα αγγλικά; Η εταιρία με προσέγγισε λόγω της ενασχόλησής μου με τους φακούς και της παρουσίας μου σε σχετικούς διαδικτυακούς τόπους του εξωτερικού και - φυσικά - ήθελε το review στα αγγλικά. Θα μπορούσα φυσικά να δημοσιεύσω το review σε μια πληθώρα αγγλόφωνων ιστότοπων Εγώ από τη μεριά μου θεώρησα καλύτερο να το παρουσιάσω εδώ και να το διαθέσω στη δική μας κοινότητα.


    Όσον αφορά το πόσο επεκτάθηκα, ελπίζω ότι διατήρησα μια ισορροπία και δεν έγινα φλύαρος, χωρίς όμως ουσιώδεις παραλήψεις. Η επένδυση ενός κυνηγού σε έναν κυνηγετικό φακό, που έχει ένα μη ευκαταφρόνητο κόστος, θεωρώ ότι πρέπει να γίνεται με πλήρη εικόνα και επίγνωση.


    Όσον αφορά πιθανές ομοιότητες με τη δουλειά του συμπαθούς Σωτήρη, έαν υπάρχουν, είναι εντελώς συμπτωματικές.


    Όσον αφορά τα πιθανά προβλήματα της θερμικής διαχείρισης που πολύ σωστά εντόπισε ο έμπειρος Cooler και Fan Reviewer (πάντα θεωρούσα άδικο να είναι και Cooler και Fan (fun) ενώ εμείς οι υπόλοιποι έχουμε λιγότερο in τίτλους) σαφώς και ο μηχανισμός του κυλιόμενου LED αλλά επίσης και η εγγενής αδυναμία των έγχρωμων LED να λειτουργήσουν με πολύ ρεύμα και να αποδώσουν τα επίπεδα φωτός των λευκών συναδέλφων τους, έθεσε περιορισμούς στο επίπεδο της μέγιστης φωτεινότητας. Κι αυτό γιατί ενώ εύκολα θα μπορούσε το λευκό LED να λειτουργήσει με περισσότερο ρεύμα και θα δώσει περισσότερο φως, αυτό θα σήμαινε αυτόματα ότι το ίδιο ρεύμα θα έκαιγε τα χρωματιστά LEDs, όταν αυτά θα συνδέονταν με το κύκλωμα οδήγησης. Πιθανή αναγνώρηση και διαφορετική αντιμετώπιση από το κύκλωμα οδήγησης θα εκτίναζε την πόλυπλοκότητα και το κόστος της κατασκευής σε δυσθεώρητα ύψη. Αλλά ακόμη και αν το παραβλέψουμε αυτό, η κύλιση των LED αποκλείει τη χρήση μιας σνυχούς θερμικής οδού (Direct Thermal Path), που είναι απαραίτητη για την αποτελεσματική απαγωγή της θερμότητας που θα εξασφαλίσει την απρόσκοπτη λειτουργία και τη μακροζωία του LED, όταν αυτό οδηγείται από υψηλά ρεύματα.


    Έτσι, η μέγιστη φωτεινότητα περιορίστηκε στα 650 lumens, η οποία πάντως είναι αρκετή για τη συγκεκριμένη χρήση, καθώς:

    1. Ο φακός προορίζεται για χρήση από κυνηγούς. Όταν κάνεις καρτέρι στο σκοτάδι και τα μάτια έχουν συνηθίσει, τα 650 lumens είναι πολλά!

    2. To zoom, σε συνδυασμό με τον αβαθμίδωτο έλεγχο της φωτεινότητας εξασφαλίζουν επαρκές και όχι υπερβολικό φως σε αποστάσεις που ξεπερνούν το μισό χιλιόμετρο.


    Όσον αφορά τη διάταξη μέτρησης φωτός σε lumens, μια ορθή επιστημονικά και  ακριβής συσκευή, κοστίζει δεκάδες χιλιάδες ευρώ και καταλαμβάνει χώρο που δε διαθέτω. Υπάρχουν home made λύσεις που ασφαλώς έχουν μεγάλα περιθώρια σφάλματος, τα οποία εύκολα μπορεί να γίνουν τραγικά. Ως εκ τούτου, το προσεγγίζω με προσοχή και υπομονή και ελπίζω αν και όταν μπορέσω να την έχω, να είναι κατά το δυνατόν σωστή και - σχετικά - ακριβής.


    Όσον αφορά τα ενδότερα του φακού, αποφάσισα συνειδητά να μην επεκταθώ γιατί θεωρώ ότι δεν ενδιαφέρει ούτε αφορά πολλούς αναγνώστες και μάλιστα ο συγκεκριμένος φακός έχει τόσο πολλά να πεις ώστε θεωρώ ότι το review θα ξέφευγε σε διαστάσεις χωρίς να προσφέρει αντίστοιχα στην μεγάλη πλειοψηφία των αναγωνστών.

    • Like 6
    • Agree 1
    Link to comment
    Share on other sites

    Στις φωτογραφιες που βαζει την αμπεροτσιμπιδα πρεπει να ναι λιγο μουφα γιατι ΔΕΝ γινεται να μετρησει με αυτο τον τροπο. Οταν μετραμε με τσιμπιδα μετραμε με τον ενα πολο και οχι με τους δυο. Αν παμε να παρουμε τετοια μετρηση θα ειναι μηδεν γιατι το πεδιο του ενος πολου εξουδετερωνει το αλλο

    Link to comment
    Share on other sites

    13 hours ago, Nick74 said:

    Αν παμε να παρουμε τετοια μετρηση θα ειναι μηδεν γιατι το πεδιο του ενος πολου εξουδετερωνει το αλλο

    Πολύ σωστά το λές !

    Αν όμως δεις προσεκτικά τα δυο καλώδια από κοντά θα δεις ότι αυτό που έχει αγκαλιάσει η αμπερόπενσα είναι λίγο διαφορετικό (λίγο πιο χοντρό) από αυτό του τηλεχειριστηρίου  και λίγο πιο γυαλιστερό!

    Οπότε η οφθαλμαπάτη -ιδιαίτερα αν η παρουσίαση περάστηκε κάπως "διαγώνια"-  χωράει εύκολα στην ιστορία, αλλά από εκεί και πέρα και δεδομένου ότι η παρουσίαση είναι του δικού μας  @pol77, νομίζω ότι μια ερώτηση είναι ασυγκρίτως προτιμότερη και σίγουρα πολύ πλησιέστερα σε αυτό που αναλογεί στον κόπο που καταβάλλεται για να "βγει"  μια -σε όλες της τις παραμέτρους- αξιοπρεπής  παρουσίαση.

    Όπως είναι η οποιαδήποτε παρουσίαση εδώ, όπου ξέρω (και θέλω να πιστεύω ότι αυτό είναι φανερό σε όλους τους φίλους) πως  ό,τι μπαίνει στα review, είναι αυστηρά μόνο η Πραγματικότητα και μπαίνει με την Υπογραφή του reviewer !

    Έγινε επεξεργασία από Seafalco
    • Like 1
    Link to comment
    Share on other sites

    πριν 19 λεπτά, το μέλος Seafalco έγραψε:

    Πολύ σωστά το λές !

    Αν όμως δεις προσεκτικά τα δυο καλώδια από κοντά θα δεις ότι αυτό που έχει αγκαλιάσει η αμπερόπενσα είναι λίγο διαφορετικό (λίγο πιο χοντρό) από αυτό του τηλεχειριστηρίου  και λίγο πιο γυαλιστερό!

    Οπότε η οφθαλμαπάτη -ιδιαίτερα αν η παρουσίαση περάστηκε κάπως "διαγώνια"-  χωράει εύκολα στην ιστορία, αλλά από εκεί και πέρα και δεδομένου ότι η παρουσίαση είναι του δικού μας  @pol77, νομίζω ότι μια ερώτηση είναι ασυγκρίτως προτιμότερη και σίγουρα πολύ πλησιέστερα σε αυτό που αναλογεί στον κόπο που καταβάλλεται για να "βγει"  μια -σε όλες τις τις παραμέτρους- αξιοπρεπής  παρουσίαση.

    Όπως είναι η οποιαδήποτε παρουσίαση εδώ, όπου ξέρω (και θέλω να πιστεύω ότι αυτό είναι φανερό σε όλους τους φίλους) πως  ό,τι μπαίνει στα review, είναι αυστηρά μόνο η Πραγματικότητα και μπαίνει με την Υπογραφή του reviewer !


    Ναι οτι ειναι αλλο καλωδιο οντως τωρα που το λες φαινεται (ειναι λιγο πιο χοντρο). Δεν ειχα σκοπο να μειωσω τον reviewer βεβαια (μια χαρα επαγγελματικη παρουσιαση ειναι και δε ξερω αν οι μετρησεις ειναι δικες του η απλα τις βρηκε ισως στη σελιδα του κατασκευαστη η σε υλικο γυρω γυρω) αλλα αν οντως εχει κοψει το καλωδιο και το εχει εννωσει καπου που δε φαινεται στη φωτο κατα τη γνωμη μου το κανει ναι μεν ως φωτογραφια απο καλλιτεχνικης αποψης αρτιοτερο, αλλα τεχνικα υποβαθμιζει την πιστοτητα της μετρησης στα ματια καποιου που χρησιμοποιει αμπεροτσιμπιδες. Αν οντως η "οφθαλμαπατη" εγινε προκειμενου να δειχνει καλυτερη η φωτο οκ, αλλα προσωπικα δε θα ειχα προβλημα ουτε θα με ξενιζε αν εβλεπα ενα γδαρμενο καλωδιο η μια εννωση (στην τελικη καθε μερα τετοια δεν κανουμε? )

    Έγινε επεξεργασία από Nick74
    Link to comment
    Share on other sites

    Κοίτα αν μια  παρουσίαση βασίζεται  σε οικειοποιημένες  μετρήσεις του κατασκευαστή και σε φωτογραφίες που μαζεύτηκαν λάθρα στον ιστό, σίγουρα δεν θα την βρεις στο Λάμπη !

    Εδώ, αν δεν μπορούμε να μετρήσουμε κάτι απλά δεν το μετράμε και το λέμε και ρητά αυτό (όπως και εδώ ο reviewer αναφέρει ότι παρά το ότι πολύ θα το ήθελε δεν μπορεί να μετρήσει φωτεινότητα!).
    Οι φωτογραφίες έχουν σκοπό είτε καλύτερης εποπτείας του προϊόντος, είτε μιας καλλιτεχνικής "υποστήριξης" των λεγομένων (όπως εδώ που θα μπορούσε απλά να μπει μόνο το πινακάκι με τις τιμές του ρεύματος).

    Το μόνο που κατά τη γνώμη μου κάποιος πολύ απαιτητικός και τελειομανής θα μπορούσε να προσάψει στις συγκεκριμένες φωτογραφίες είναι ότι η ομοιότητα των δύο καλωδίων δεν λειτουργεί υπέρ της άμεσης διευκρίνισης του τι είναι τι!

    Από εκεί και πέρα -ιδιαίτερα σε ένα τέτοιο θέμα μετρήσεων- η έλλειψη της πλήρους φωτογραφικής εποπτείας του setup των μετρήσεων δεν μπορεί να θέσει εν αμφιβόλω την αξιοπιστία της μέτρησης καθώς ποτέ δεν ετέθη σαν προαπαιτούμενο η  οπτική απόδειξη του setup μετρήσεων!

    Φαντάζεσαι δηλαδή πόσες φωτογραφίες -και τι στήσιμο θα χρειαζόταν- για να αποδεικνύω κάθε φορά εγώ και σε κάθε διαφορετική ψύκτρα την θέση -ας πούμε- των 4 αισθητήρων που χρησιμοποιώ για την μέτρηση  της θερμοκρασίας του ρεύματος αέρα που μπαίνει και βγαίνει από την ψύκτρα !

    Απλά είναι ανέφικτο και αυτή η αξιοπιστία "καλύπτεται"  και εννοείται σαν το πρώτο και σημαντικότερο πράγμα μεταξύ αυτών  που  καλύπτει η στοιχειώδης εμπιστοσύνη μεταξύ αναγνώστη και reviewer και  την οποία -καθώς  όλοι μας έχουμε και κοπιάσει πολύ και καταθέσει "ψυχή" και χρόνο περισσότερο από αυτόν που δεν είχαμε- θέλω να πιστεύω ότι εδώ στο Λάμπη, την έχουμε κατακτήσει!

    Το παραδέχομαι ότι η "αντανακλαστική" αντίδραση στις επίμαχες φωτογραφίες  κάποιου που ξέρει από τέτοιες μετρήσεις είναι να αναρωτηθεί για πως έγινε αυτή η μέτρηση!

    Για την συνέχεια όμως, θέλω να πιστεύω, ότι μπορούμε και καλύτερα . . . . .  ! 

    • Like 1
    Link to comment
    Share on other sites

    Ο σκοπός των φωτογραφιών των ενδείξεων της αμπεροτσιμπίδας δεν ήταν να φανεί η διάταξη που χρησιμοποιήθηκε για να γίνουν οι μετρήσεις, αλλά να φανούν με πιο παραστατικό τρόπο οι ενδείξεις. Ίσως θα ήταν καλύτερα να είχα παραθέσει μόνο τον πίνακα με τις μετρήσεις για να αποφευχθούν φαινόμενα τύπου σου δείχνω τα αστέρια και κοιτάς / σχολιάζεις το δάχτυλο.


    Σε κάθε περίπτωση, μια ερώτηση περί της διάταξης, αν αυτό είναι το ζητούμενο, θα ήταν πολύ πιο κομψή και ευγενική από αποστροφές του τύπου "μούφα" και "ΔΕΝ γίνεται".


    Αφού όμως ρωτήθηκε, έστω και με αυτόν τον τρόπο, θα εξηγήσω κάποια πράγματα σχετικά με τη διάταξη μέτρησης στο συγκεκριμένο φακό. Ο φακός αυτός λοιπόν έχει το κύκλωμα οδήγησης (ή μέρος αυτού) μέσα στο tail cap, το οποίο έχει 2 σημεία επαφής με το σώμα του φακού: 1: το ελατήριο, που έρχεται σε επαφή με τον αρνητικό πόλο της μπαταρίας και 2: την επαφή με το σώμα στο σημείο που βιδώνει το tail cap σε αυτό. Έτσι ολοκληρώνεται το κύκλωμα. Για να μπορέσω να παρεμβάλω την αμπεροτσιμπίδα και να μετρήσω, έπρεπε να ξεβιδώσω το tail cap και να φροντίσω ώστε οι παραπάνω 2 επαφές να γίνουν μέσω 2 διακριτών καλωδίων σιλικόνης, υψηλής διαμέτρου, ώστε να ελαχιστοποιηθούν οι απώλειες. Το 1 από τα 2 αυτά καλώδια, περνάει μέσα από την αμπεροτσιμπίδα, και έτσι γίνεται η μέτρηση. Τώρα, καθώς ο φακός αυτός έρχεται με 2 διαφορετικά tail caps, ένα με το διακόπτη επάνω του και ένα με remote switch, άφησα το remote switch να φαίνεται στις φωτογραφίες για να είναι εμφανές αν μετράμε το ένα ή το άλλο tail cap.


    Η χρήση ενός καλωδίου άλλου χρώματος θα μπορούσε να είχε βοηθήσει στην αποφυγή παρεξηγήσεων, αλλά δεν είχα φανταστεί ότι από όλο το review, θα έμενε κάποιος στις συγκεκριμένες φωτογραφίες και μάλιστα σε κάτι που δεν αφορά καν το σκοπό τους.

    • Like 2
    Link to comment
    Share on other sites


    Create an account or sign in to comment

    You need to be a member in order to leave a comment

    Create an account

    Sign up for a new account in our community. It's easy!

    Register a new account

    Sign in

    Already have an account? Sign in here.

    Sign In Now

×
×
  • Δημιουργία...

Important Information

Ο ιστότοπος theLab.gr χρησιμοποιεί cookies για να διασφαλίσει την καλύτερη εμπειρία σας κατά την περιήγηση. Μπορείτε να προσαρμόσετε τις ρυθμίσεις των cookies σας , διαφορετικά θα υποθέσουμε ότι είστε εντάξει για να συνεχίσετε.