Introduction
3 months ago I reviewed a very interesting light from Wuben, the Wuben X2. Its unconventional, rectangular design maximizes pocketability and is a refreshing change from the cylindrical norm.
Today, I will be reviewing its larger sibling, the Wuben X1. While the overall design and form factor are distinctly similar, the substantially larger size allows for a significant increase in output and run times. We are talking about soda can light performance, while being able to comfortably fit in a large jacket pocket.
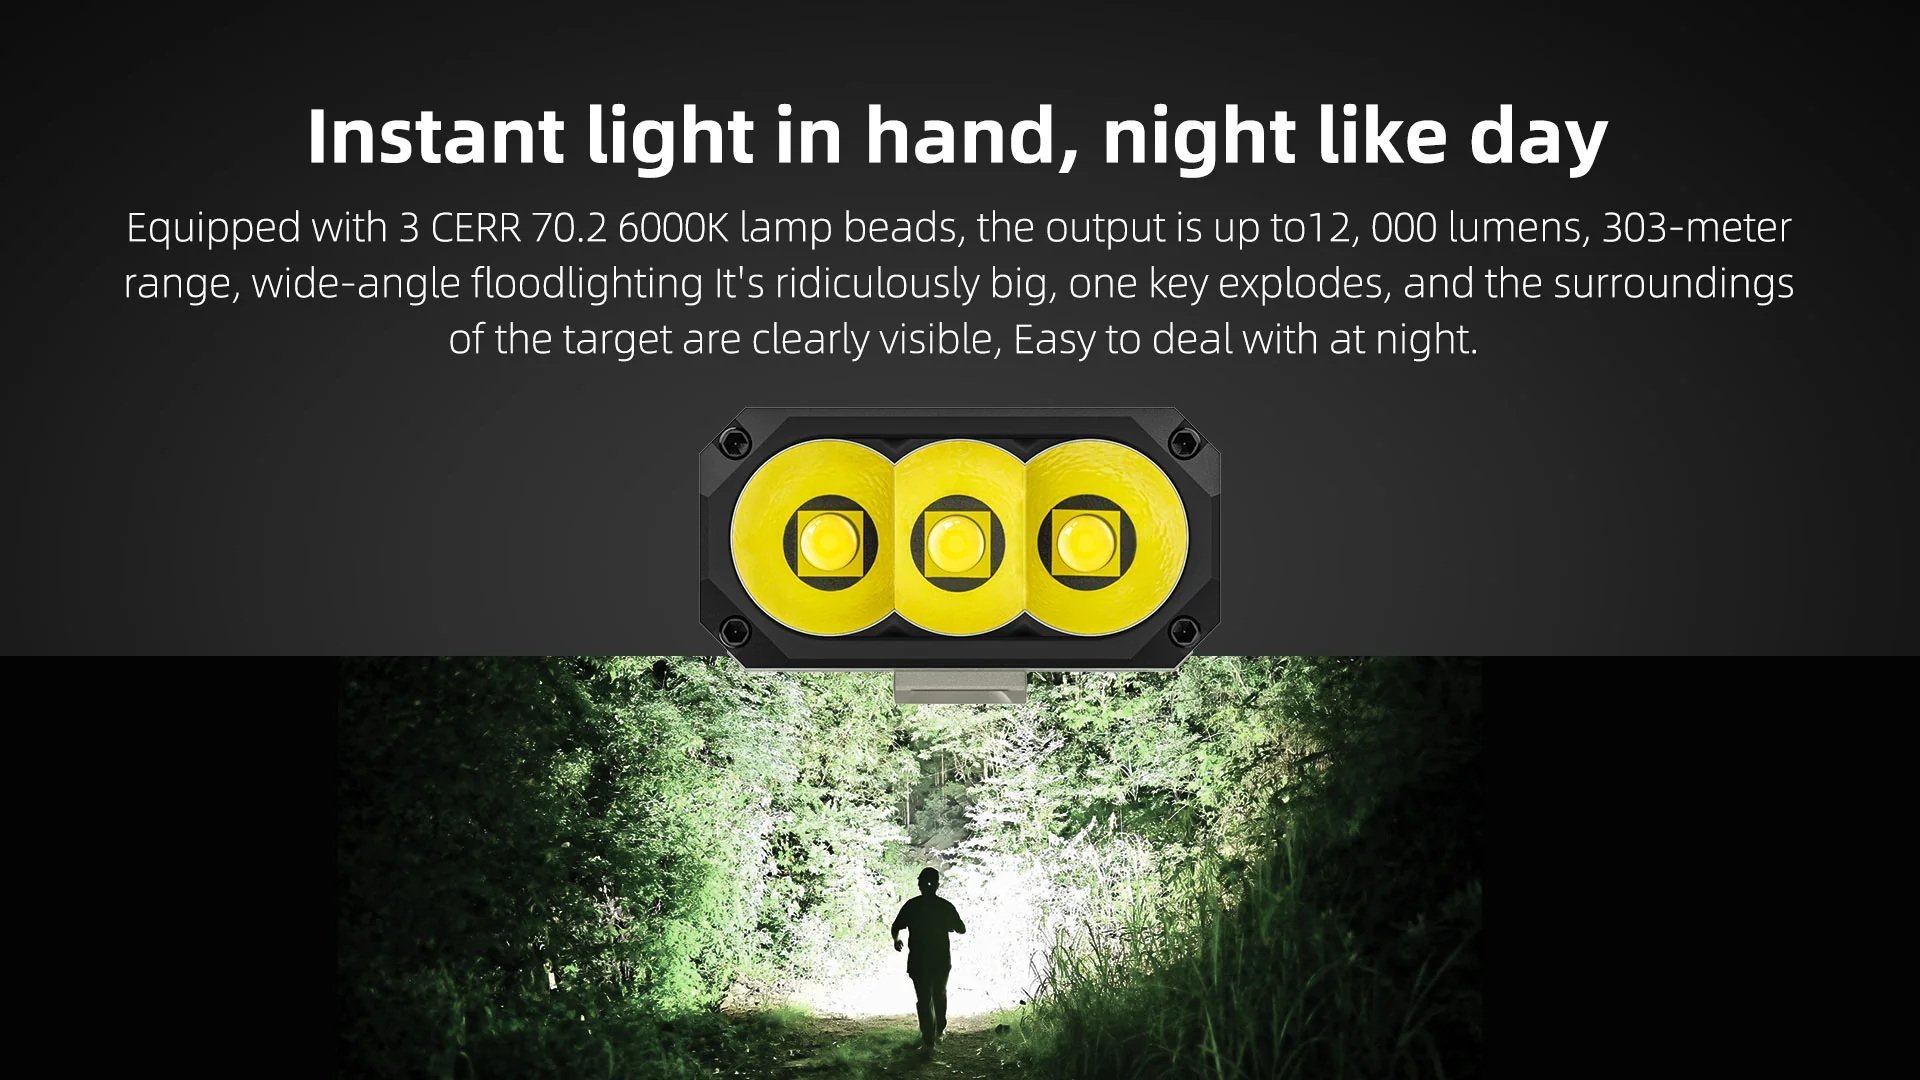
This is, indubitably, an intriguing prospect, so let's dive into the review and see if the Wuben X1 can deliver.
Unboxing
Before I begin the unboxing, I want to mention that the Wuben X1 is made of aluminium and comes in 2 finish options: Black anodizing and White Micro-Arc Oxidation. The sample I will be reviewing today is the latter.
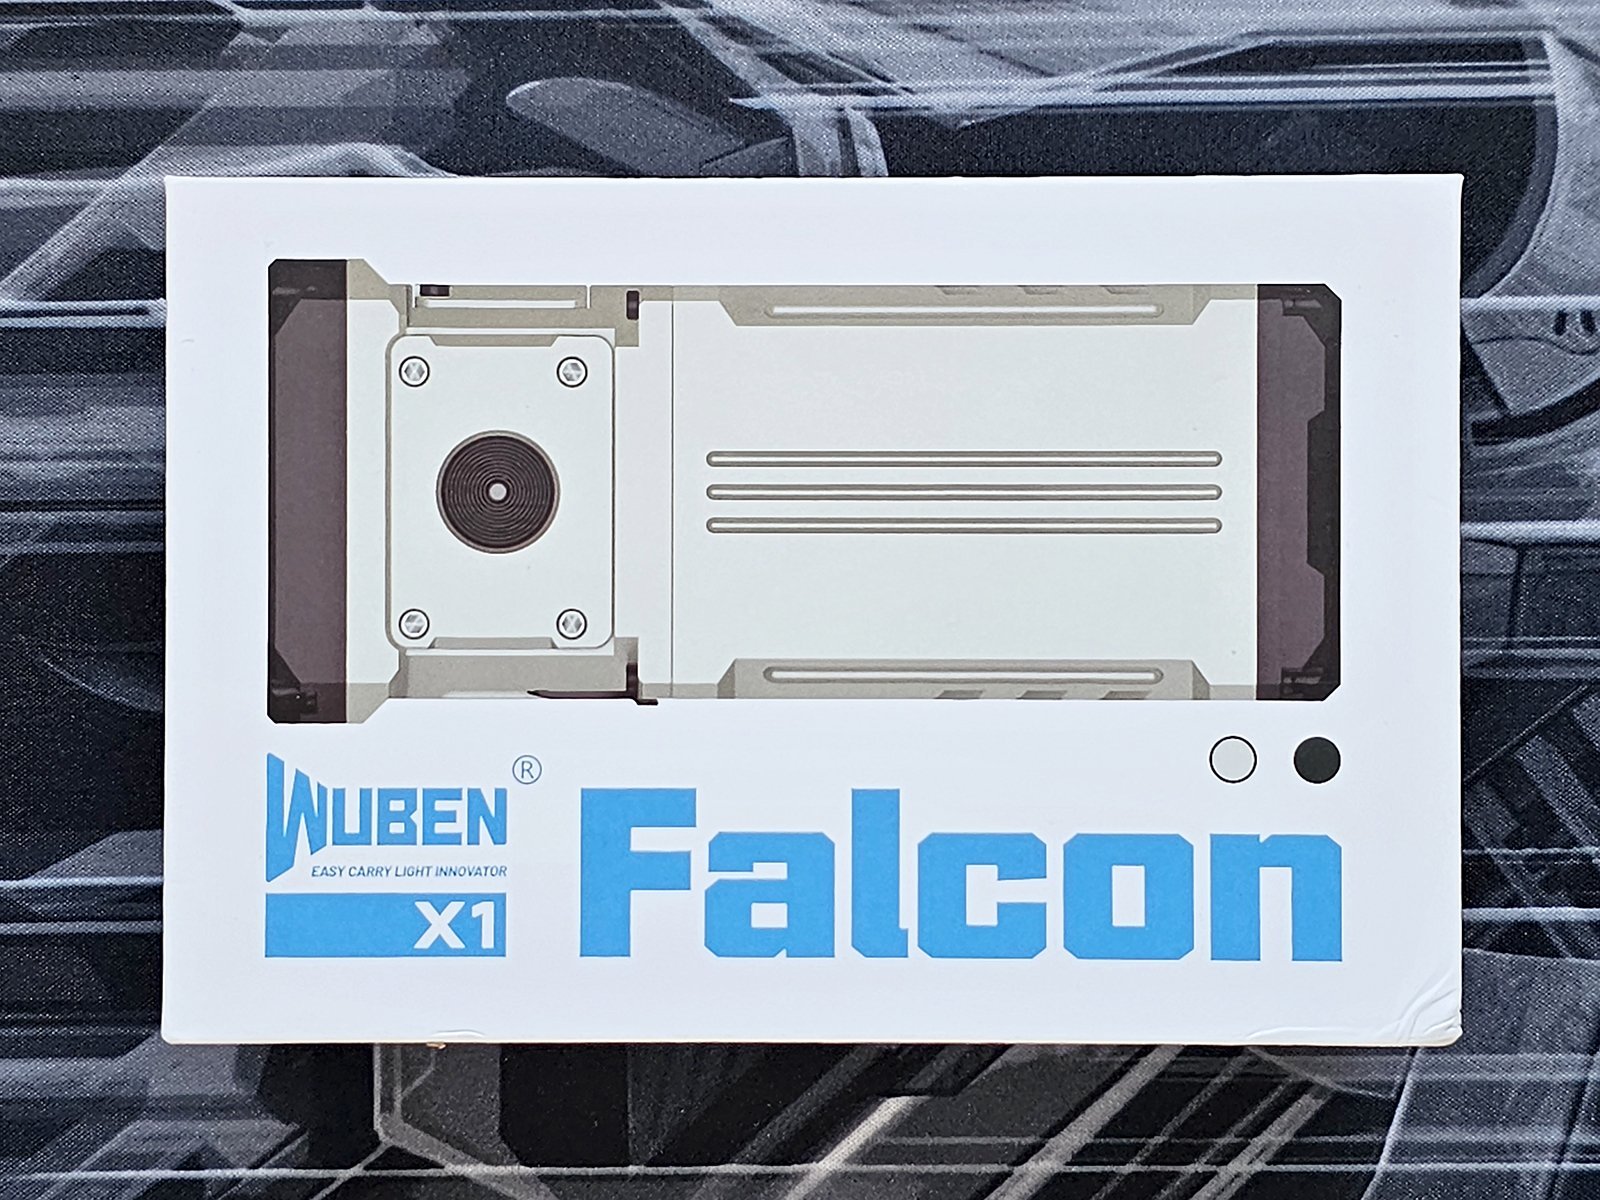
The Wuben X1 comes in a nice, mostly white box.

The top of the box features a picture of the top of the torch, along with the brand and model name. The Wuben X1 is dubbed Falcon.
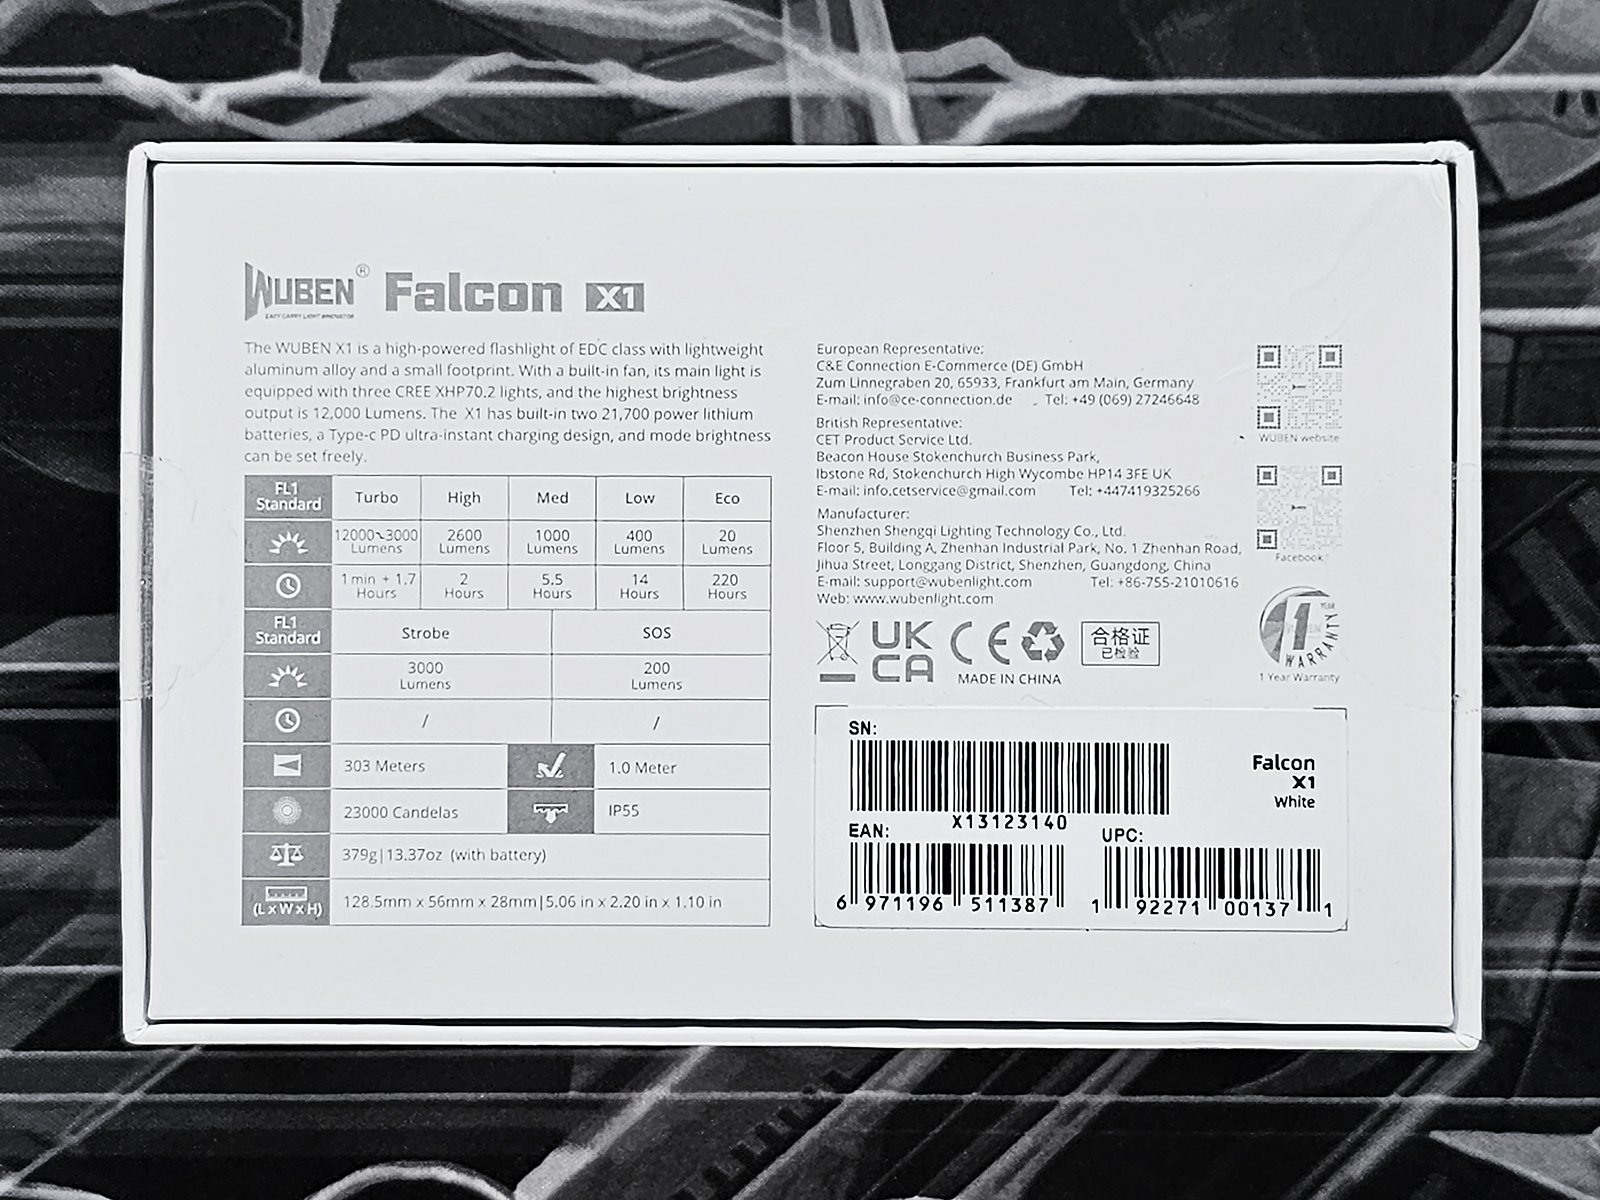
The bottom of the box includes a detailed specifications table as well as details about the manufacturer and representatives, certifications, barcodes, serial numbers etc. Most importantly, it states that the Wuben X1 is covered by a 1 year warranty. On the other hand, the Wuben website product page clearly states that the warranty of the Wuben X1 is 5 years. I am going to go with the website on that one, as it definitely makes more sense for the level and price of this product.
The 2 larger sides are uneventful, only sporting the company logo.
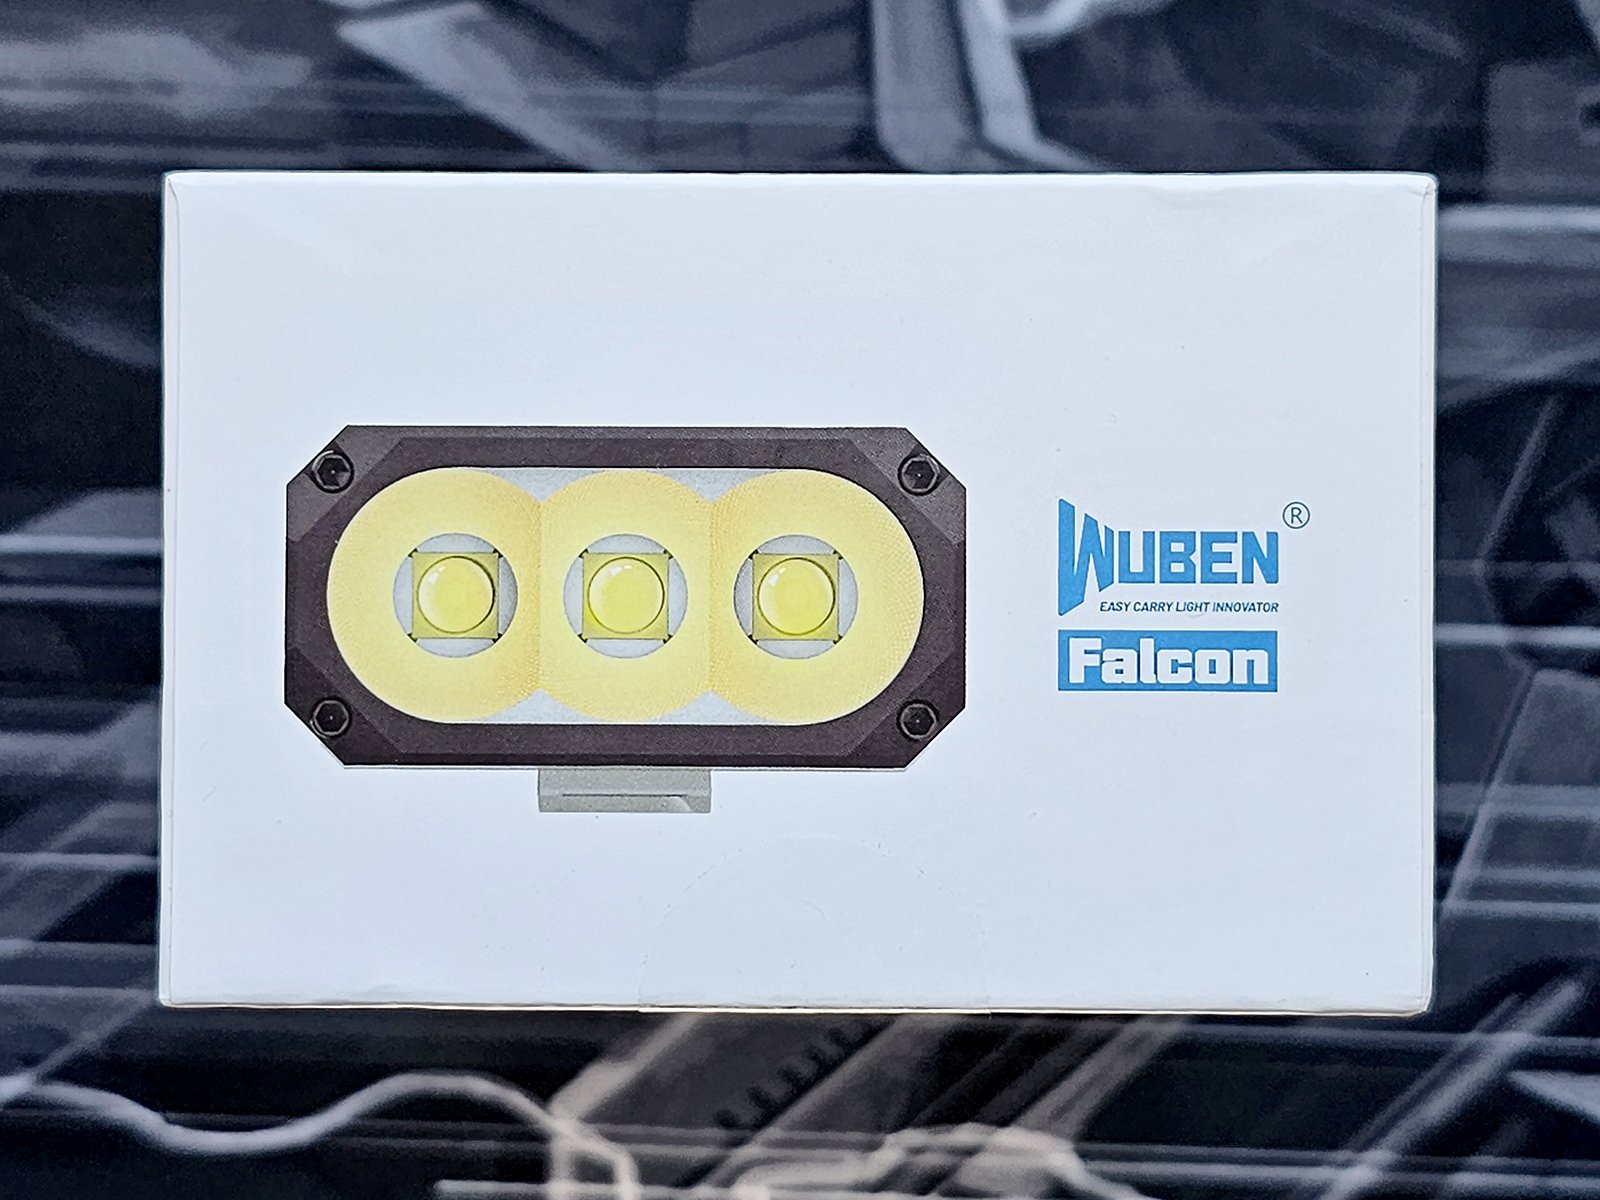
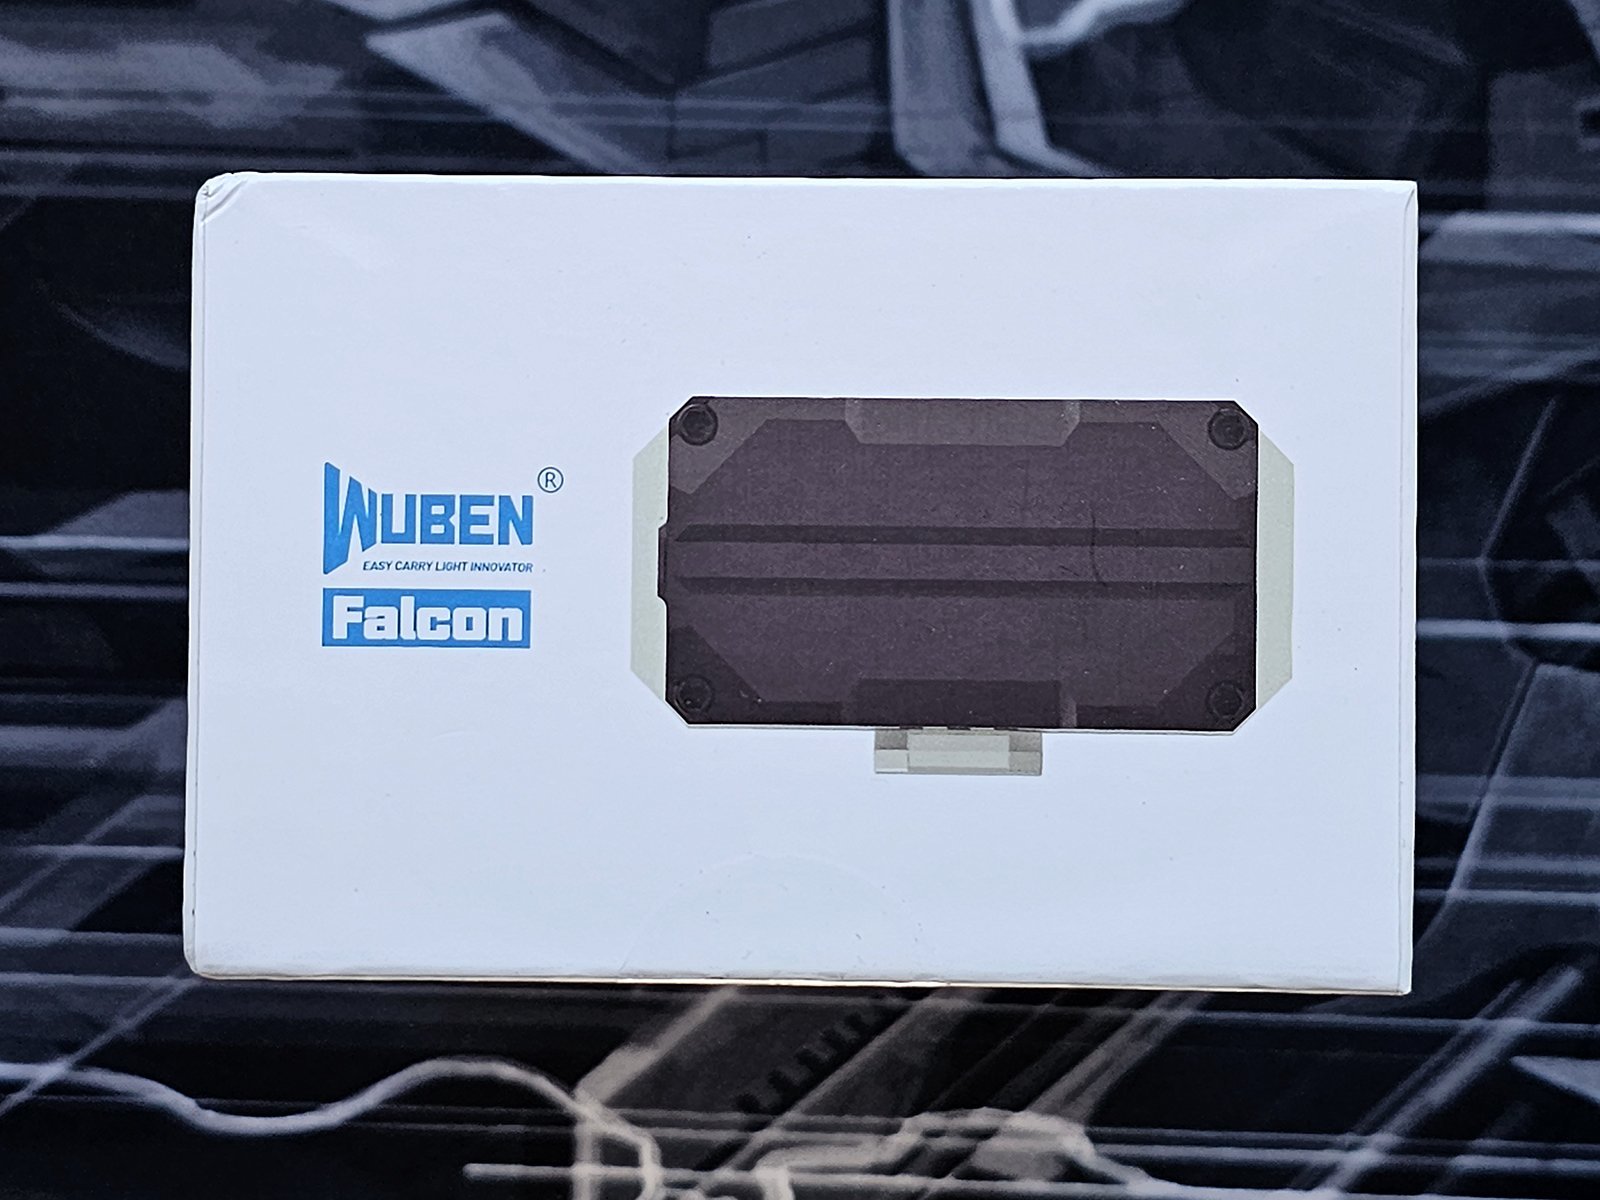
The 2 smaller sides have photos of the front and rear of the torch.
Upon opening the box, we are greeted by a holster and a smaller white box.
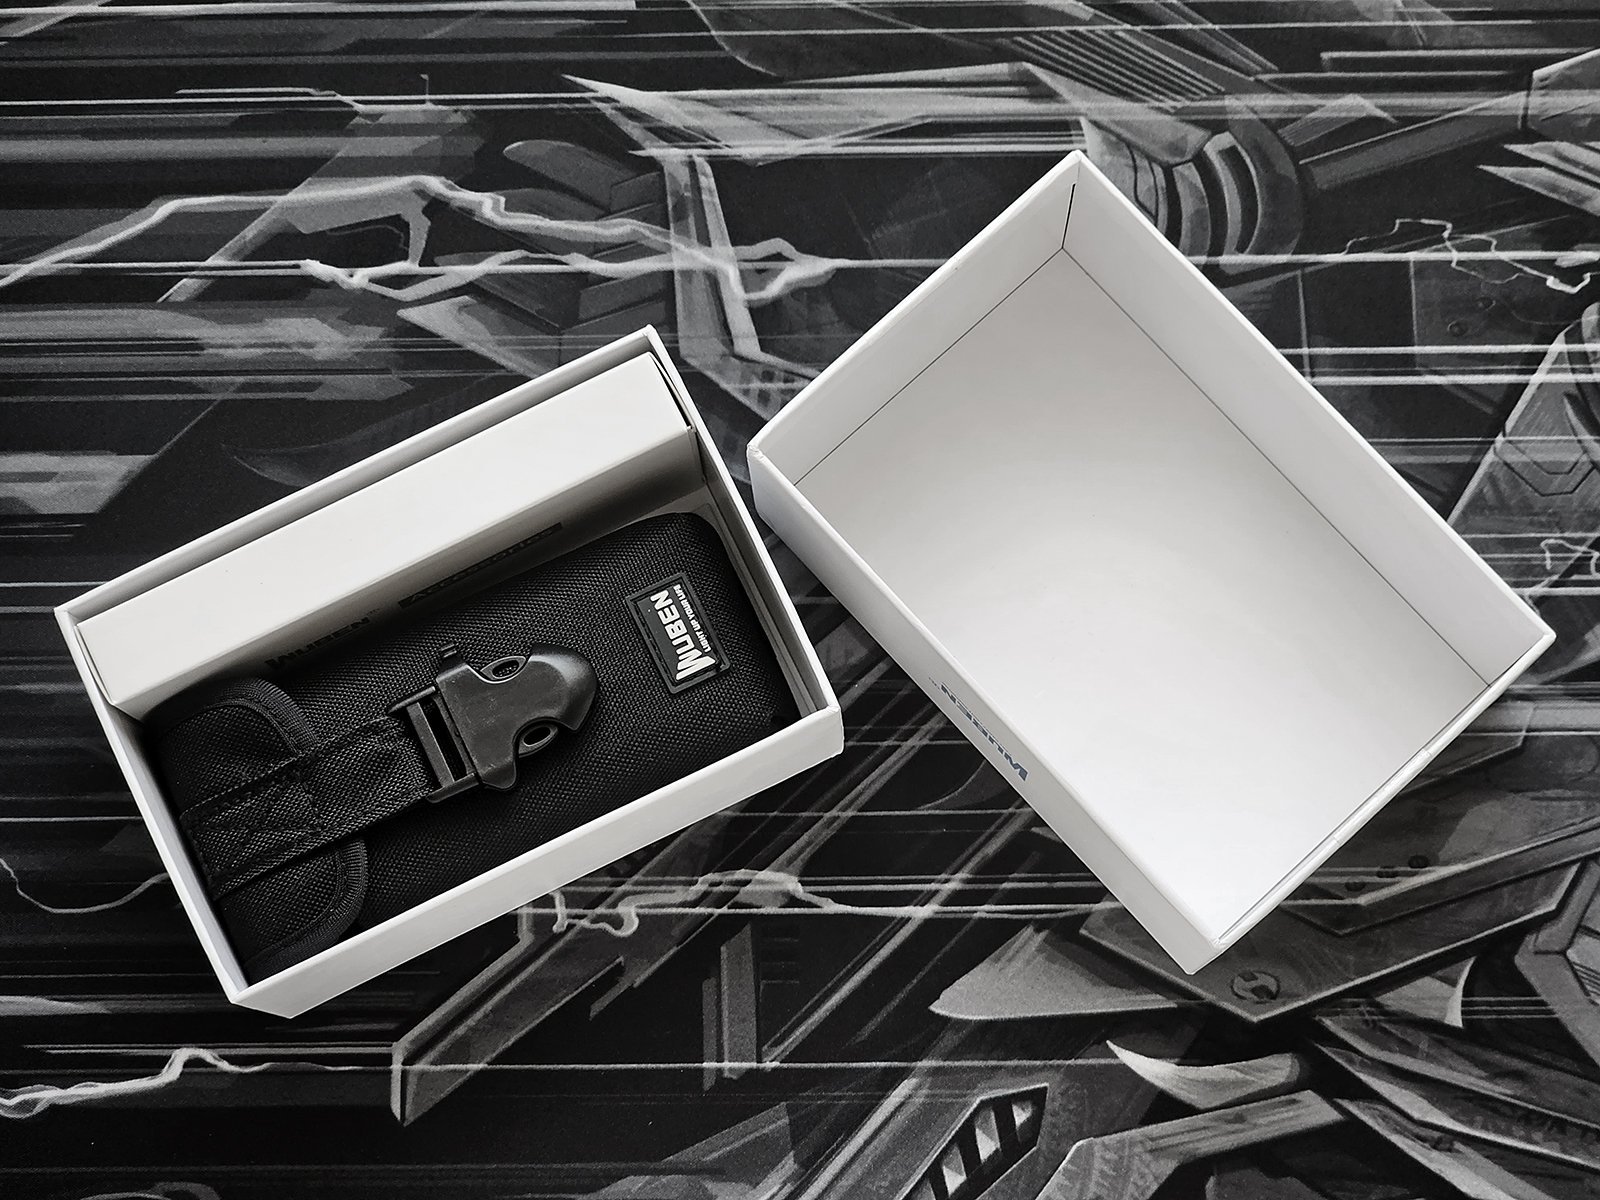
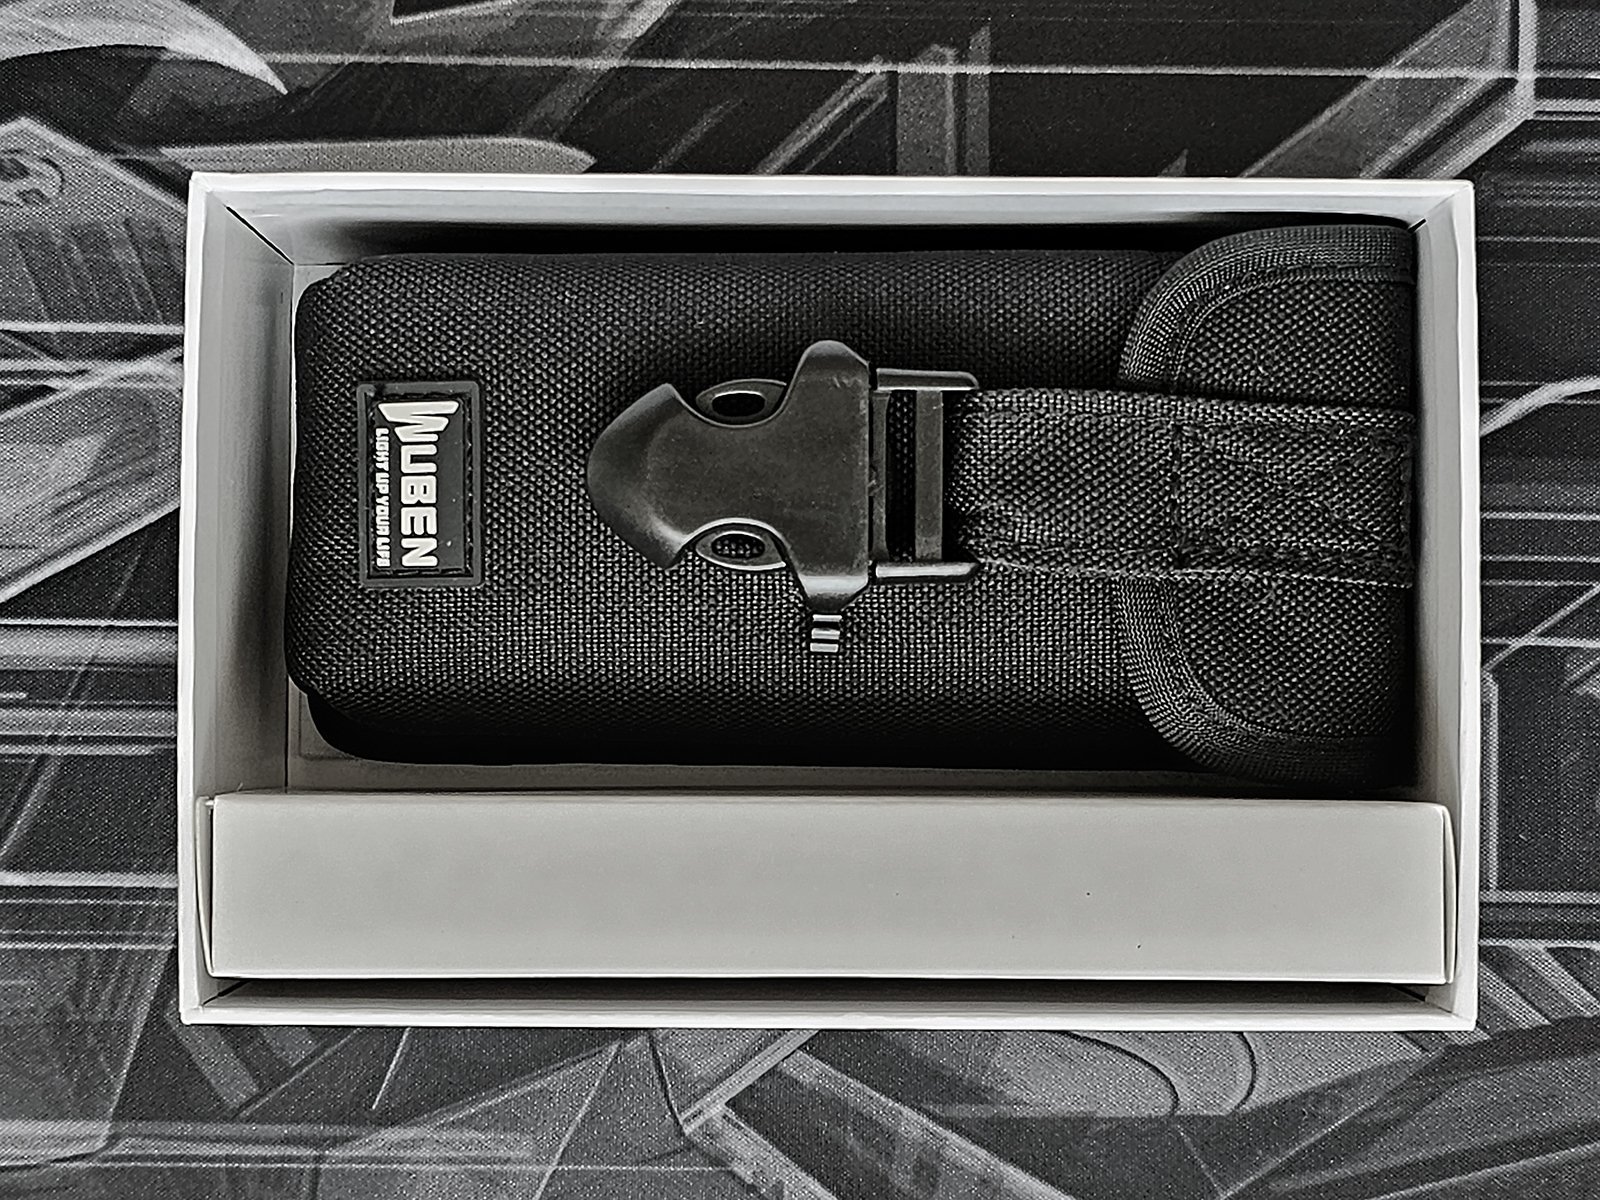
Under the holster, there is the user manual. The accessories in the box are quite spartan and include only a USB C to USB C charging cable and a lanyard with spring loaded clips on each end.
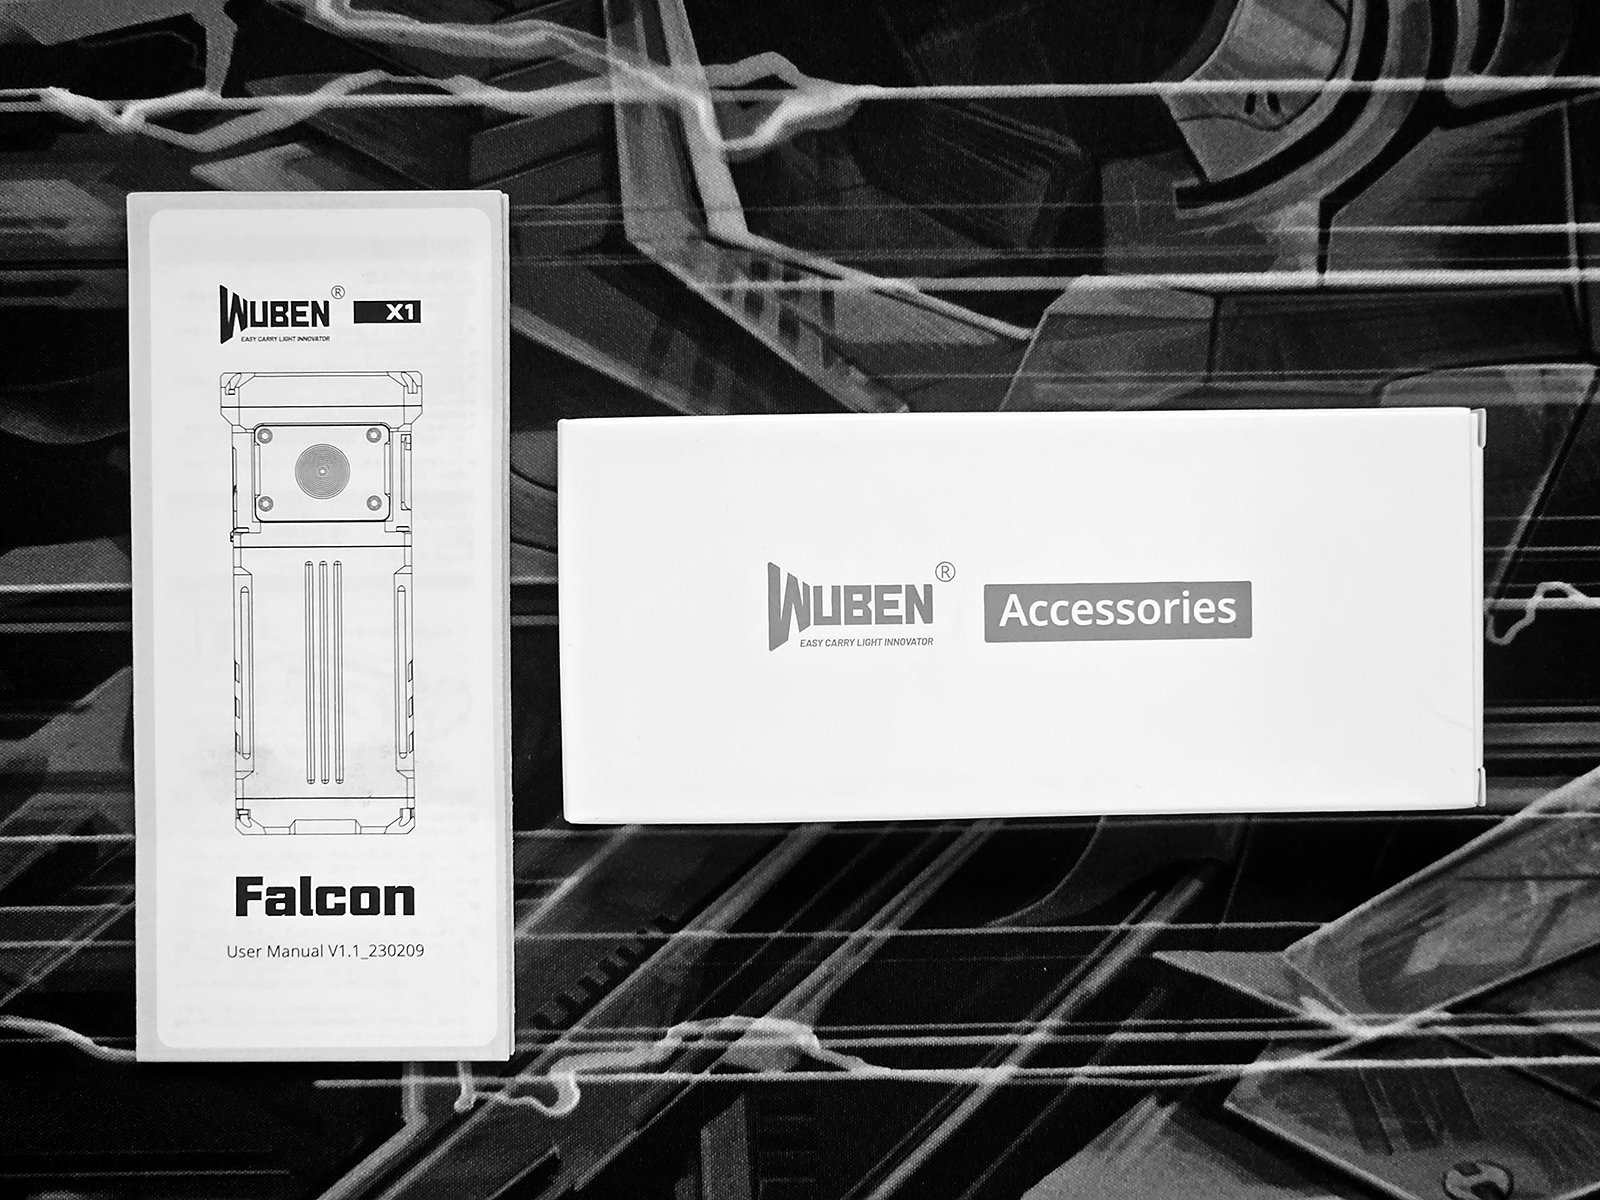
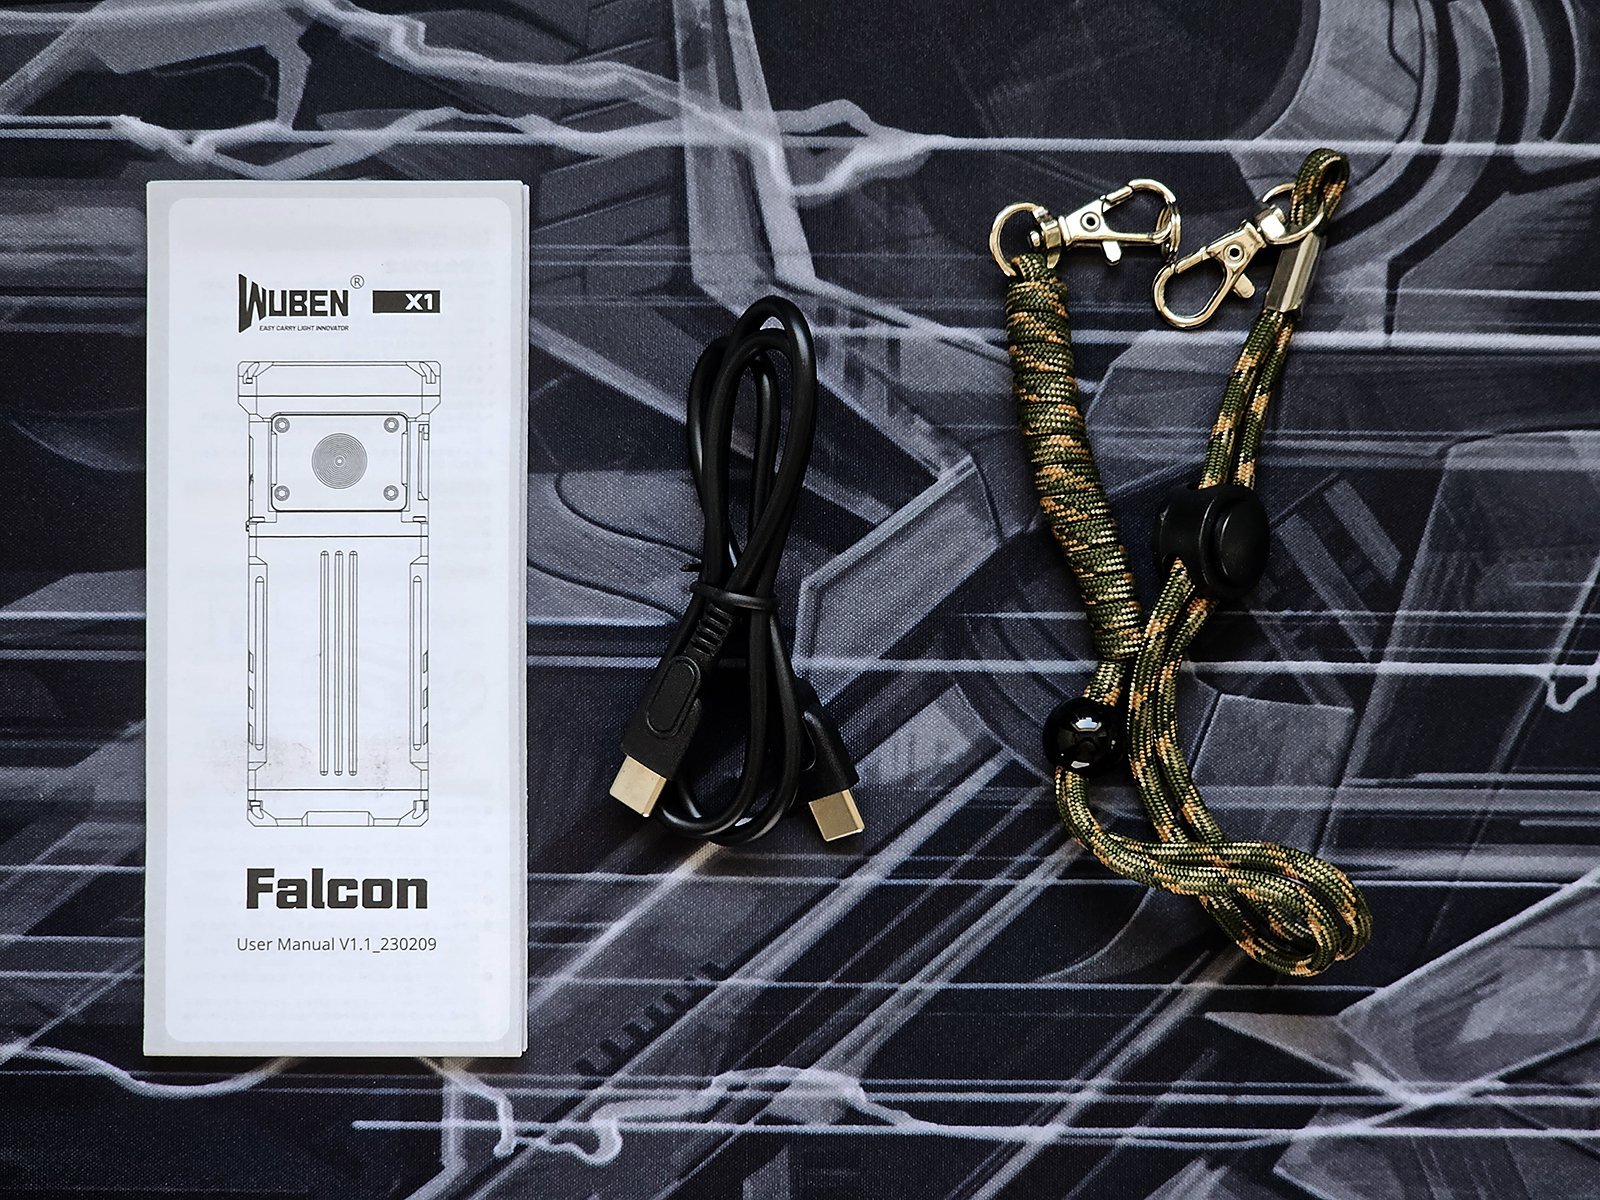
The holster contains the torch, but let's have a look at the holster first.
There is a plastic buckle at the front that secures the flap.
At the back, there is a plastic D ring and a belt loop.
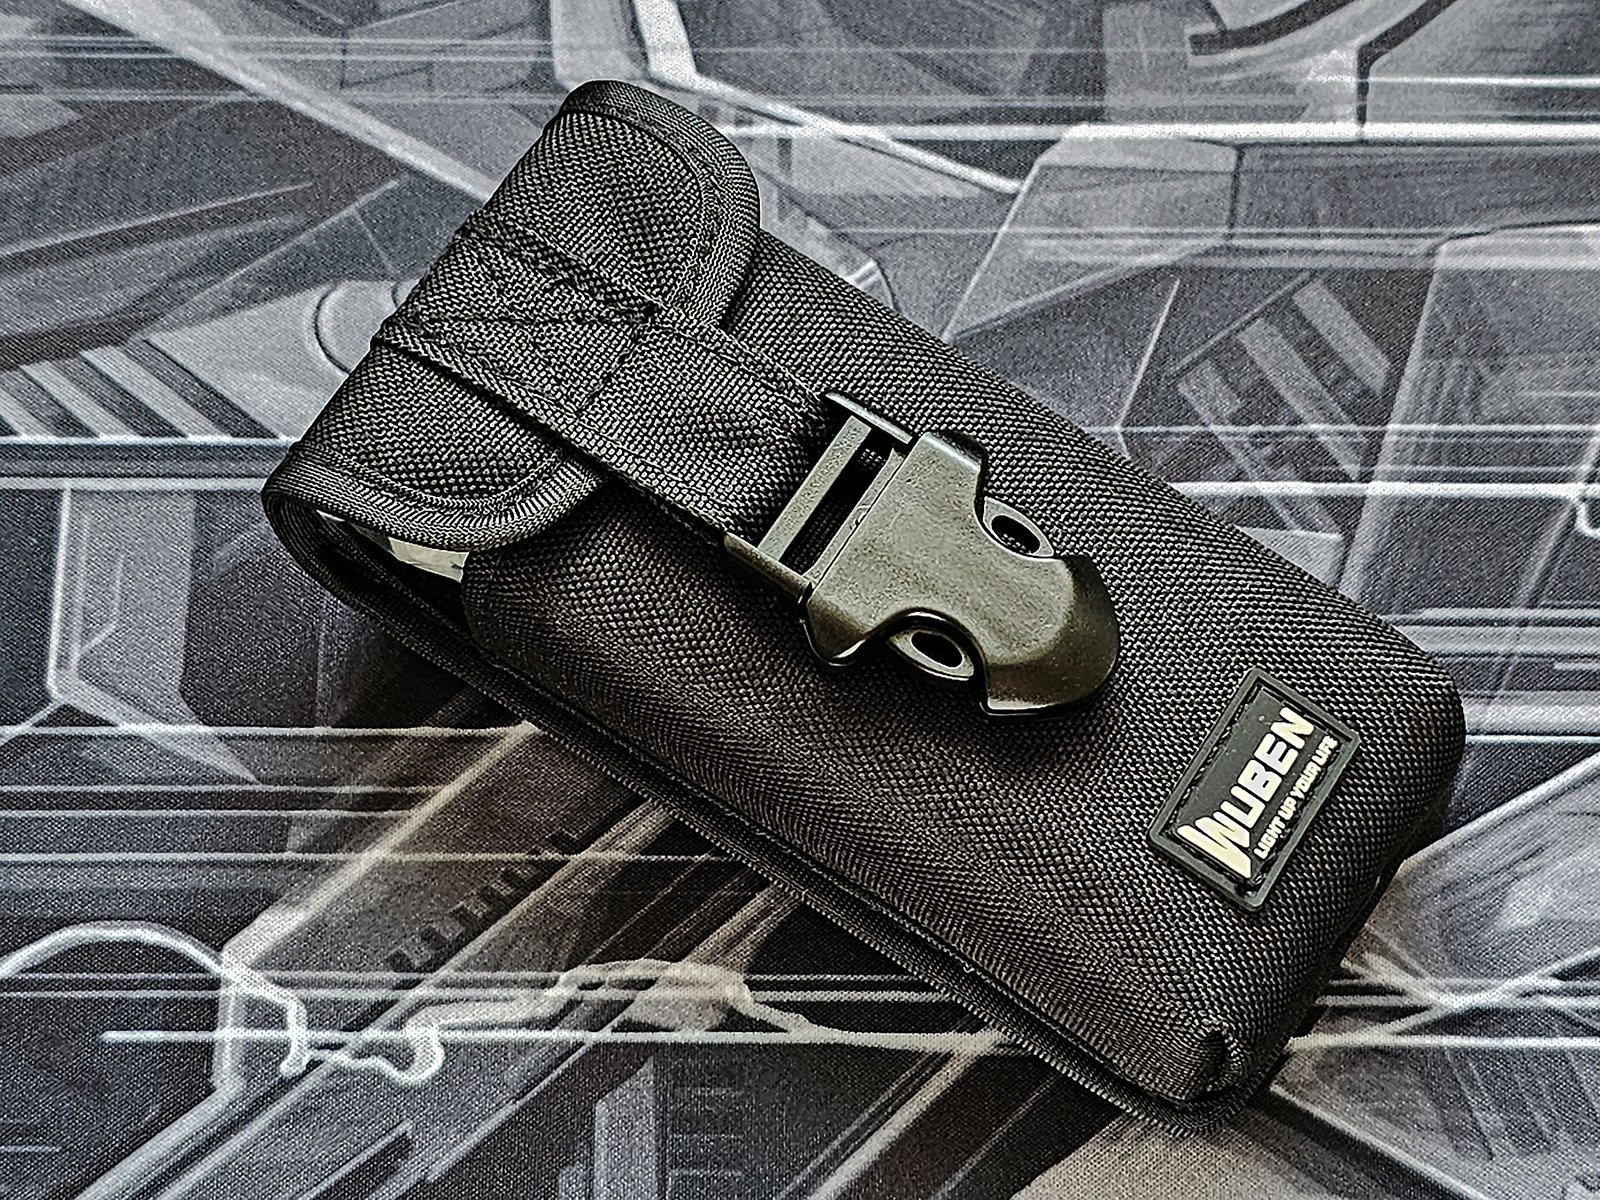
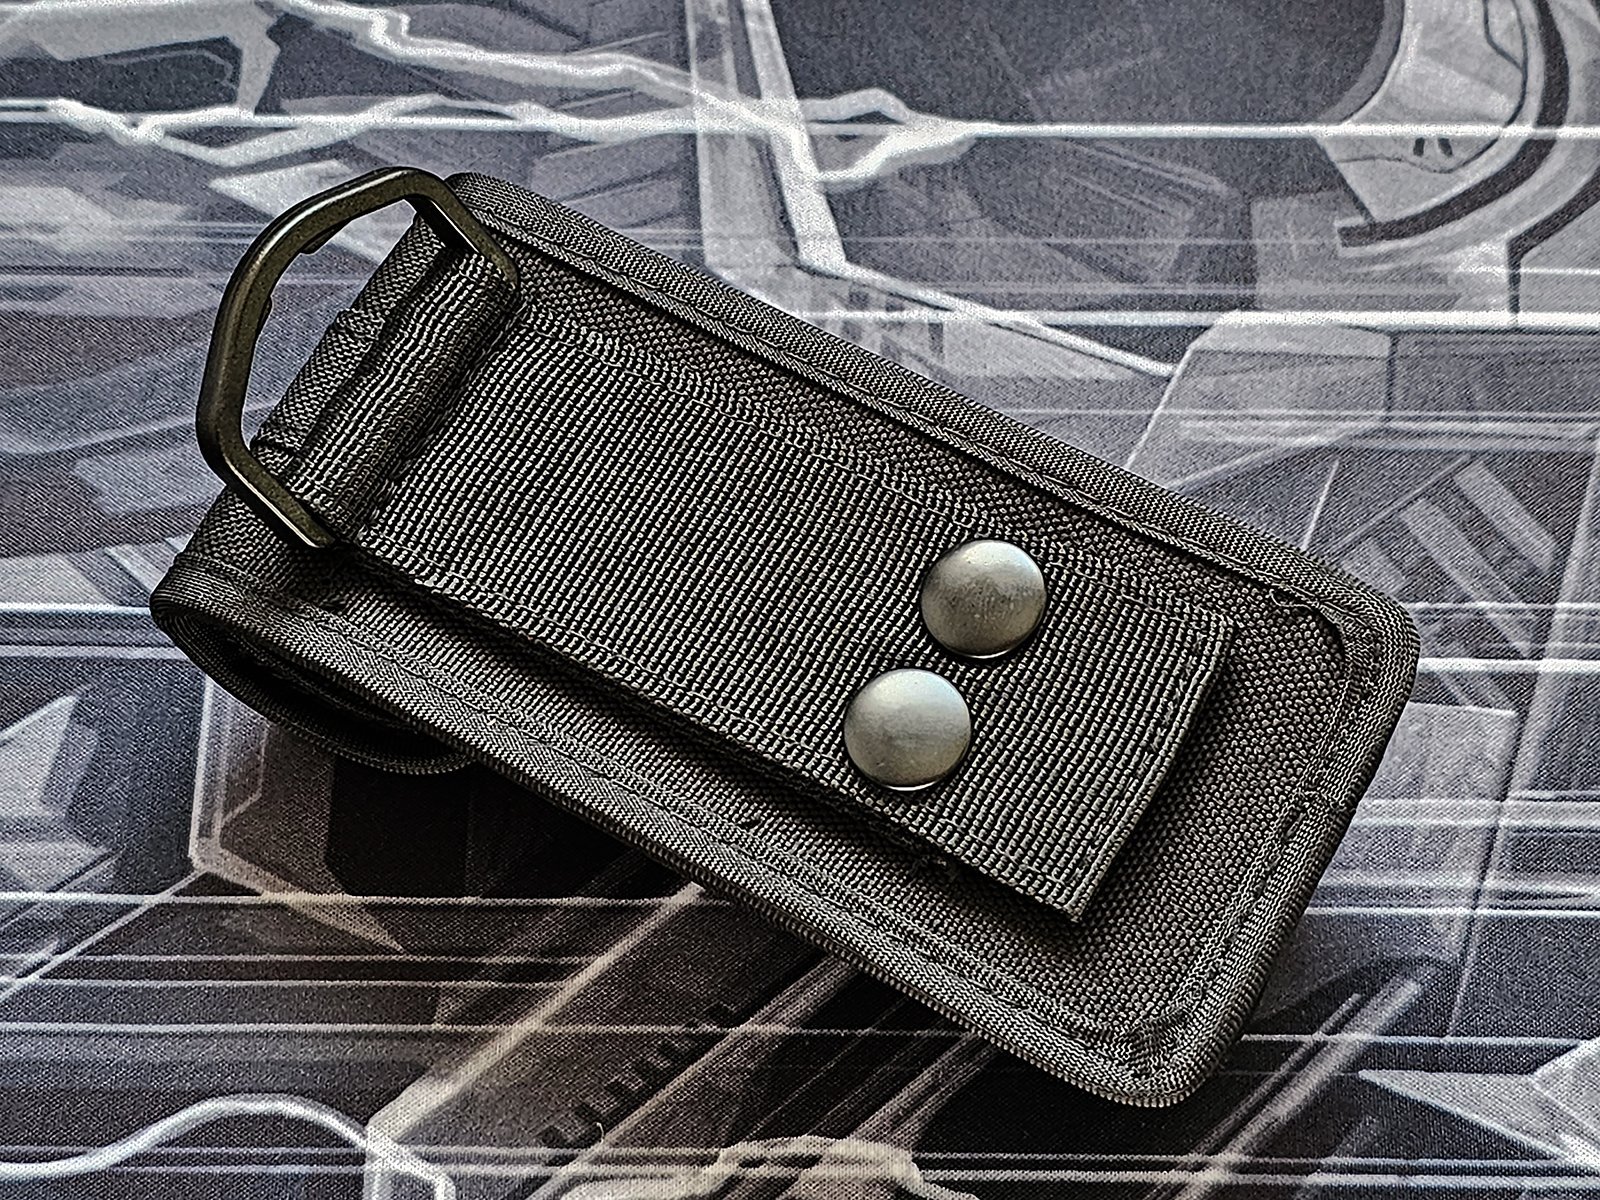
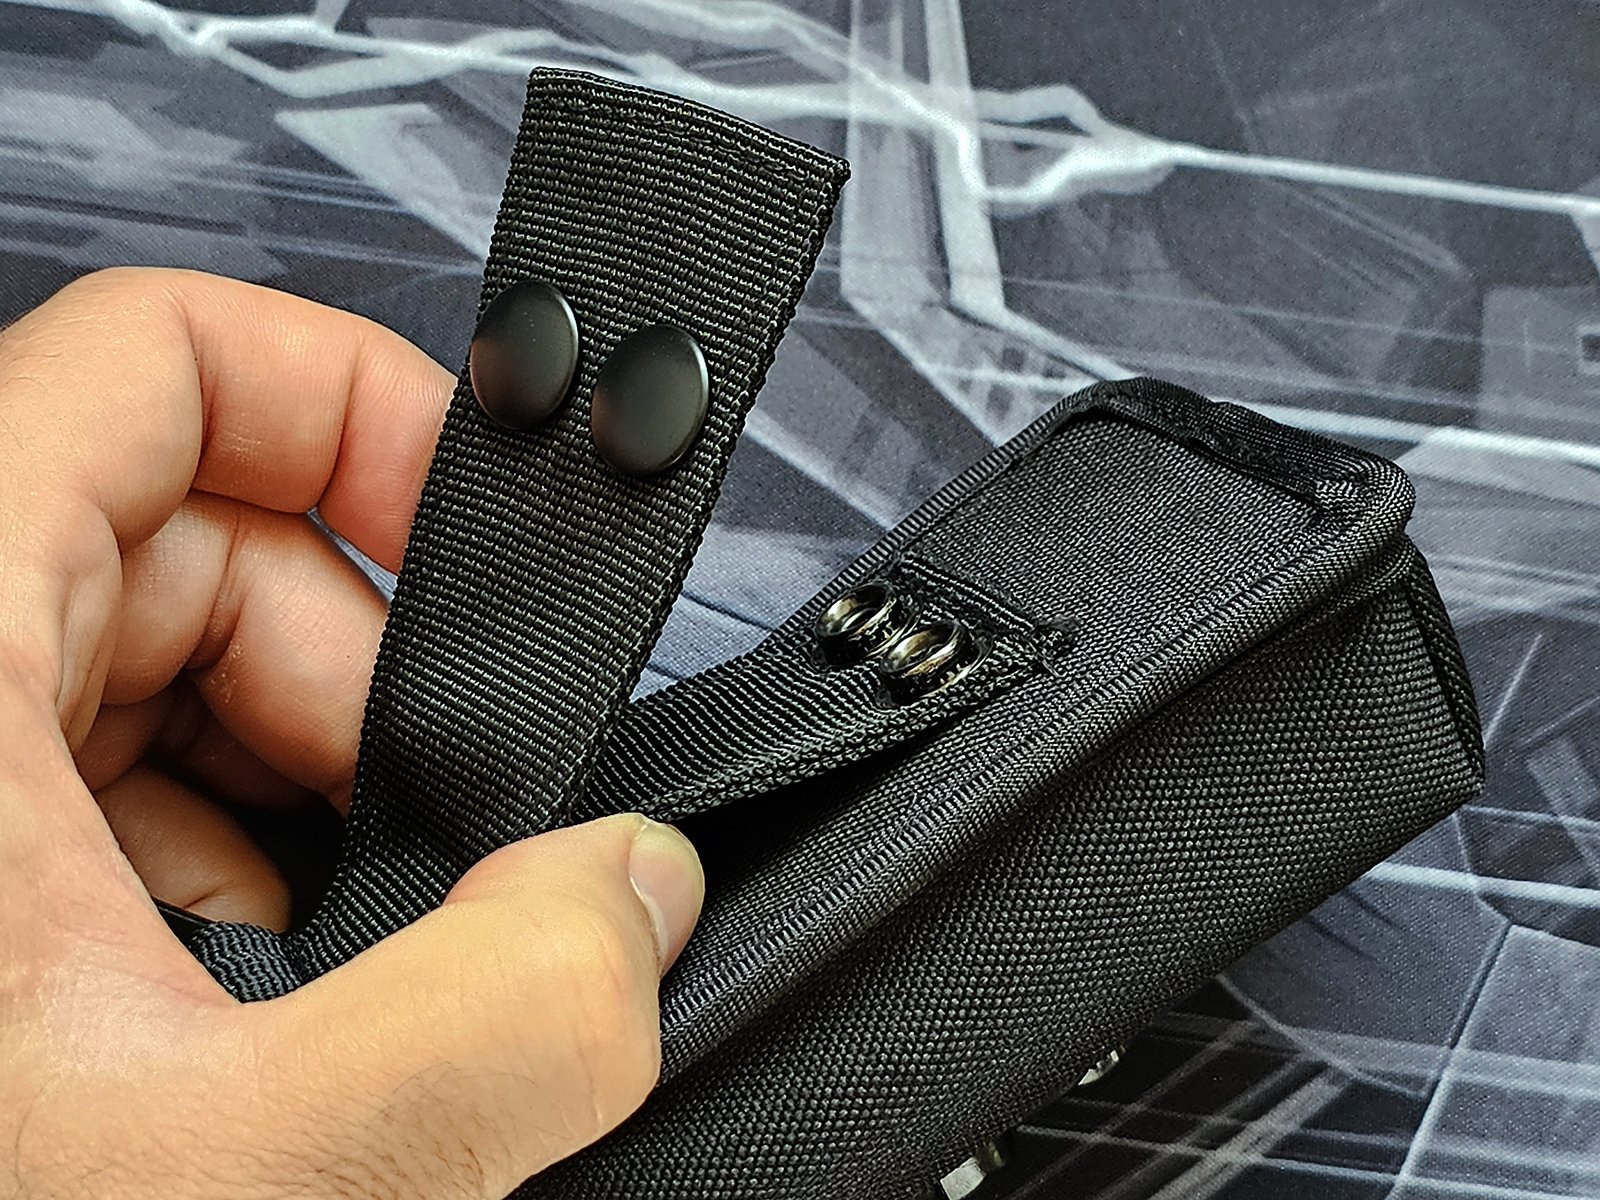
The belt loop is double. The inner loop is permanently sawn on the holster, for absolute safety and the outer loop can open and close with 2 buttons so users can put the holster on their belt temporarily, without needing to open the belt.
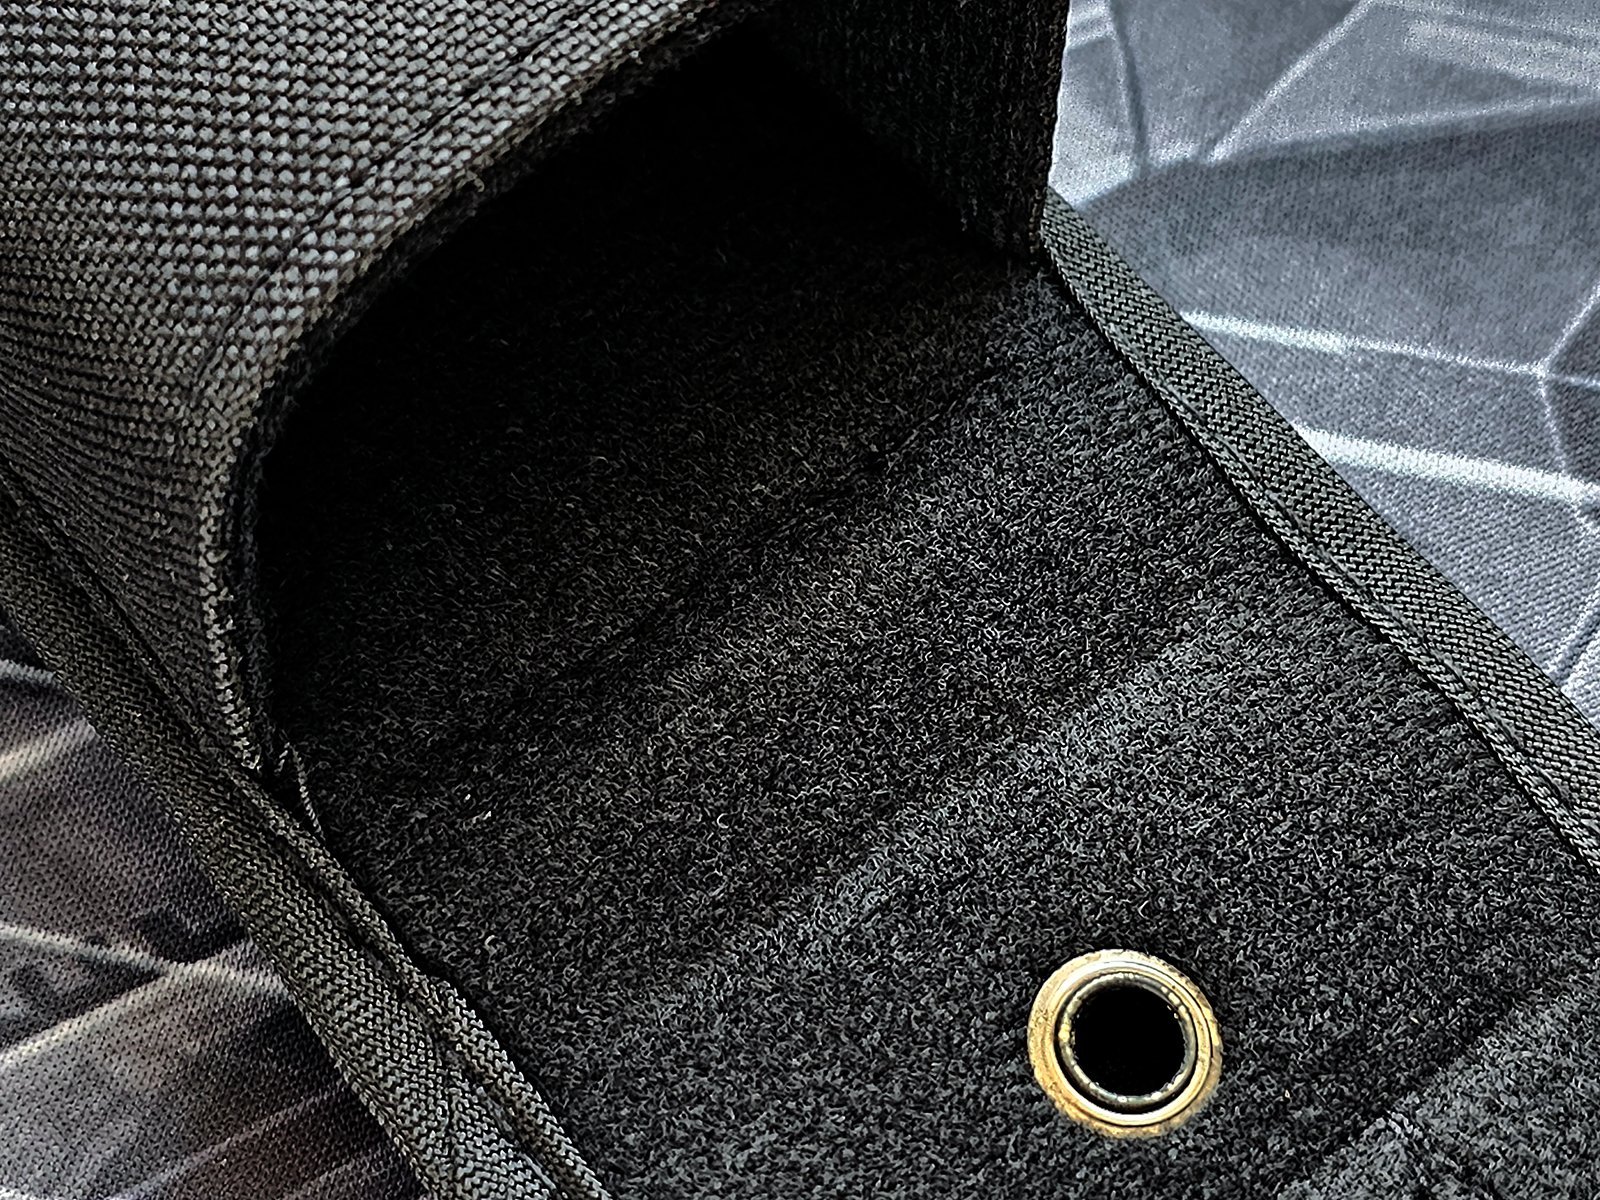
The inside of the holster is soft and will not damage the finish of the torch, even with extended use.
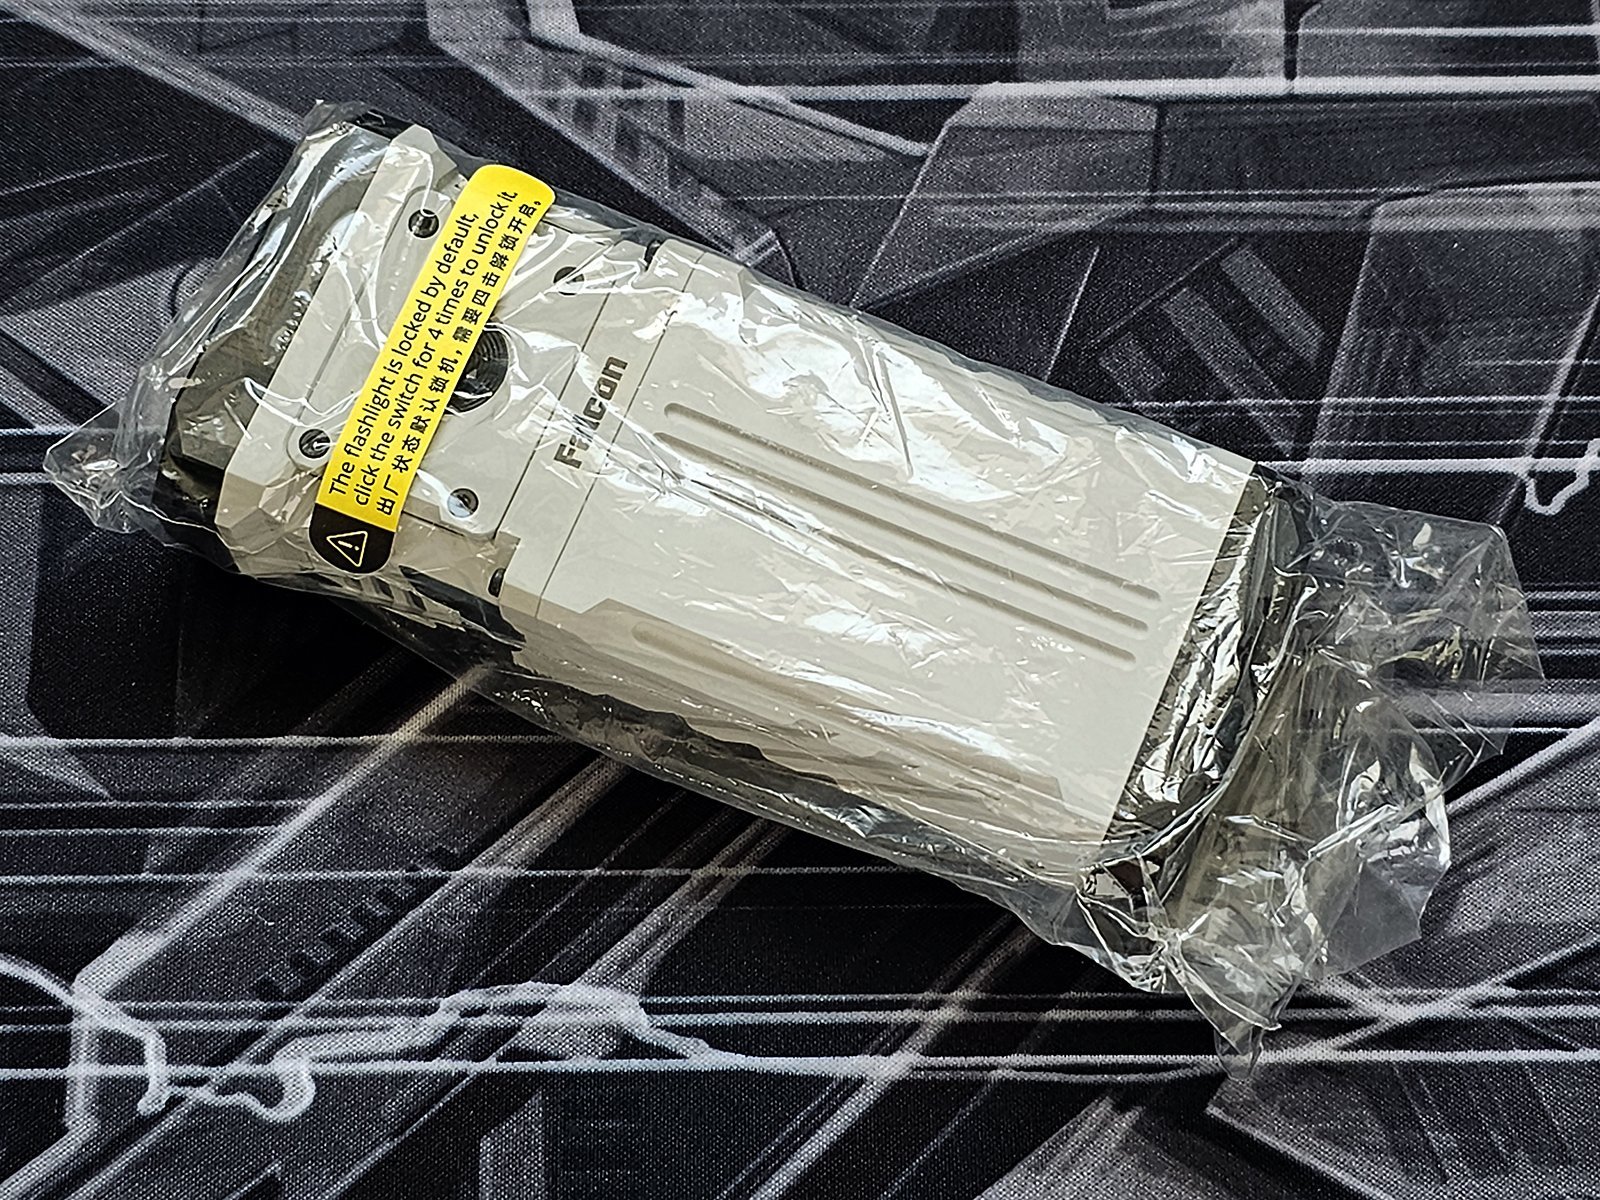
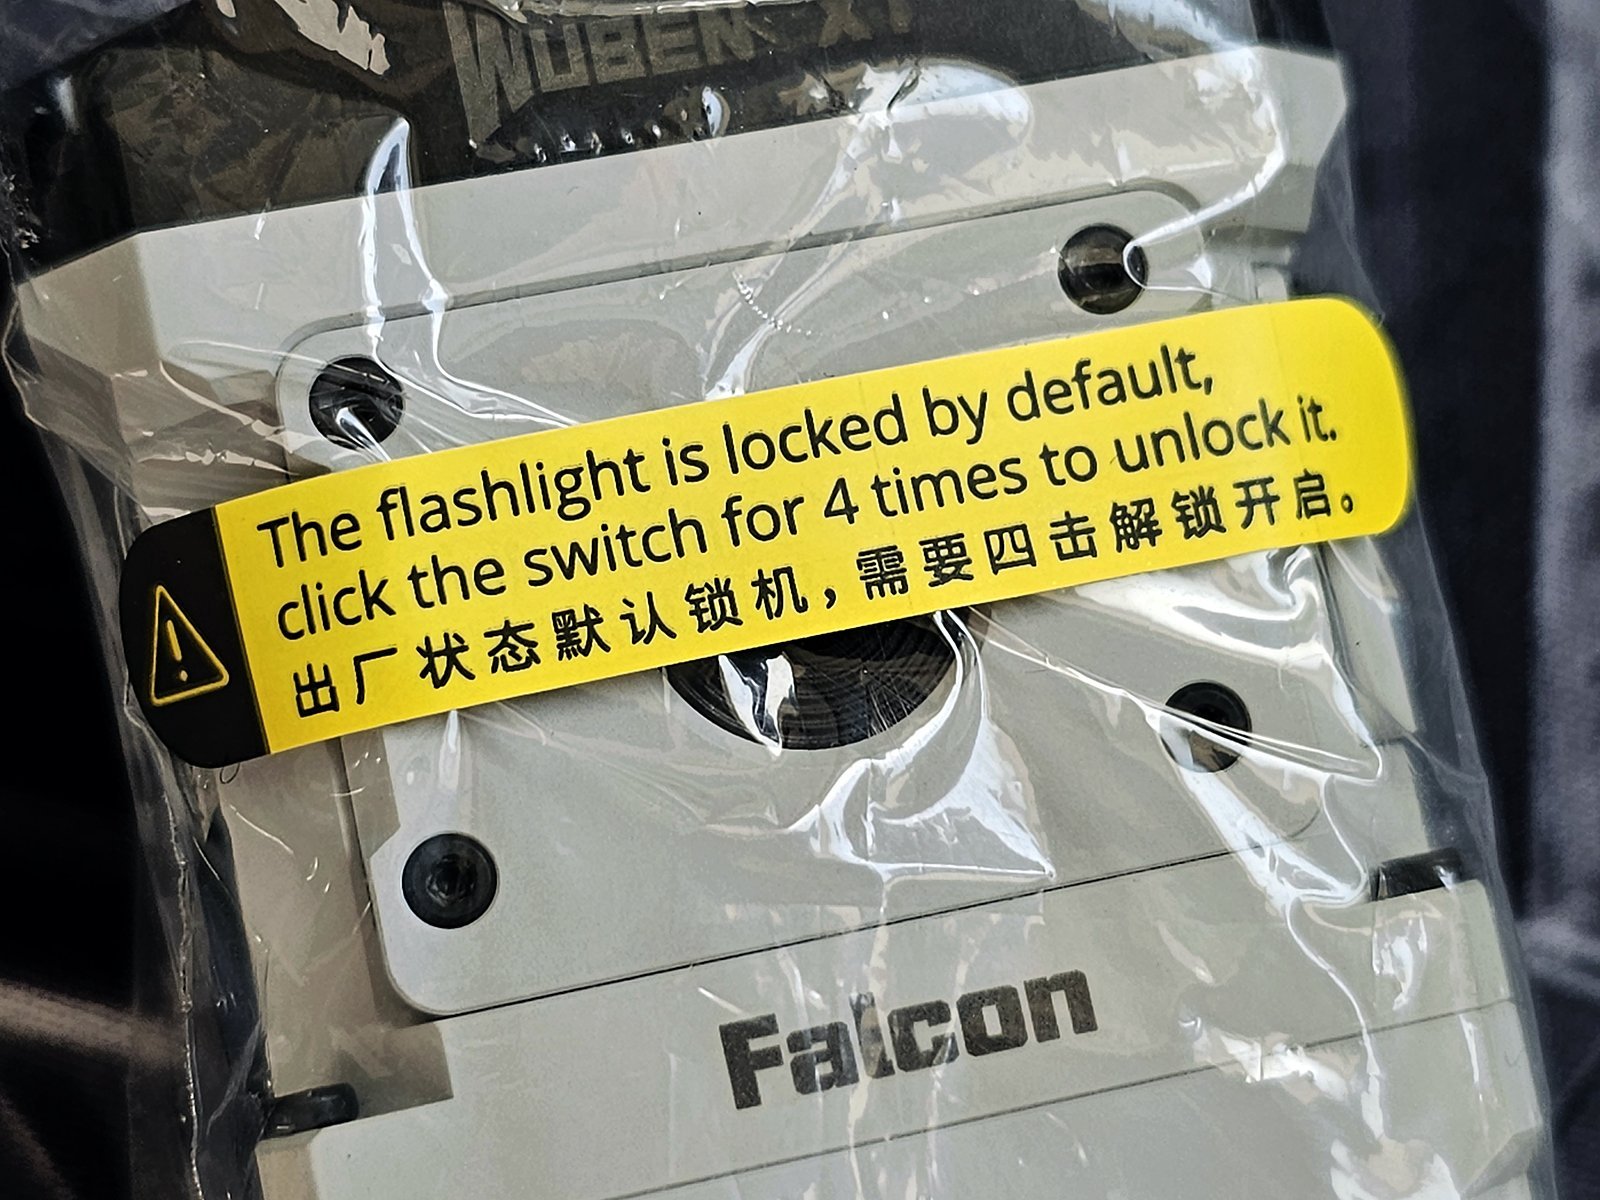
The torch itself comes wrapped in a plastic bag, which features a yellow sticker. As the batteries are not (supposed to be) removable, the only way to ensure safe shipping is to electronically lock the light and that is exactly that Wuben did. The sticker explains to the user that the torch is locked and how to unlock it.
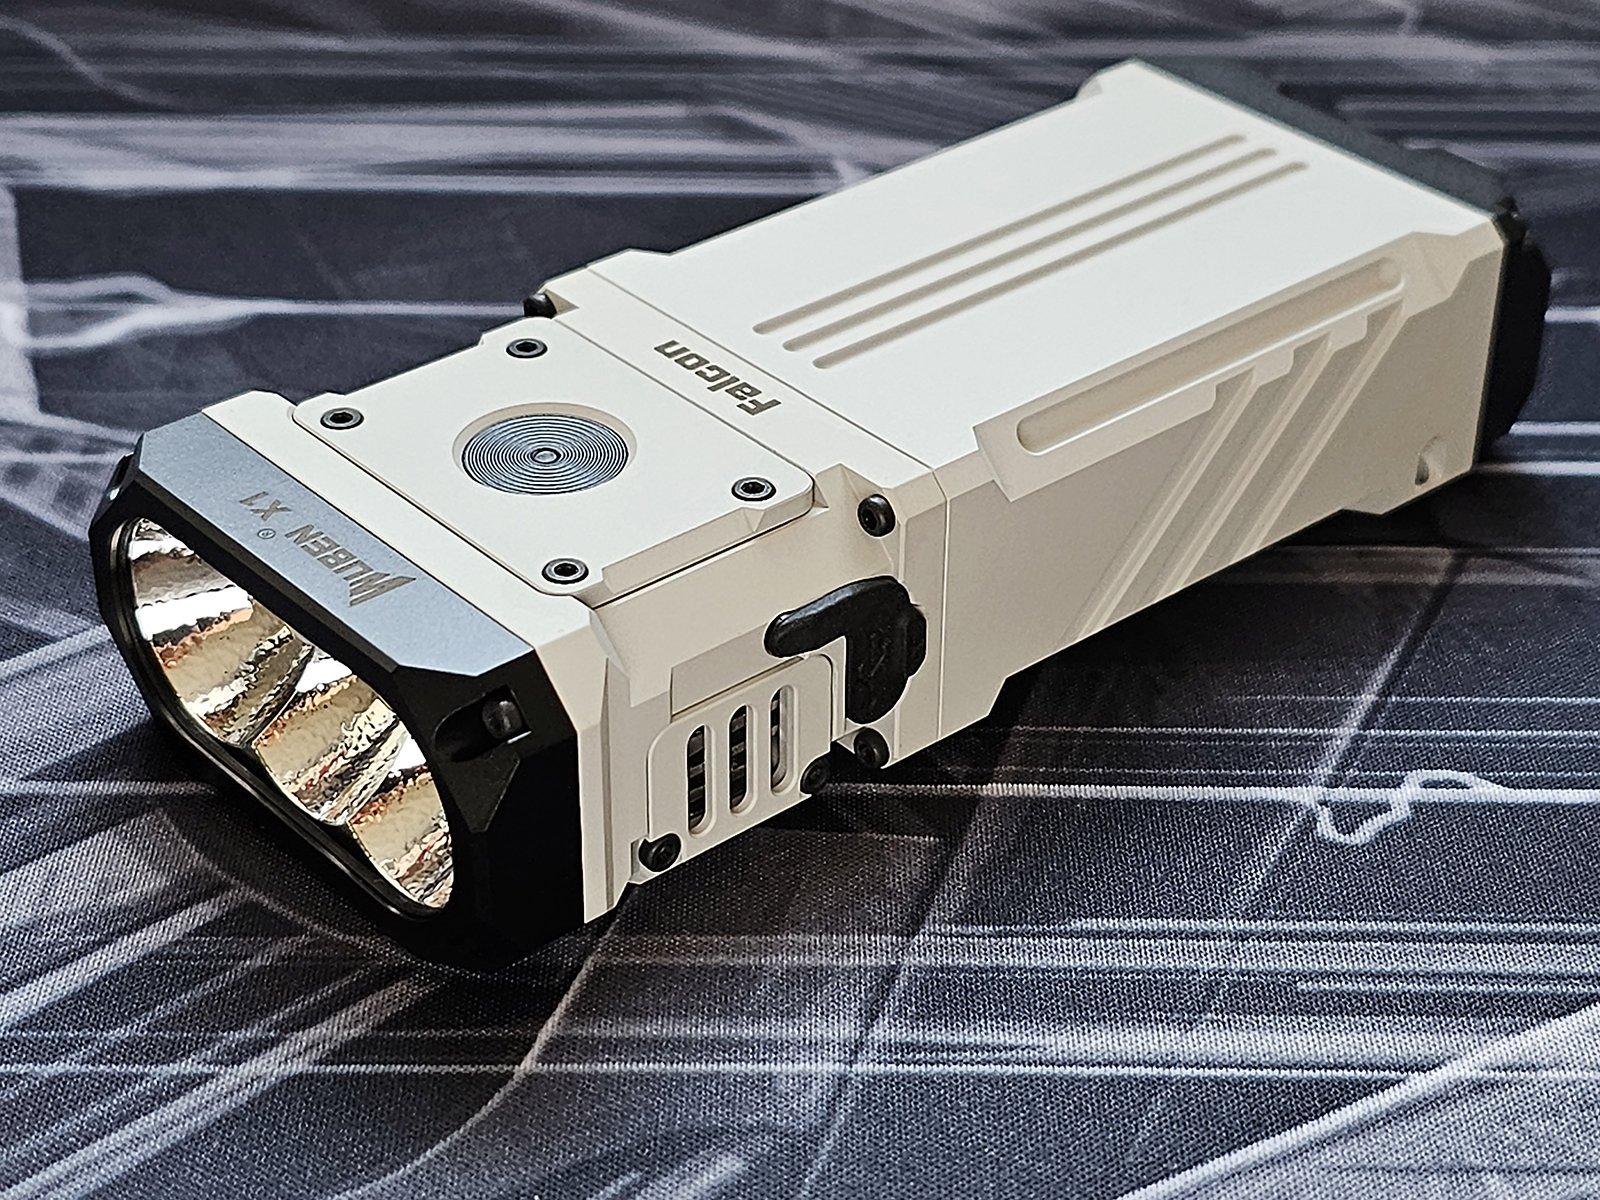
The Wuben X1 in Micro-Arc Oxidation white is a beautiful torch. Wuben opted for Black anodized bezel and tail, which looks nice and also makes me think that the reports I have read online about MAO not being as resilient as specs say and chipping more than black anodization may have some truth in them. The button and screws are also black.
The top features the operation button while the bottom has 2 small screw holes and a lanyard attachment hole towards the rear end, on one side.
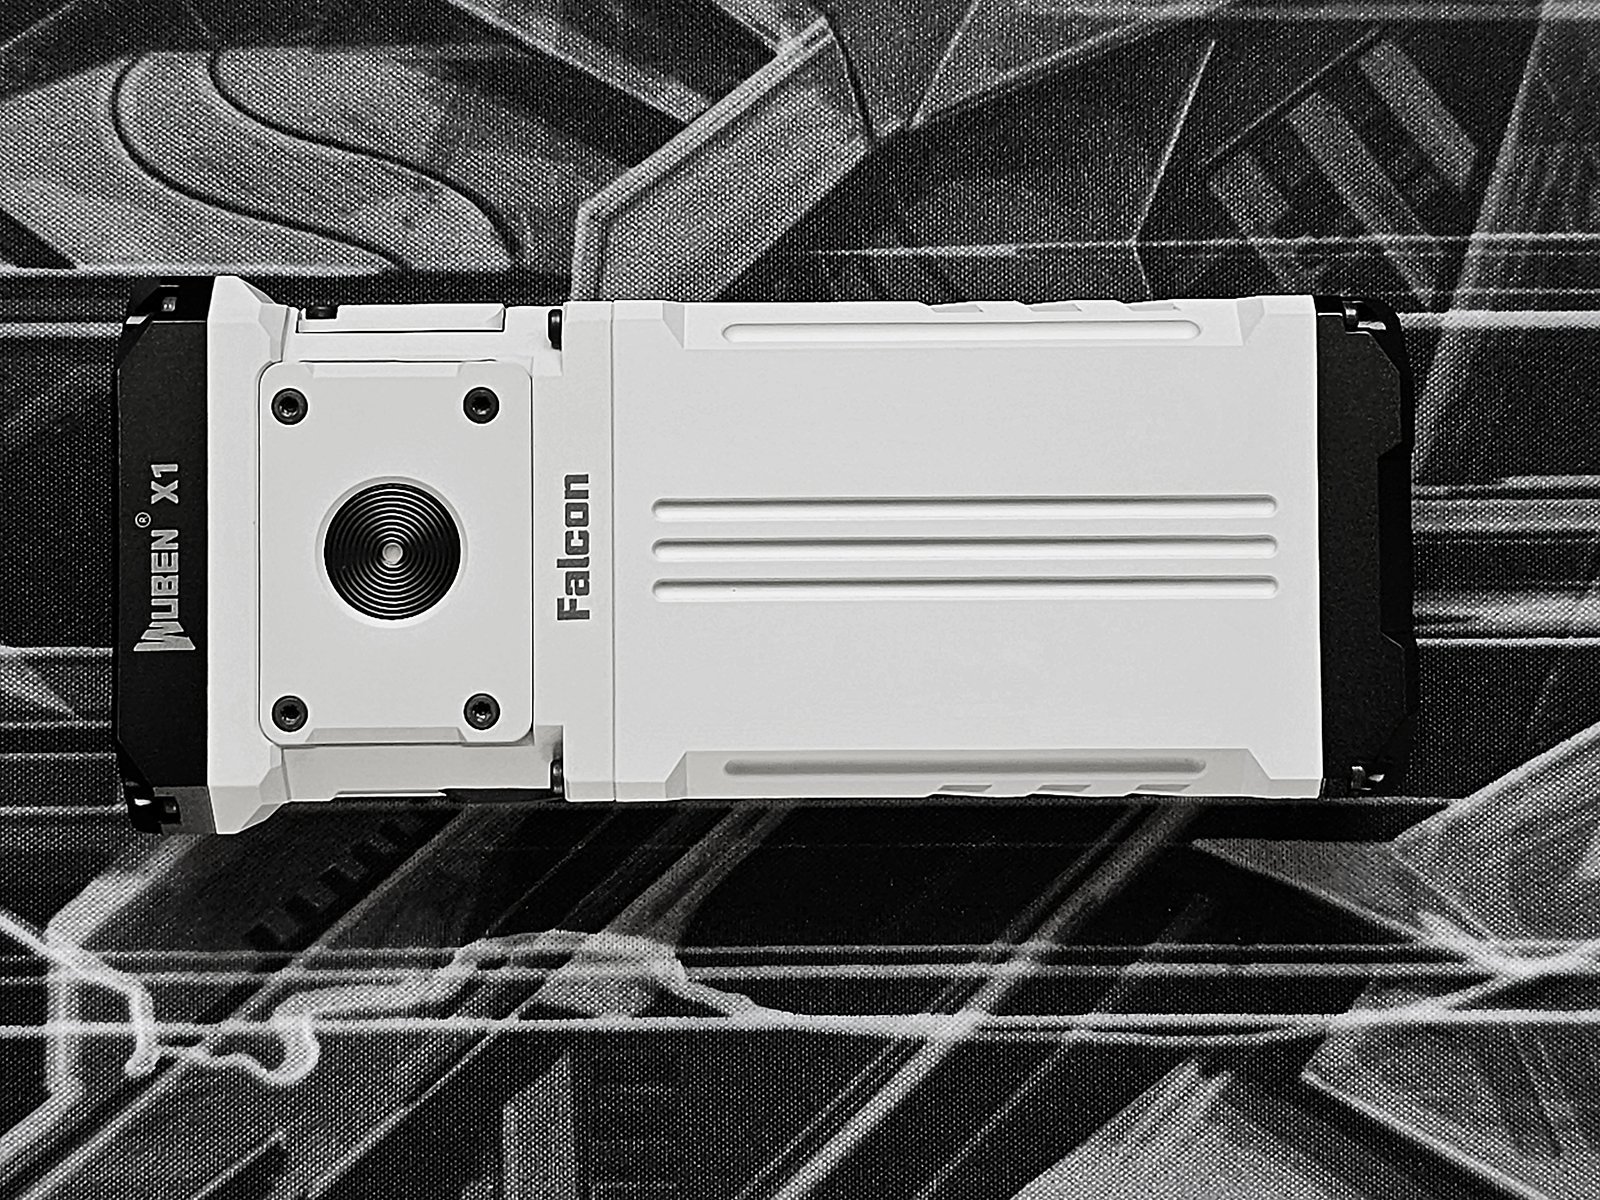
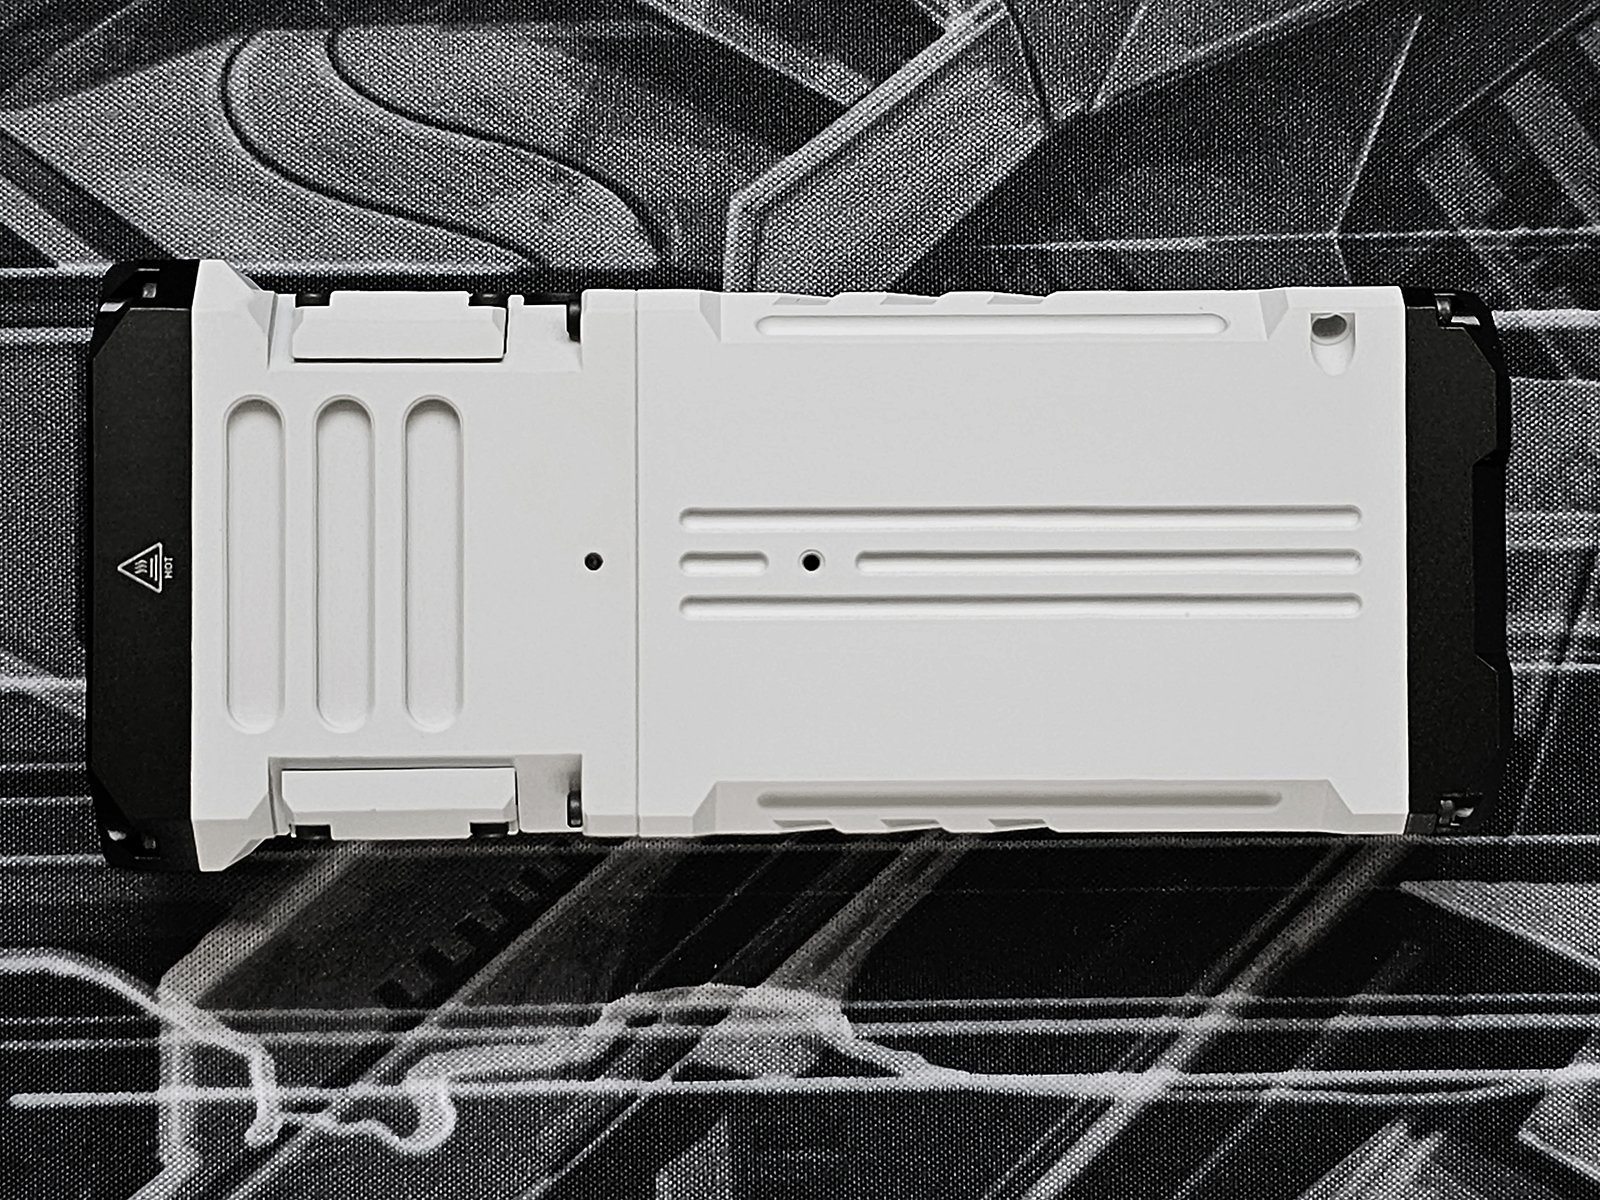
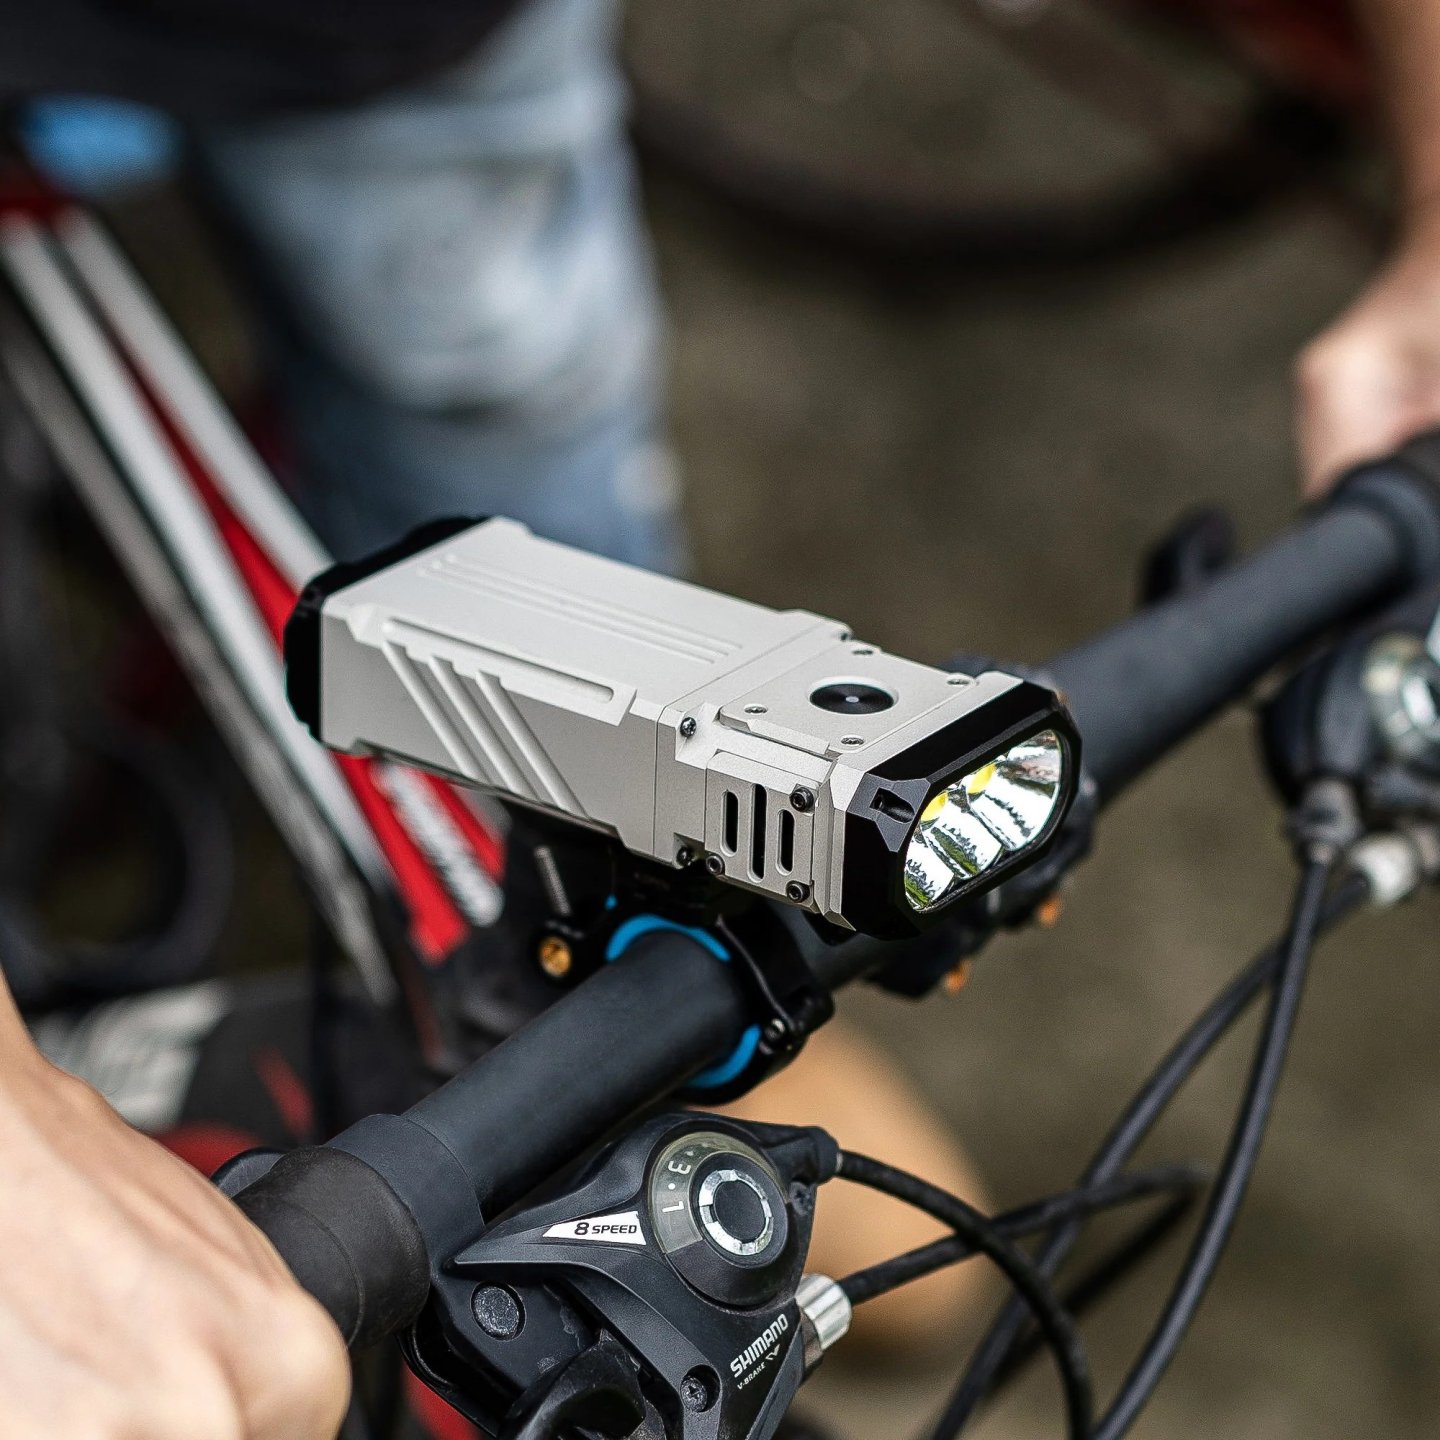
The screw holes are for attaching the optional bicycle mount.
On one side there is a rubber flap, covering the USB C charging port. There is also a grill, covering an aluminium heat sink.
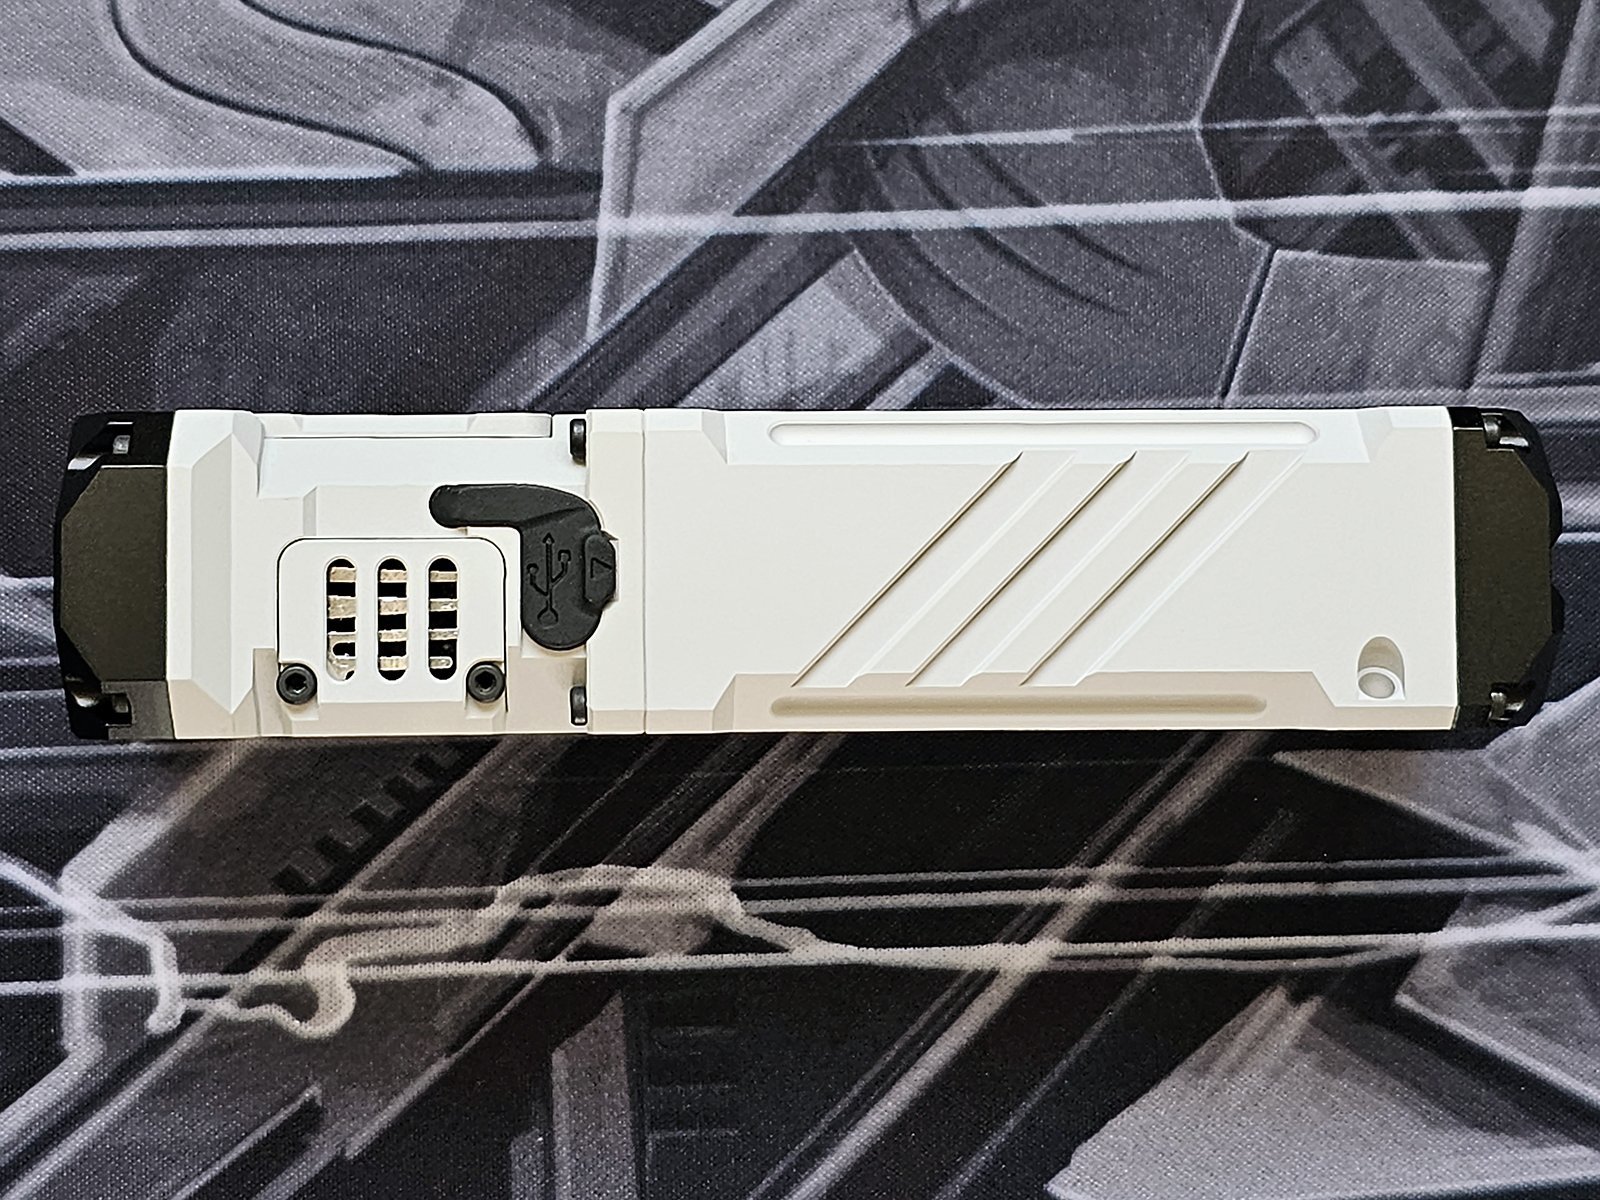
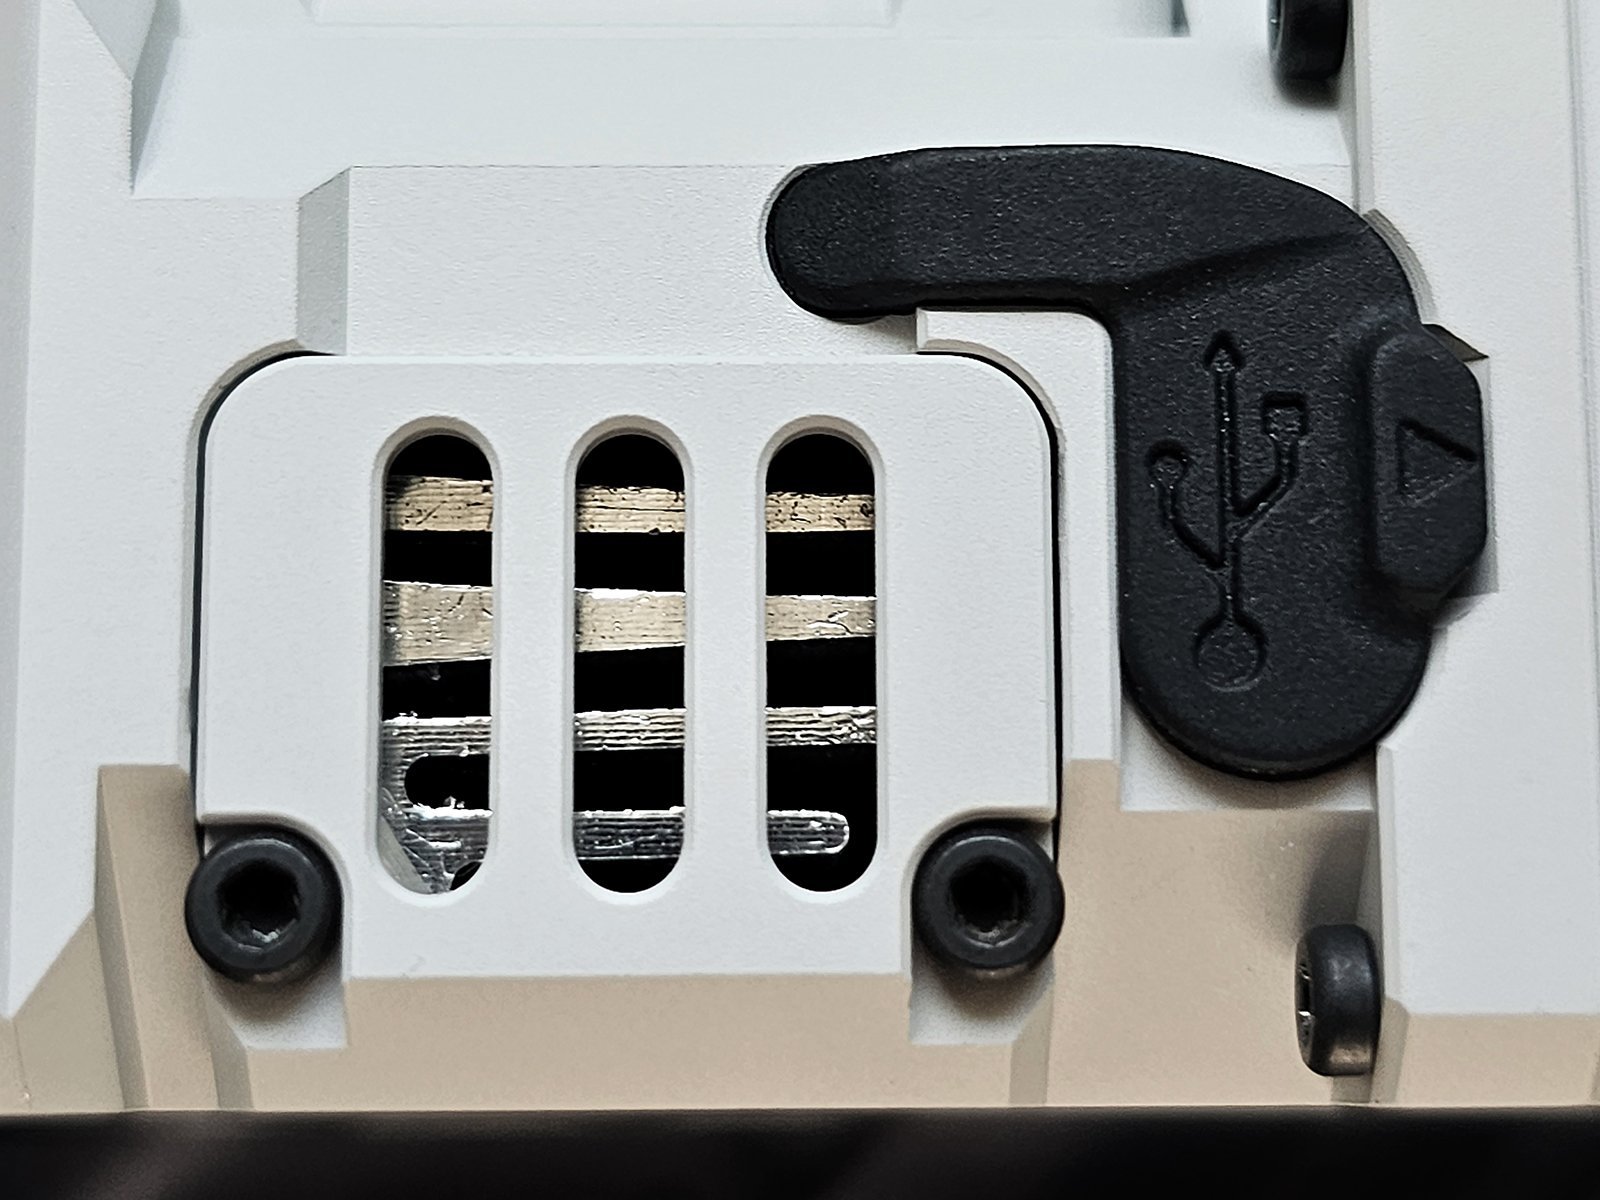
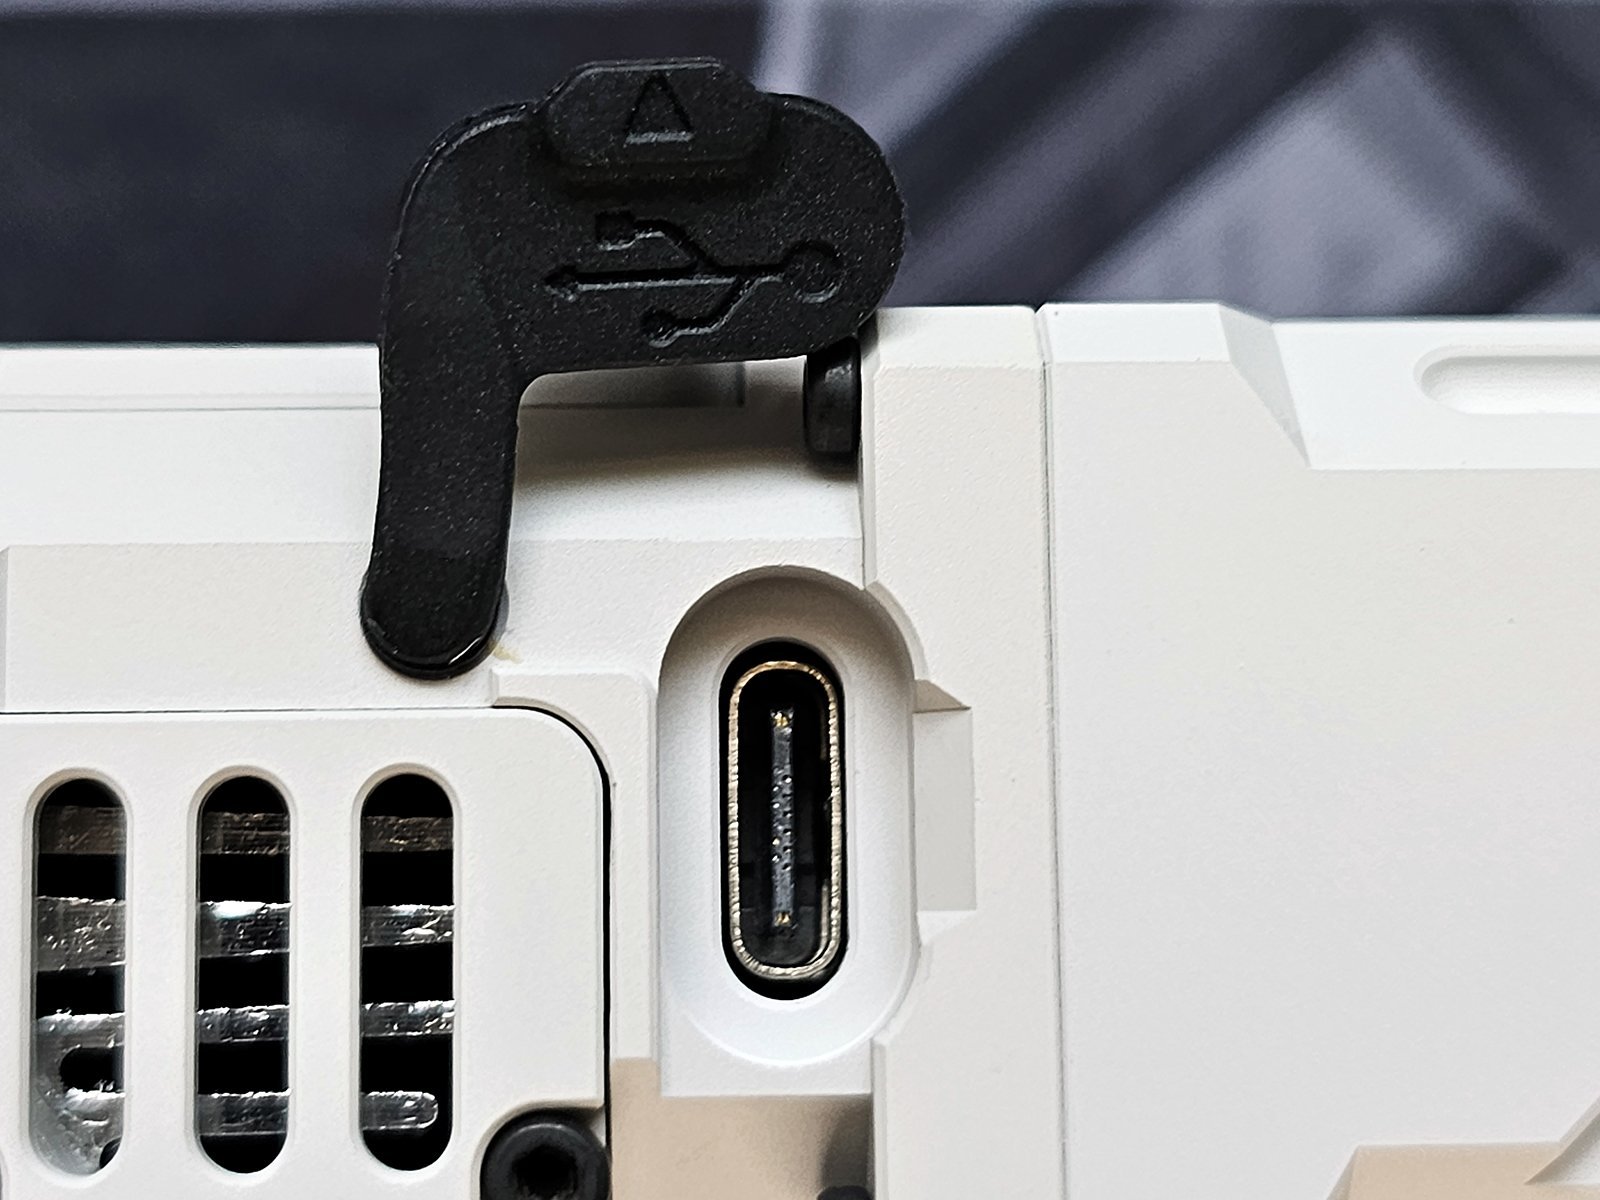
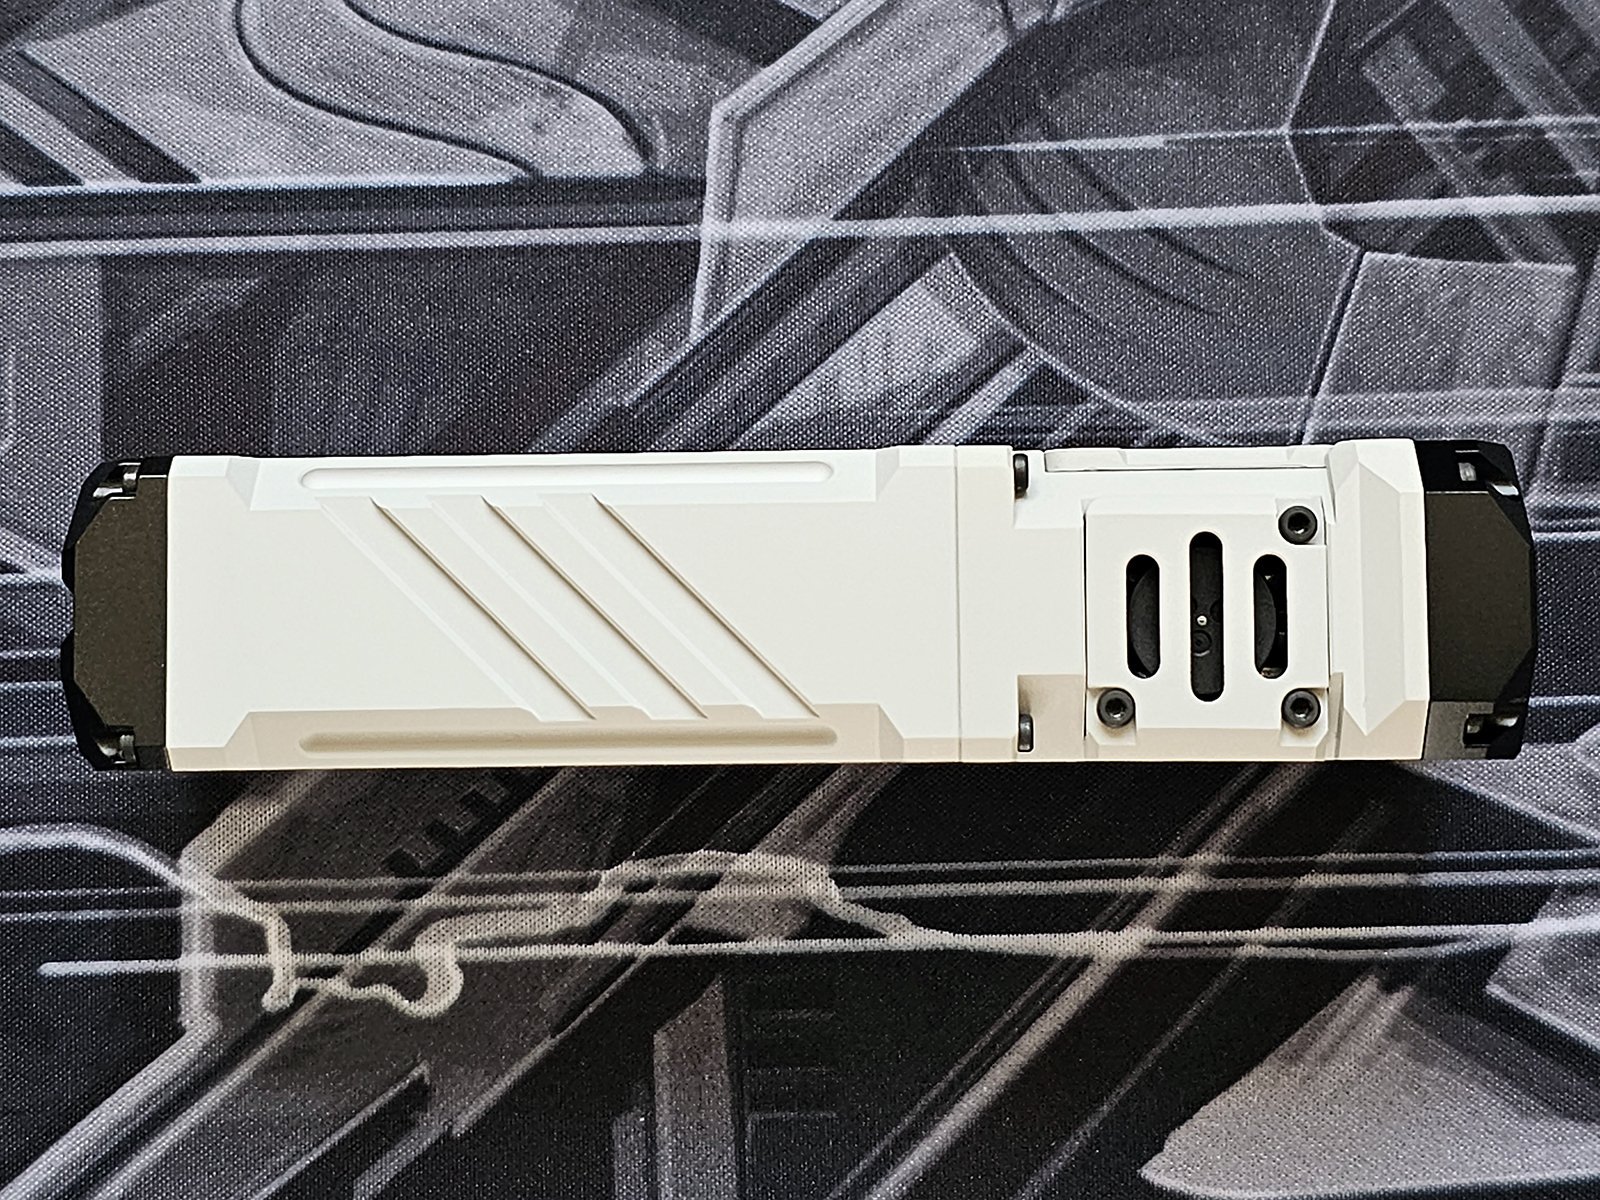
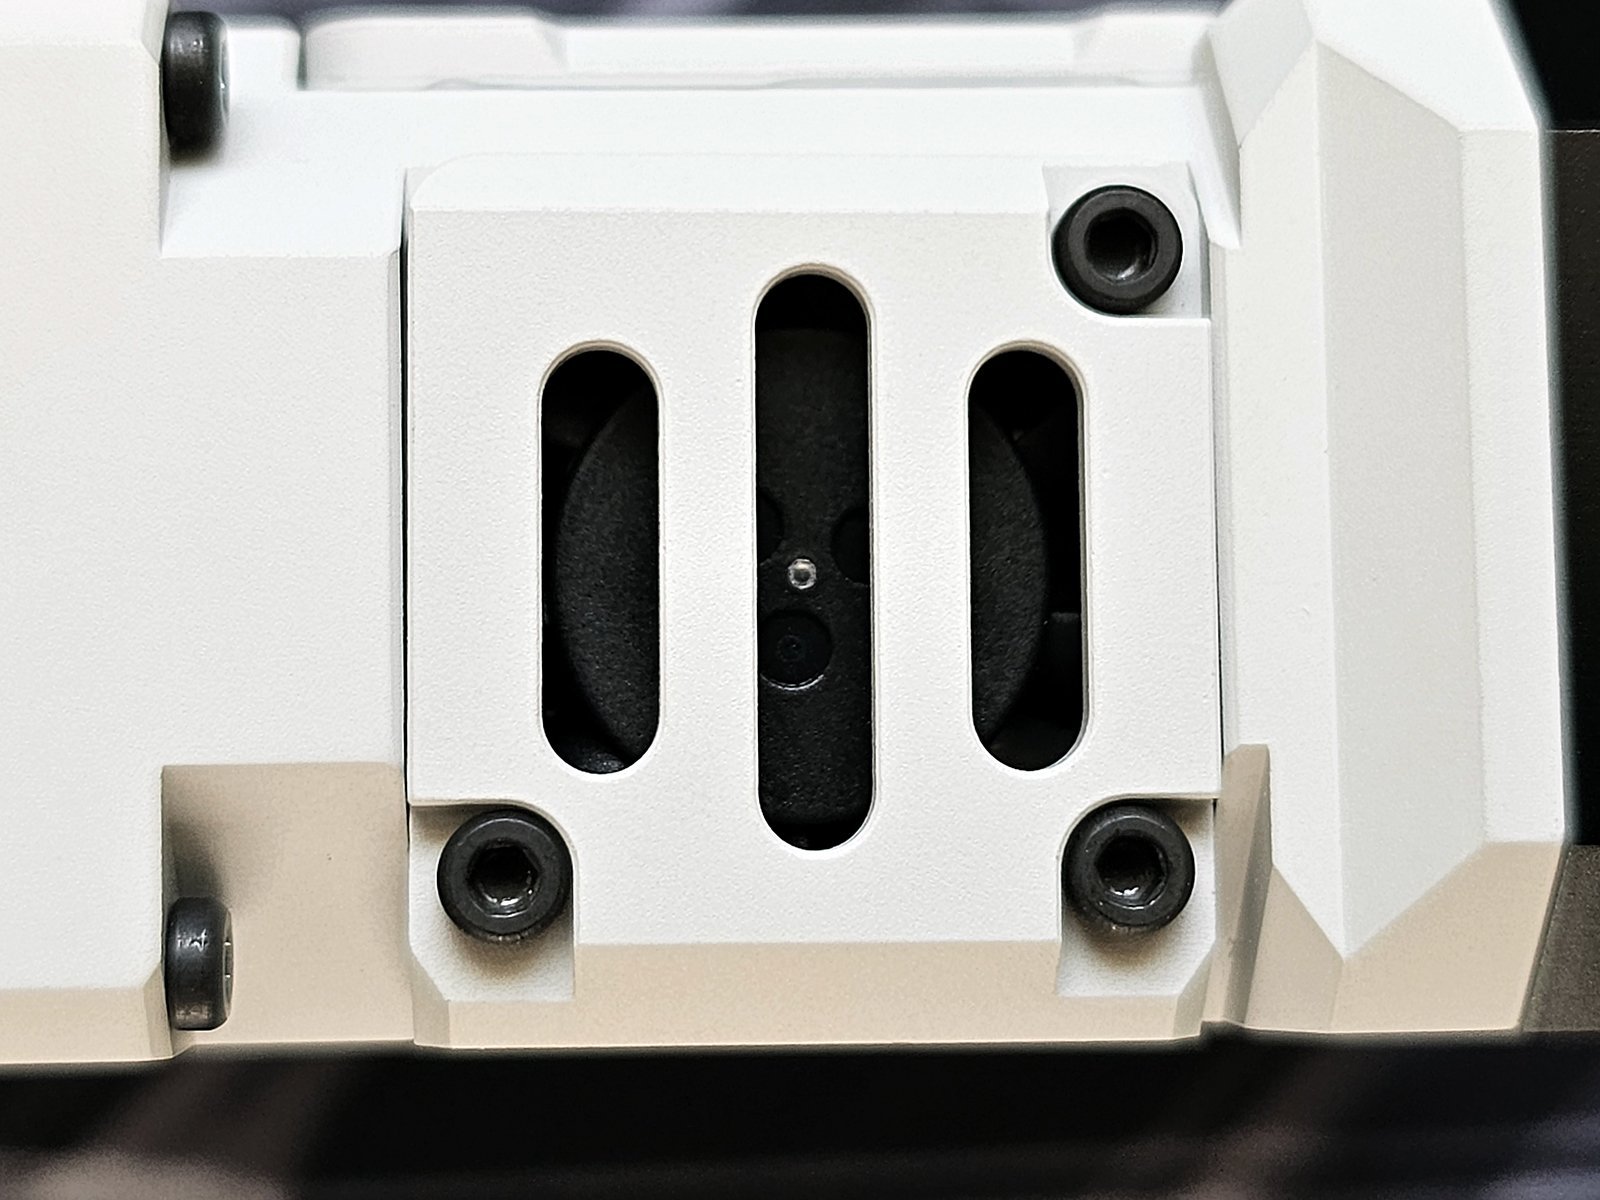
On the other side, there is another grill, covering a small fan.
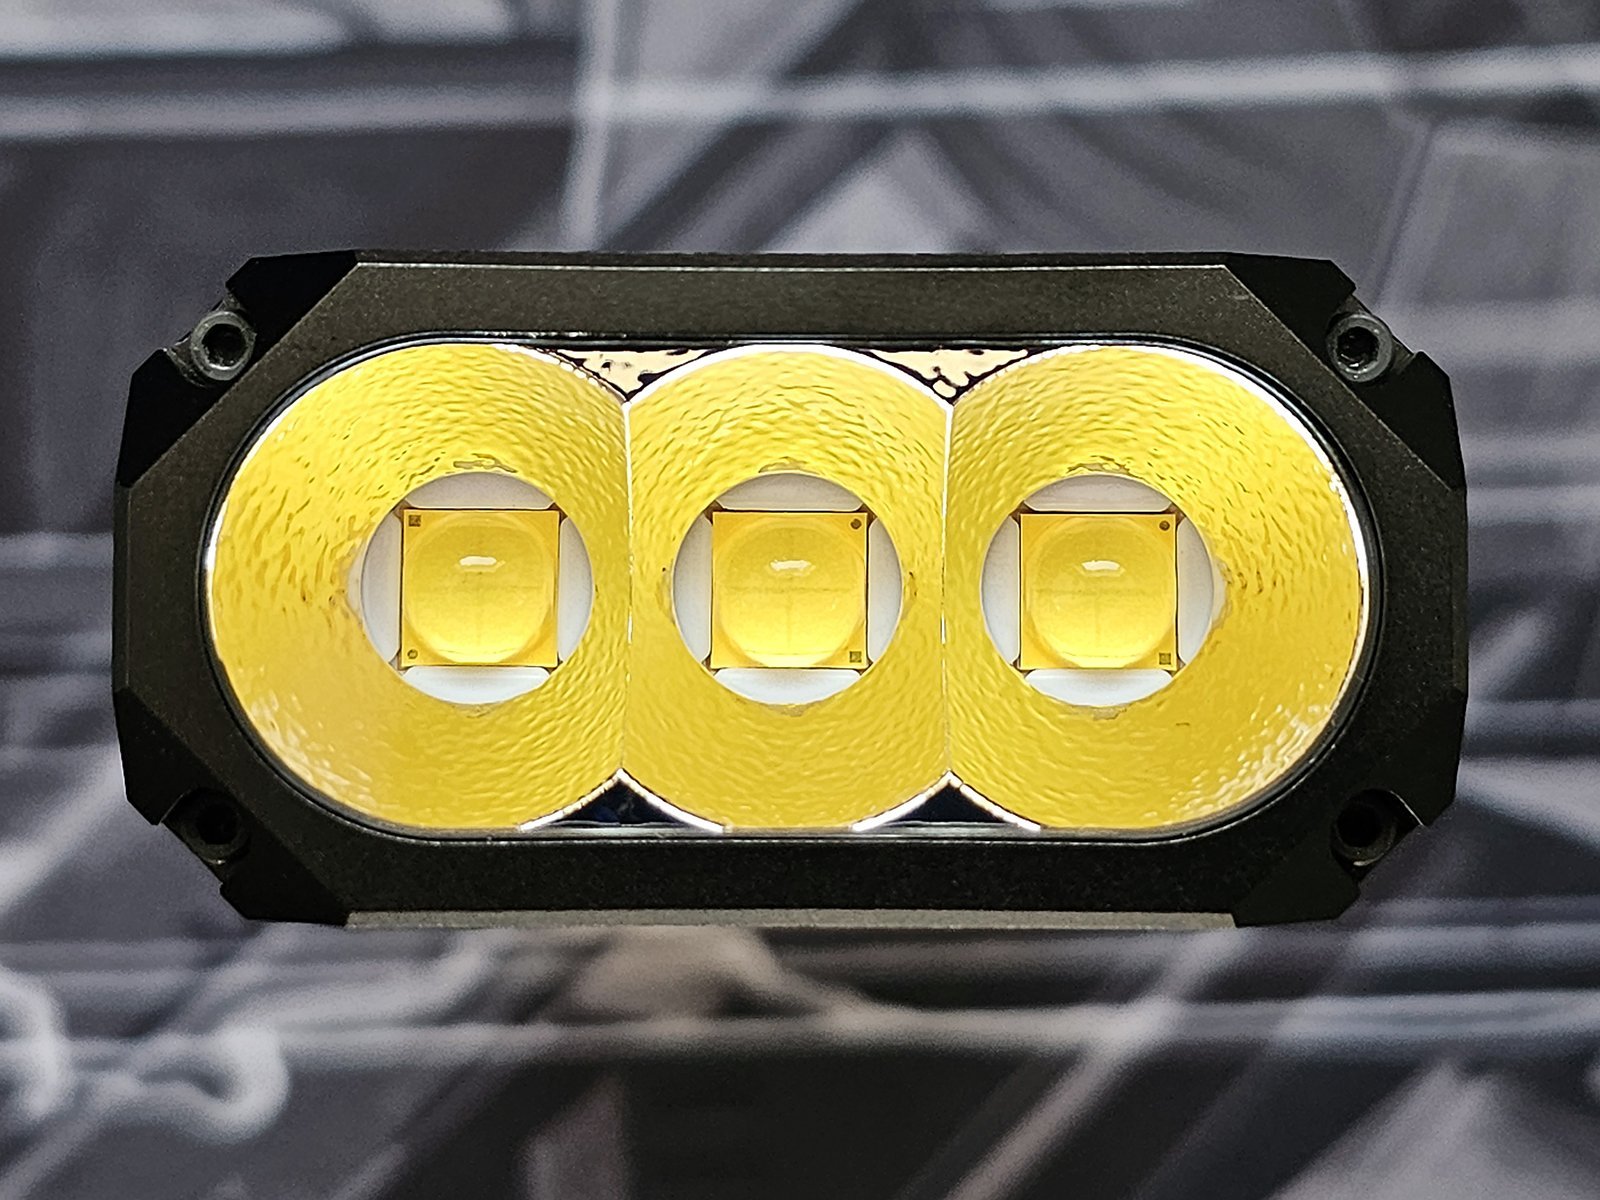
The front features 3 Cree XHP 70.2 emitters in a row, behind a triple, shallow, orange peal reflector. The combination of the large emitters with such a reflector is a clear indication of a floody beam.
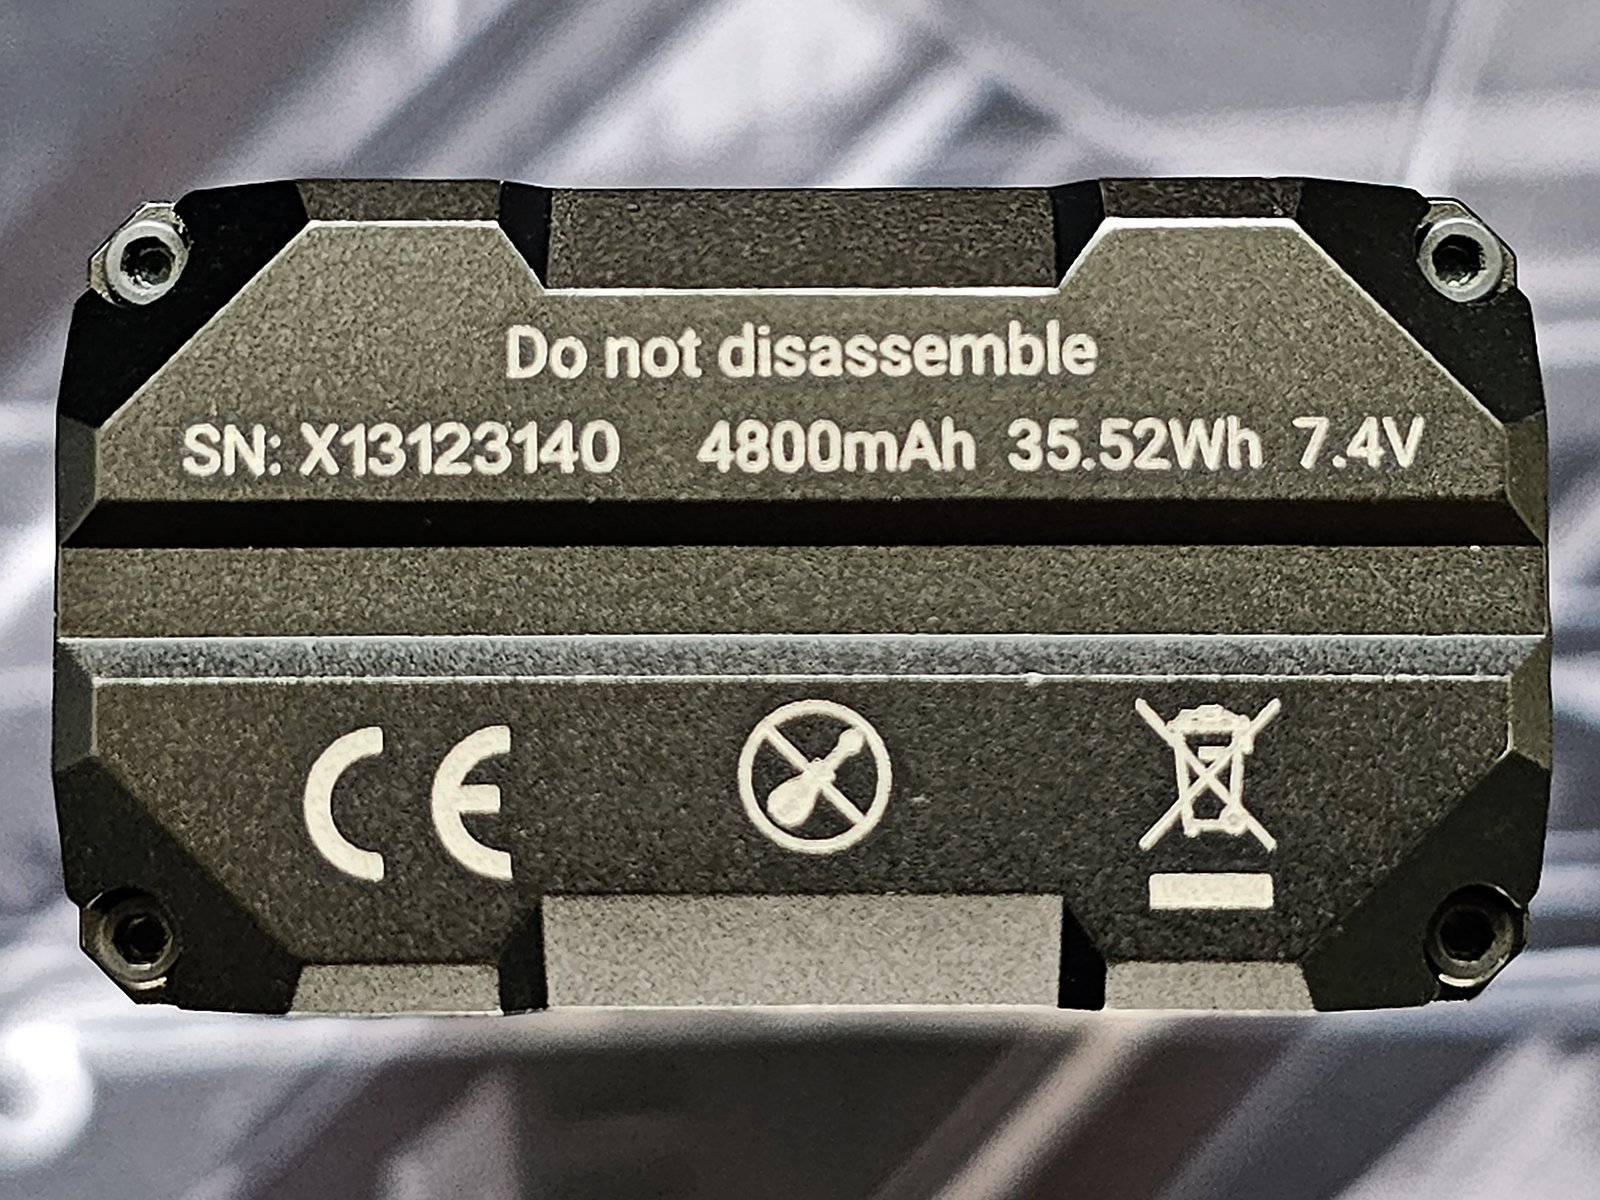
The tail cap features the serial number, the battery capacity in mAh and Wh and the battery voltage. 7.4V clearly means 2 Li-Ion batteries in series.
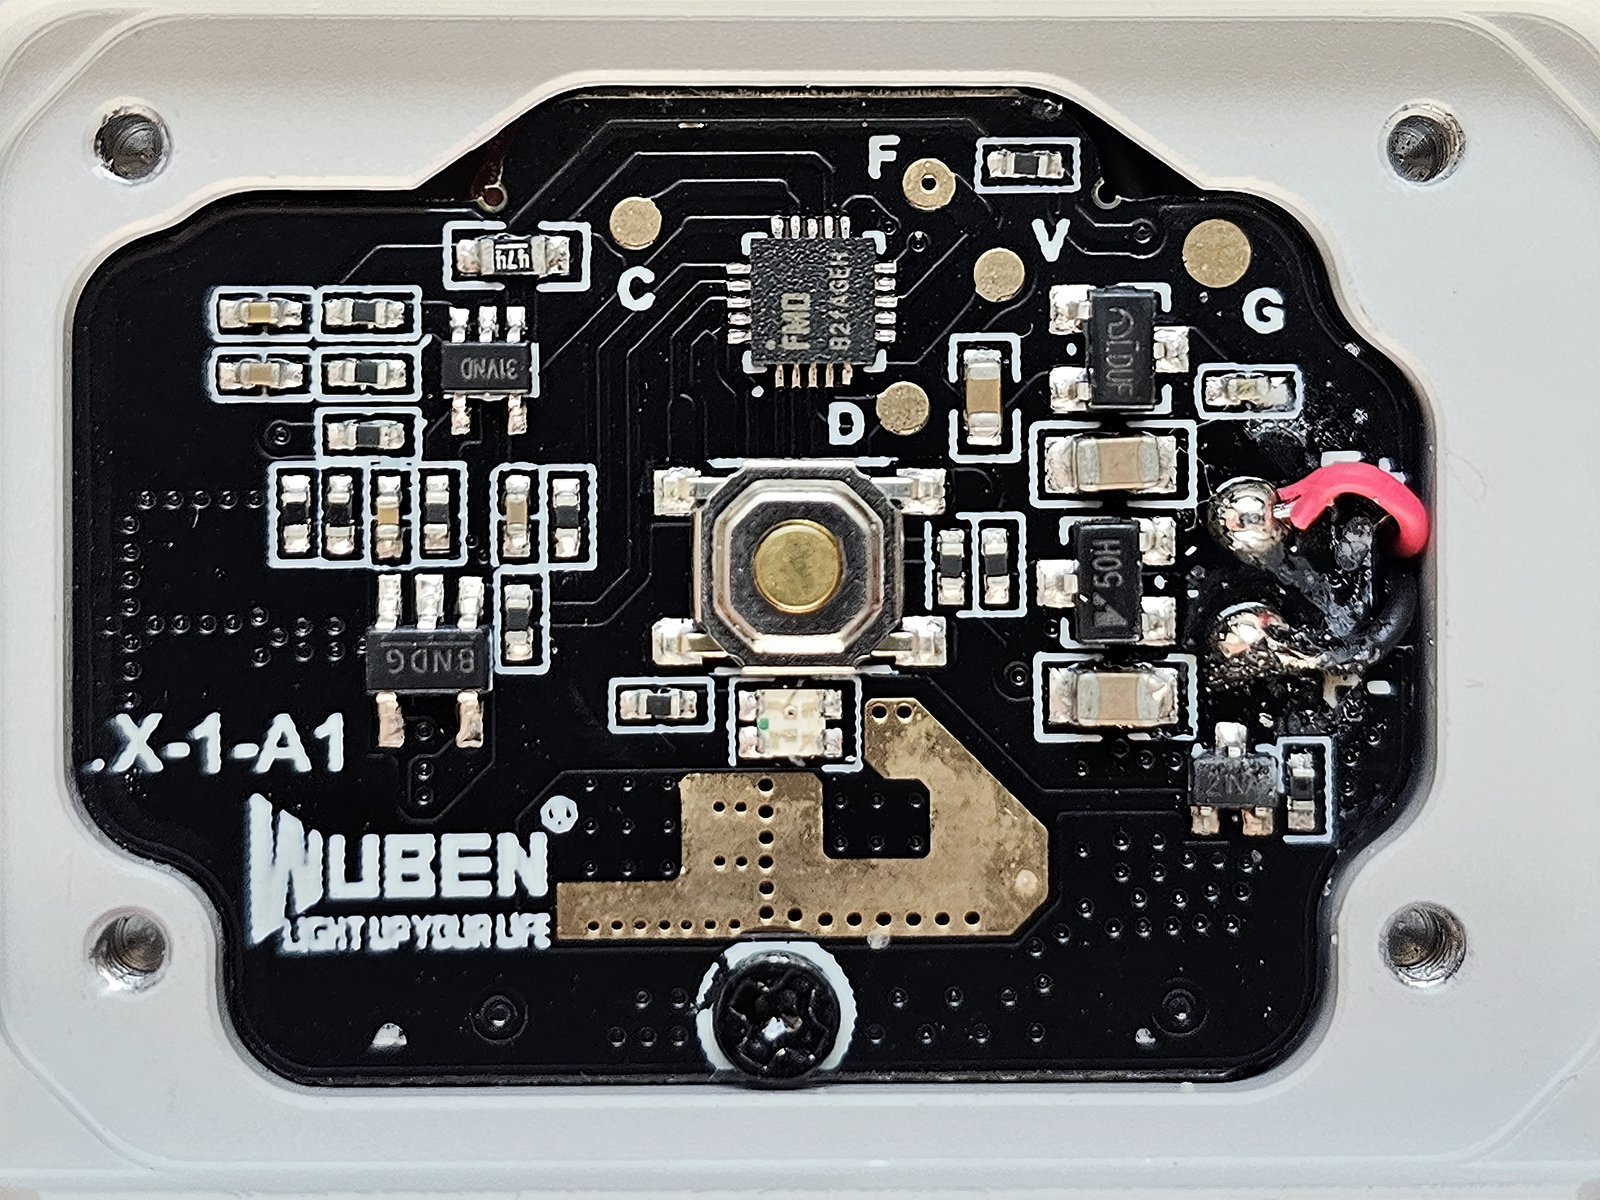
There is a warning to not disassemble but the 4 screws in the corners look very inviting.
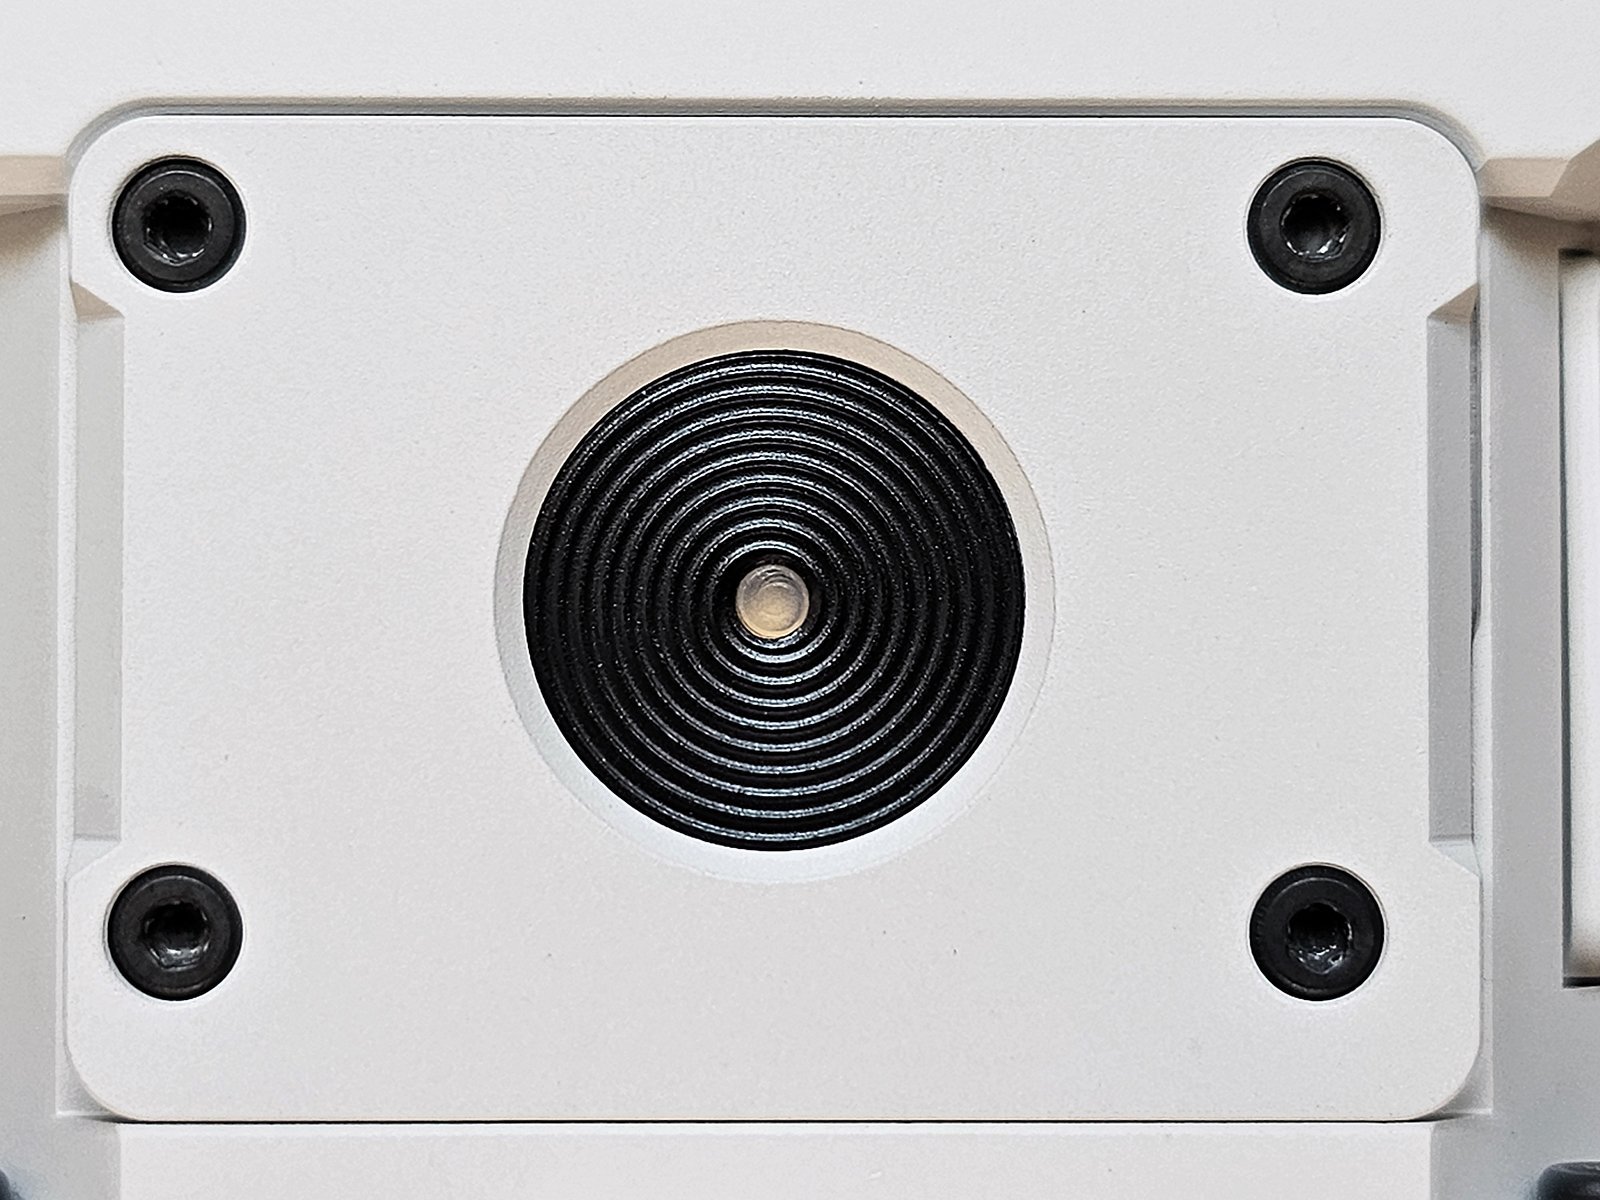
The button is placed in the centre of a removable plate and has a clear dot in the middle, through which an indicator LED shines. It is slightly recessed and easy to find in the dark, without gloves. It requires a pressing force of about 500g to activate.
Unscrewing
Despite the warning, I went ahead and removed the 4 screws holding the tail cap. This is fairly straightforward, as there is no thread locker, but be extremely careful if you decide to do so. The tail cap is under considerable tension and you are guaranteed to strip the screw holes if you do not keep pressure on the tail cap while removing the 4 screws. And I mean a whole lot of pressure. Consider yourselves warned.
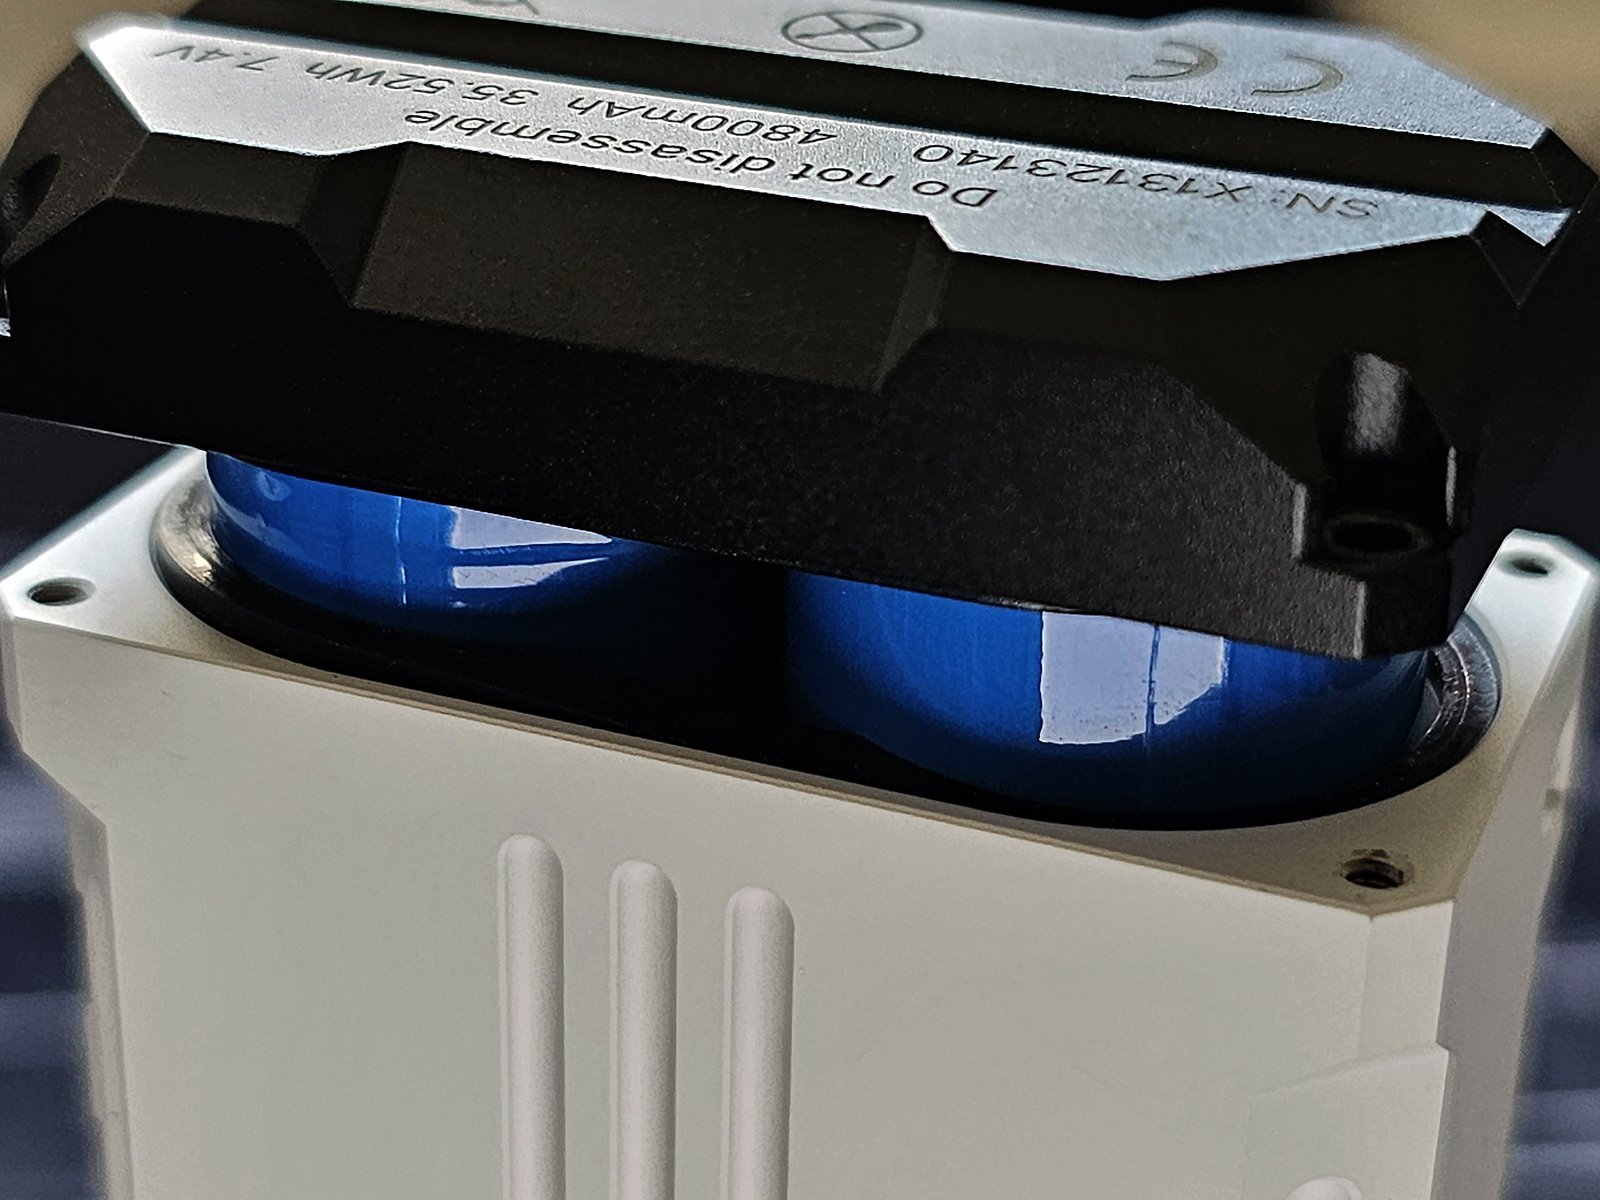
Removing the 4 screws allows the tail cap to come off and reveal 2 batteries in series, as the voltage inscribed on the tail cap indicated.
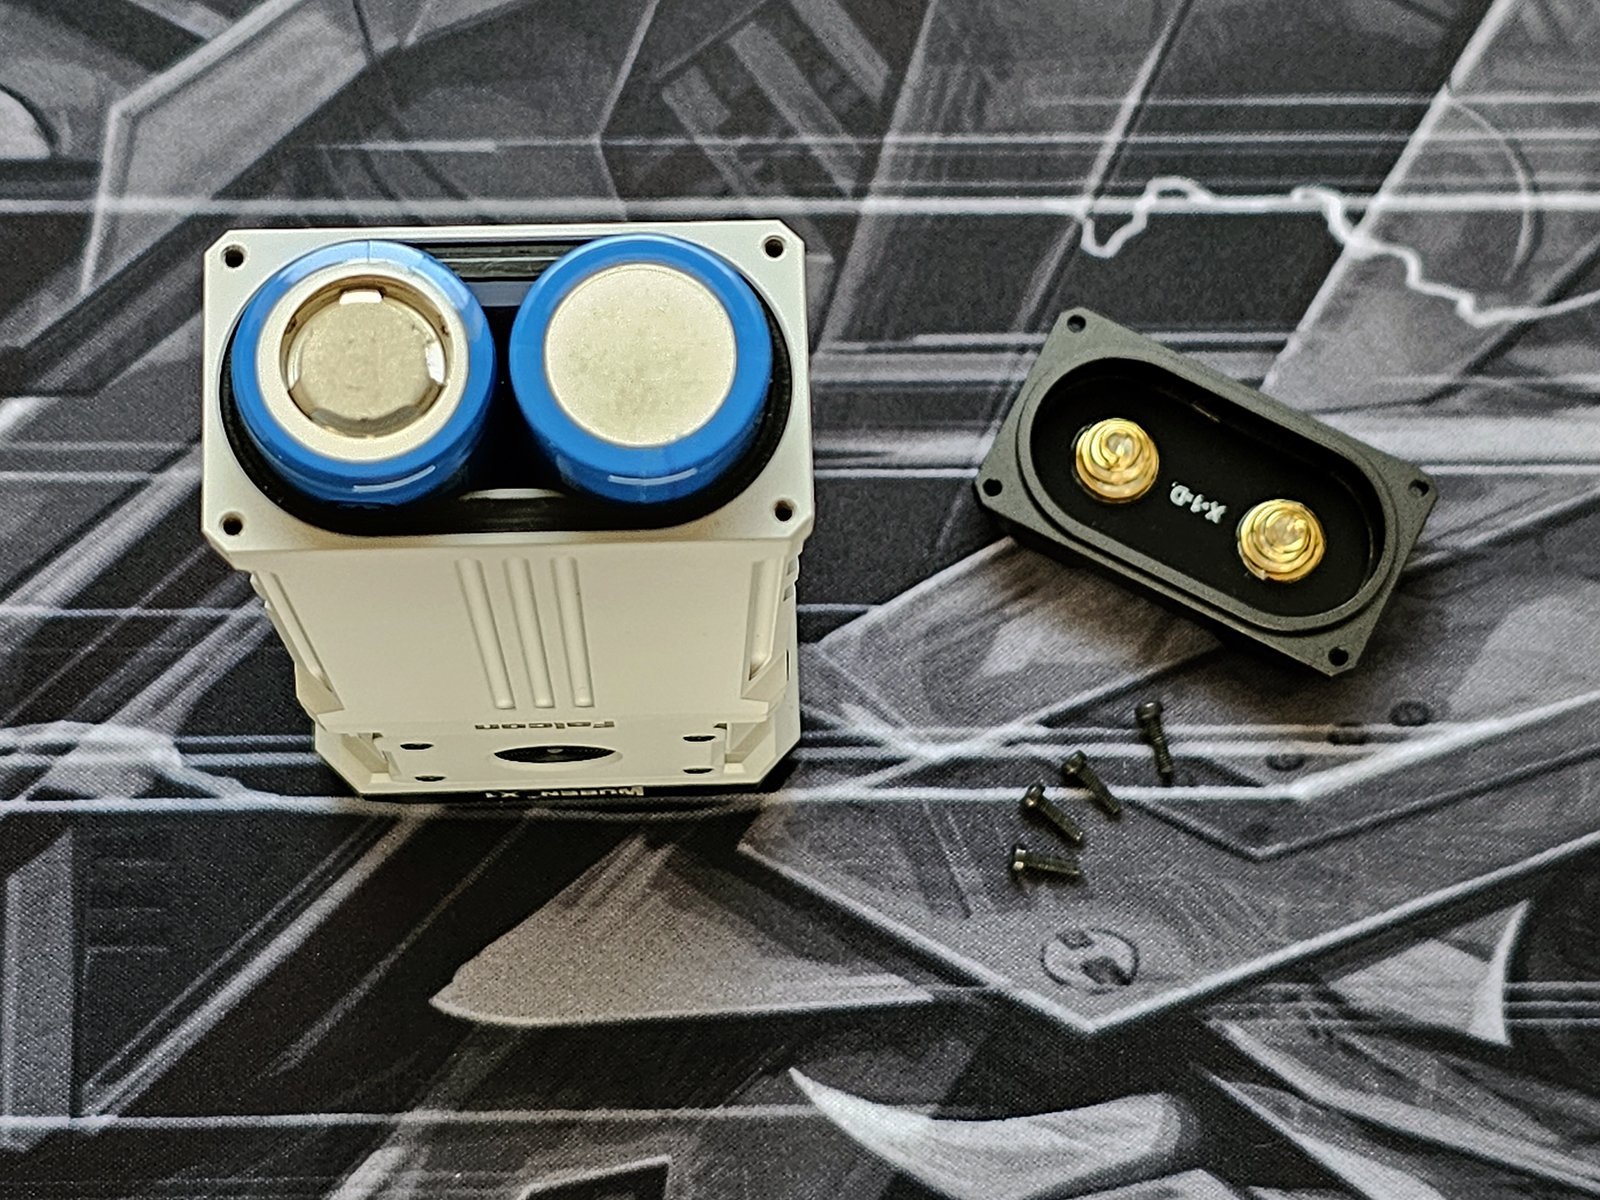
The batteries are Wuben branded, unprotected, flat top, 21700 Li-Ion batteries with a stated capacity of 4800mAh. They are not proprietary in any way so the batteries of the Wuben X1 can indeed be replaced with any unprotected 21700 Li-Ion batteries when the included ones wear out. Take great care to make sure the batteries used are well matched, as there is no balancing function.

There are thick, high quality springs on both ends of the battery tubes.
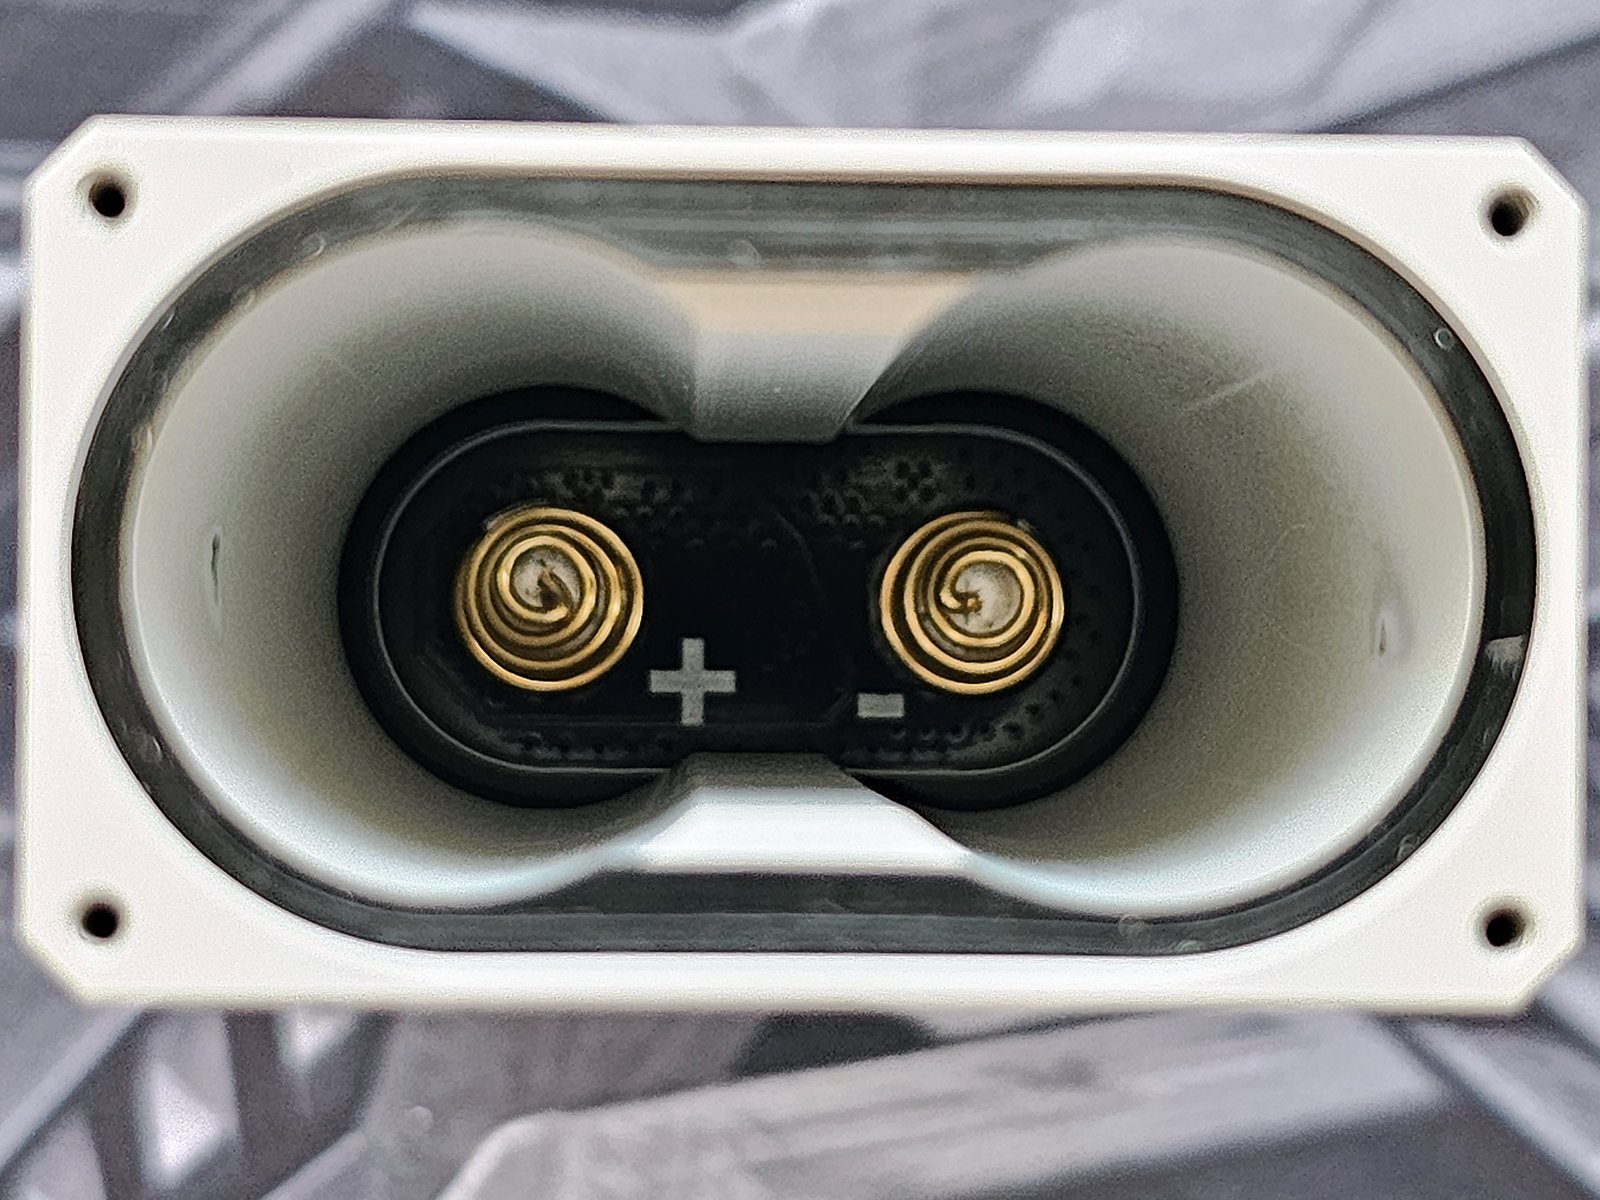
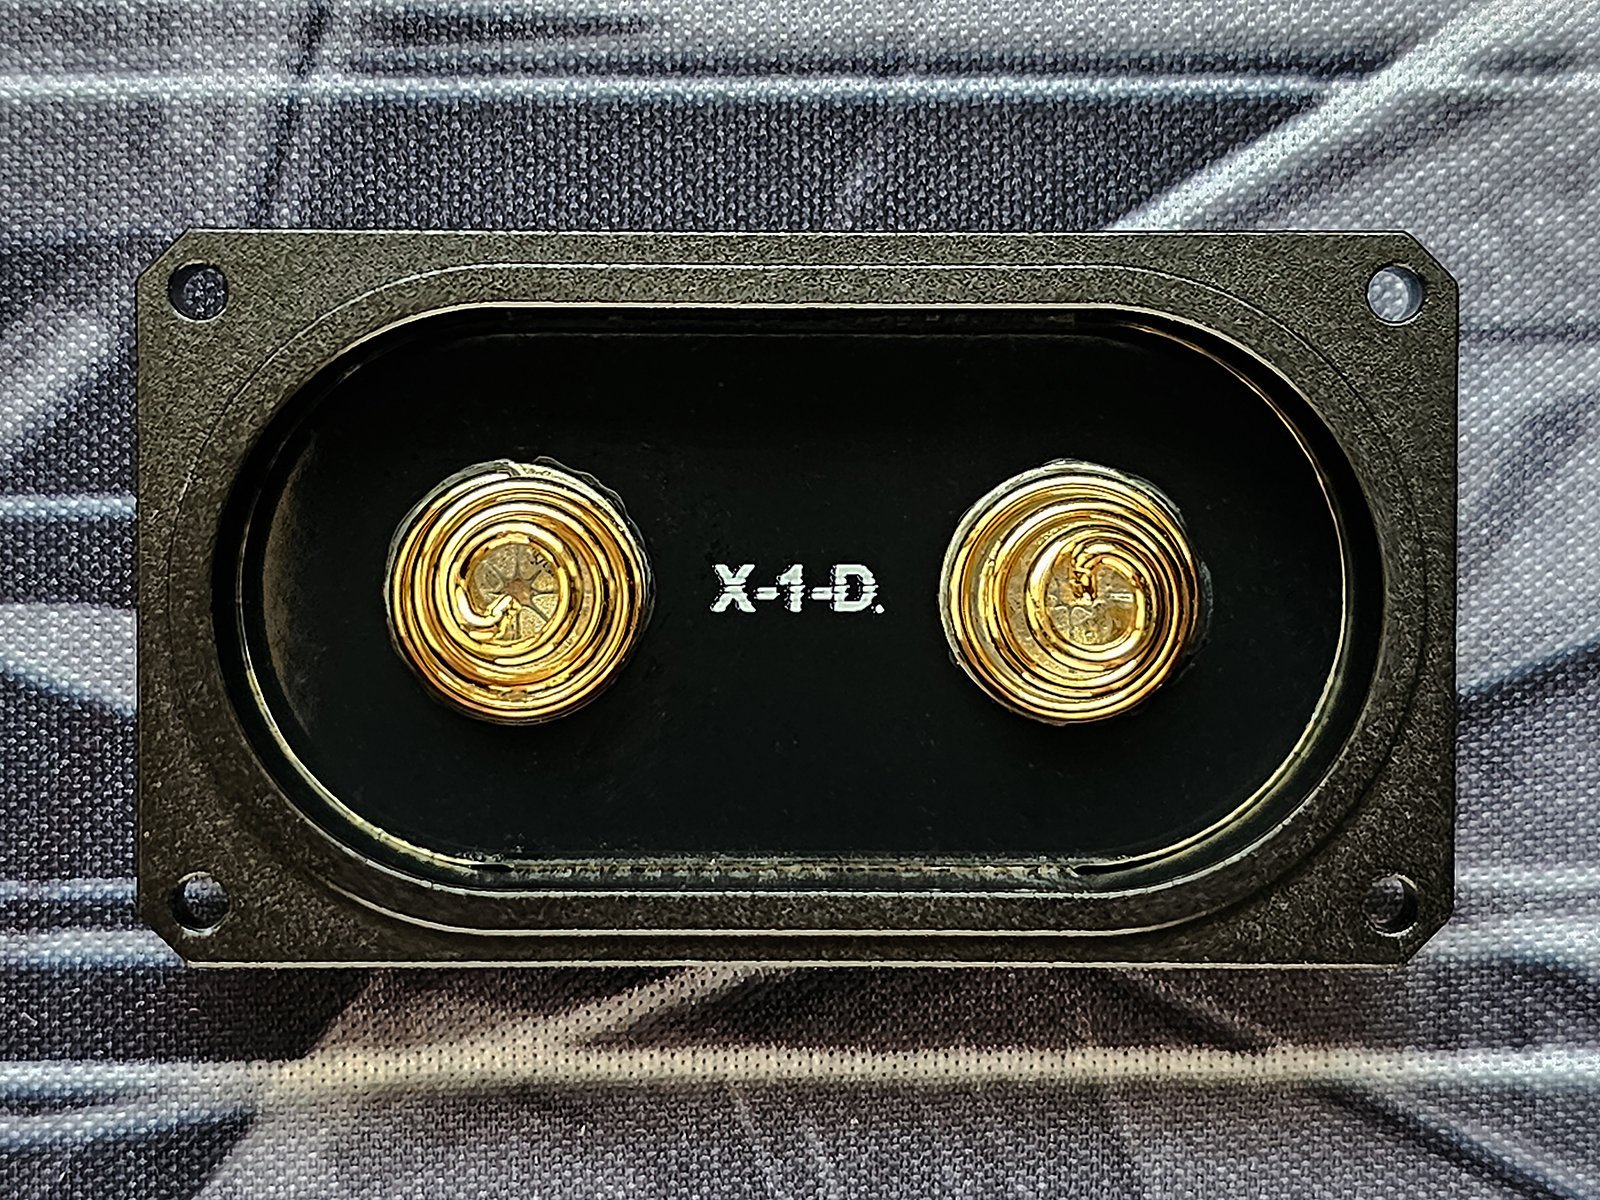
Since I started removing screws, I thought I'd take a look at the fan. Removing the 3 screws that hold the grill over it, the fan is revealed. The reason that the grill has 3 instead of the 4 expected screws to hold it in place is also revealed, as the 4th corner of the fan seems to be a conduit for the cables travelling towards the button.
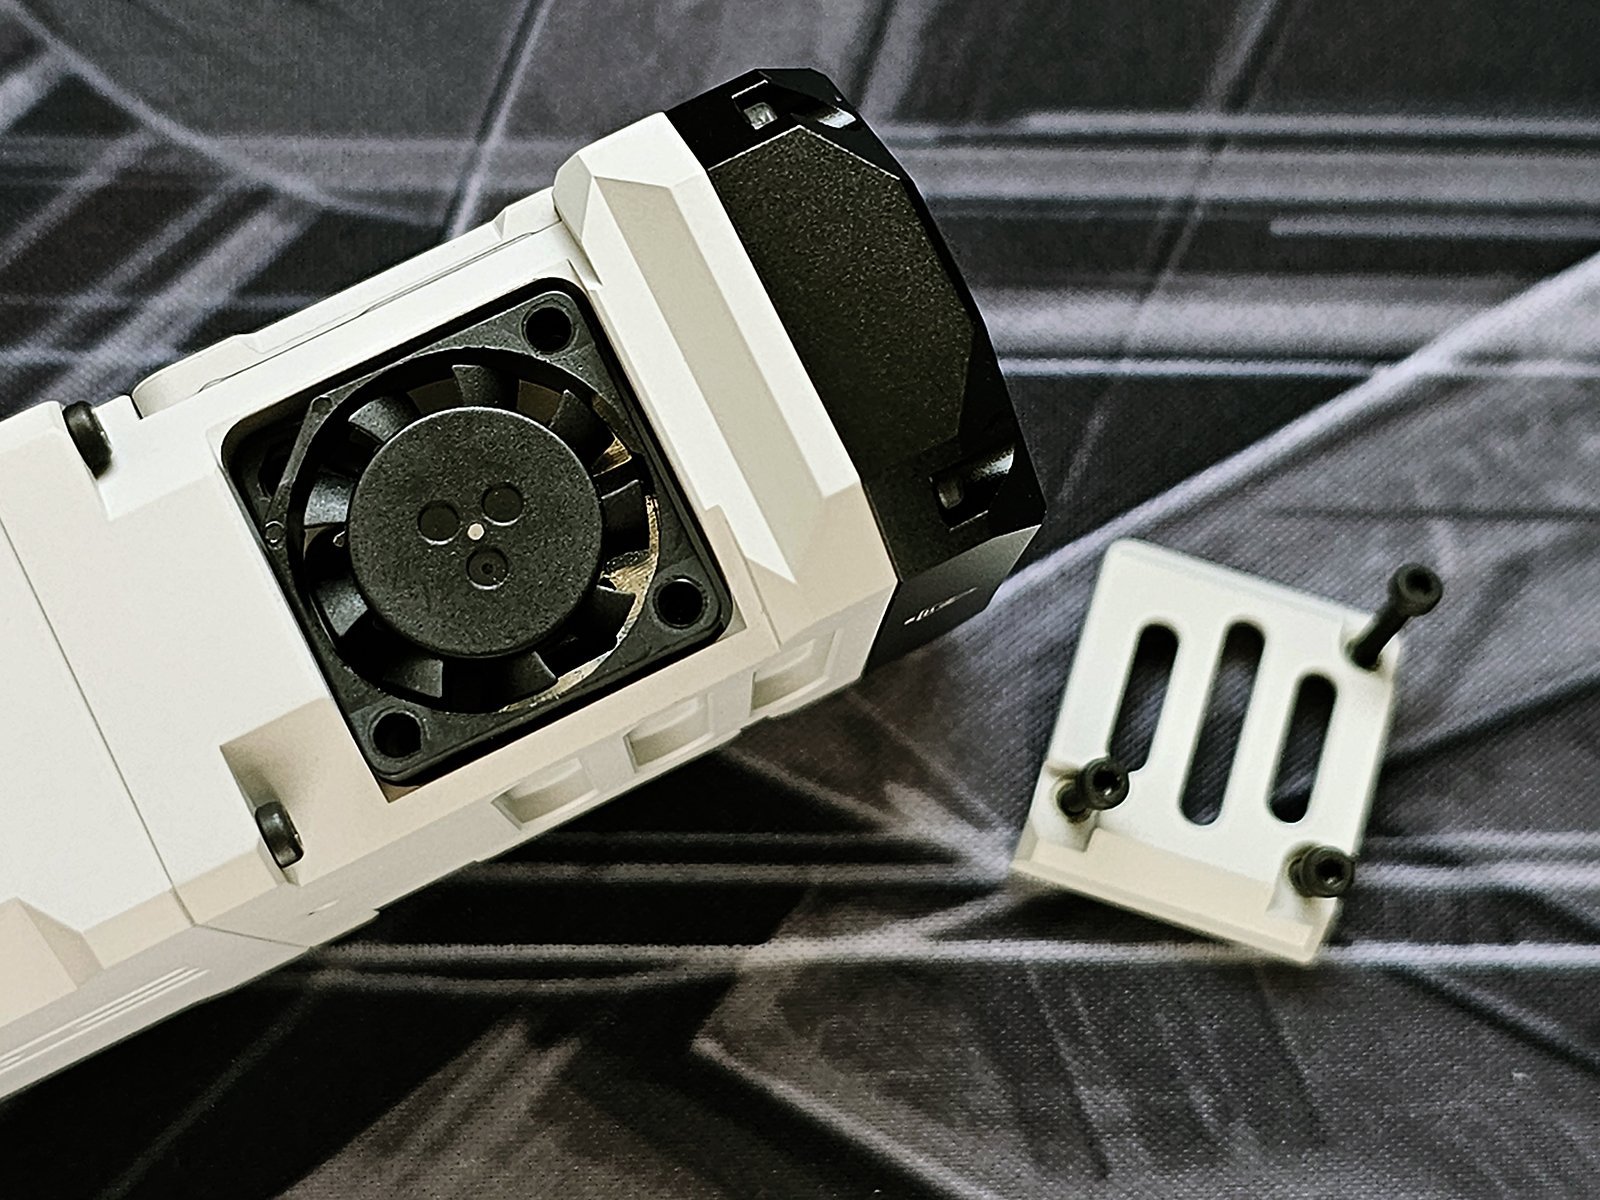
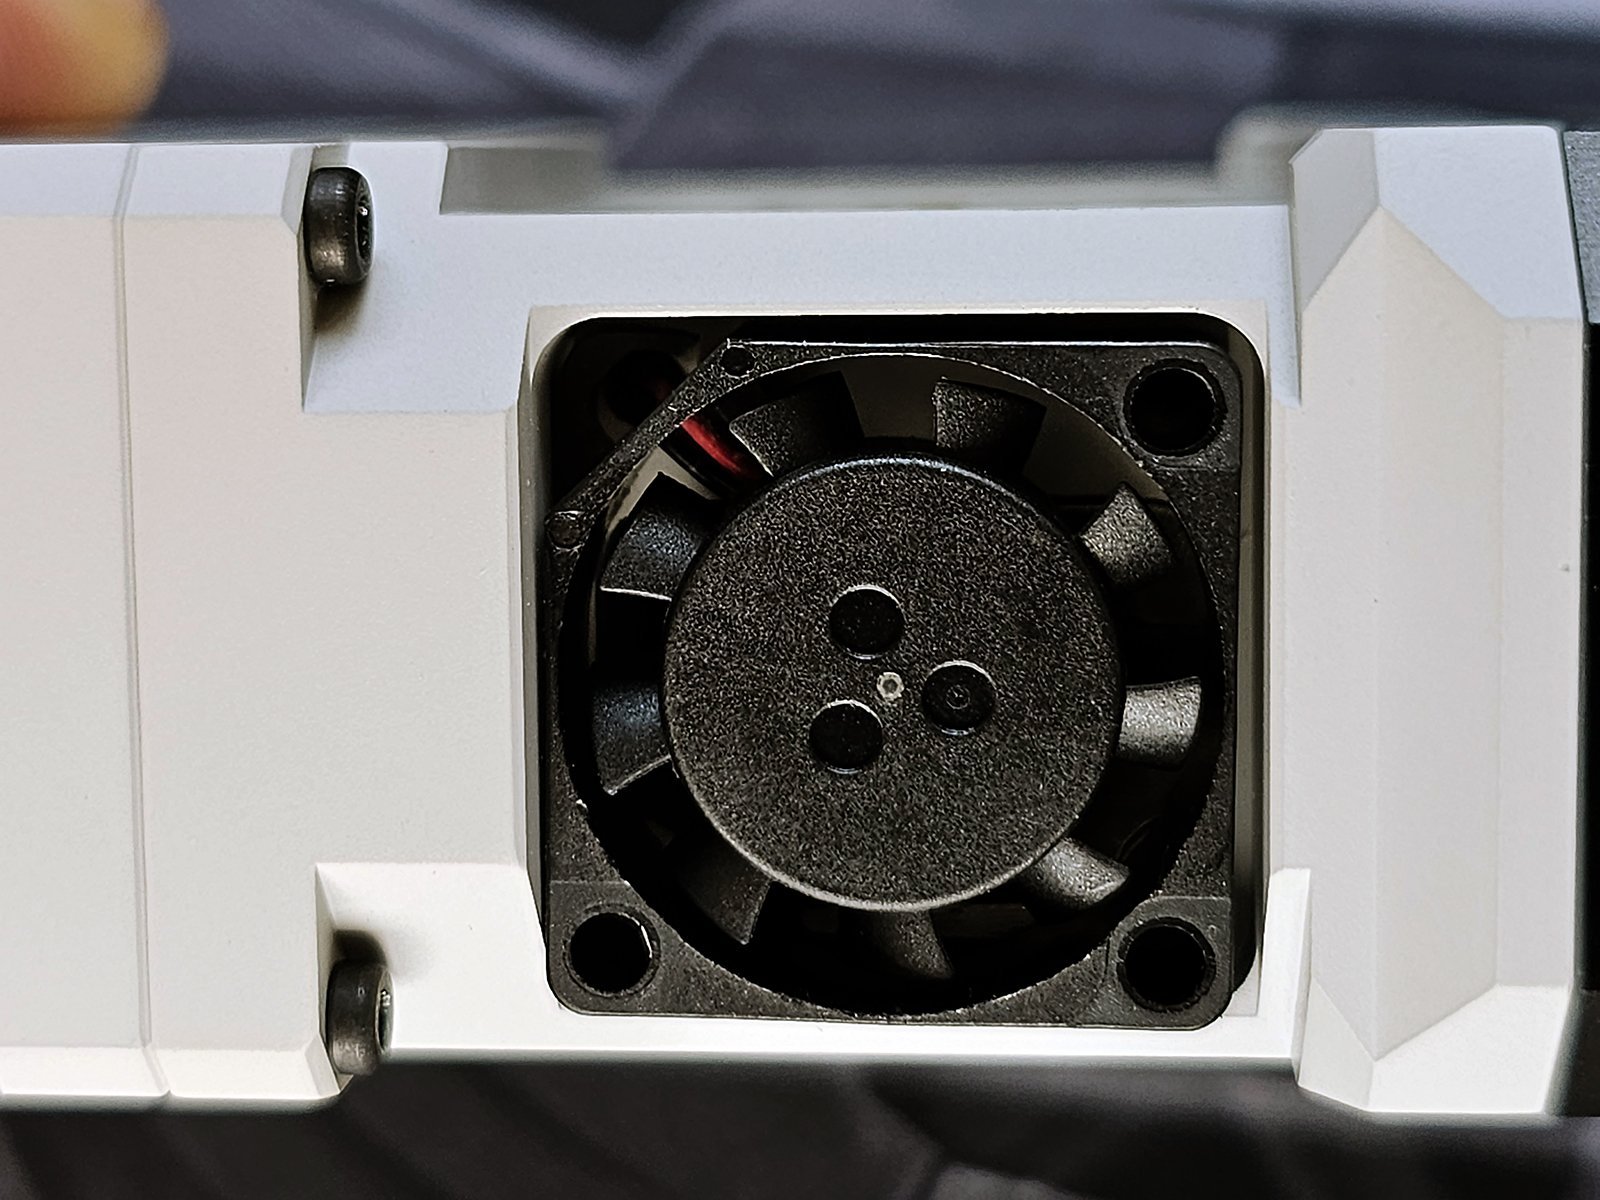
So let's remove the button and follow the cables.
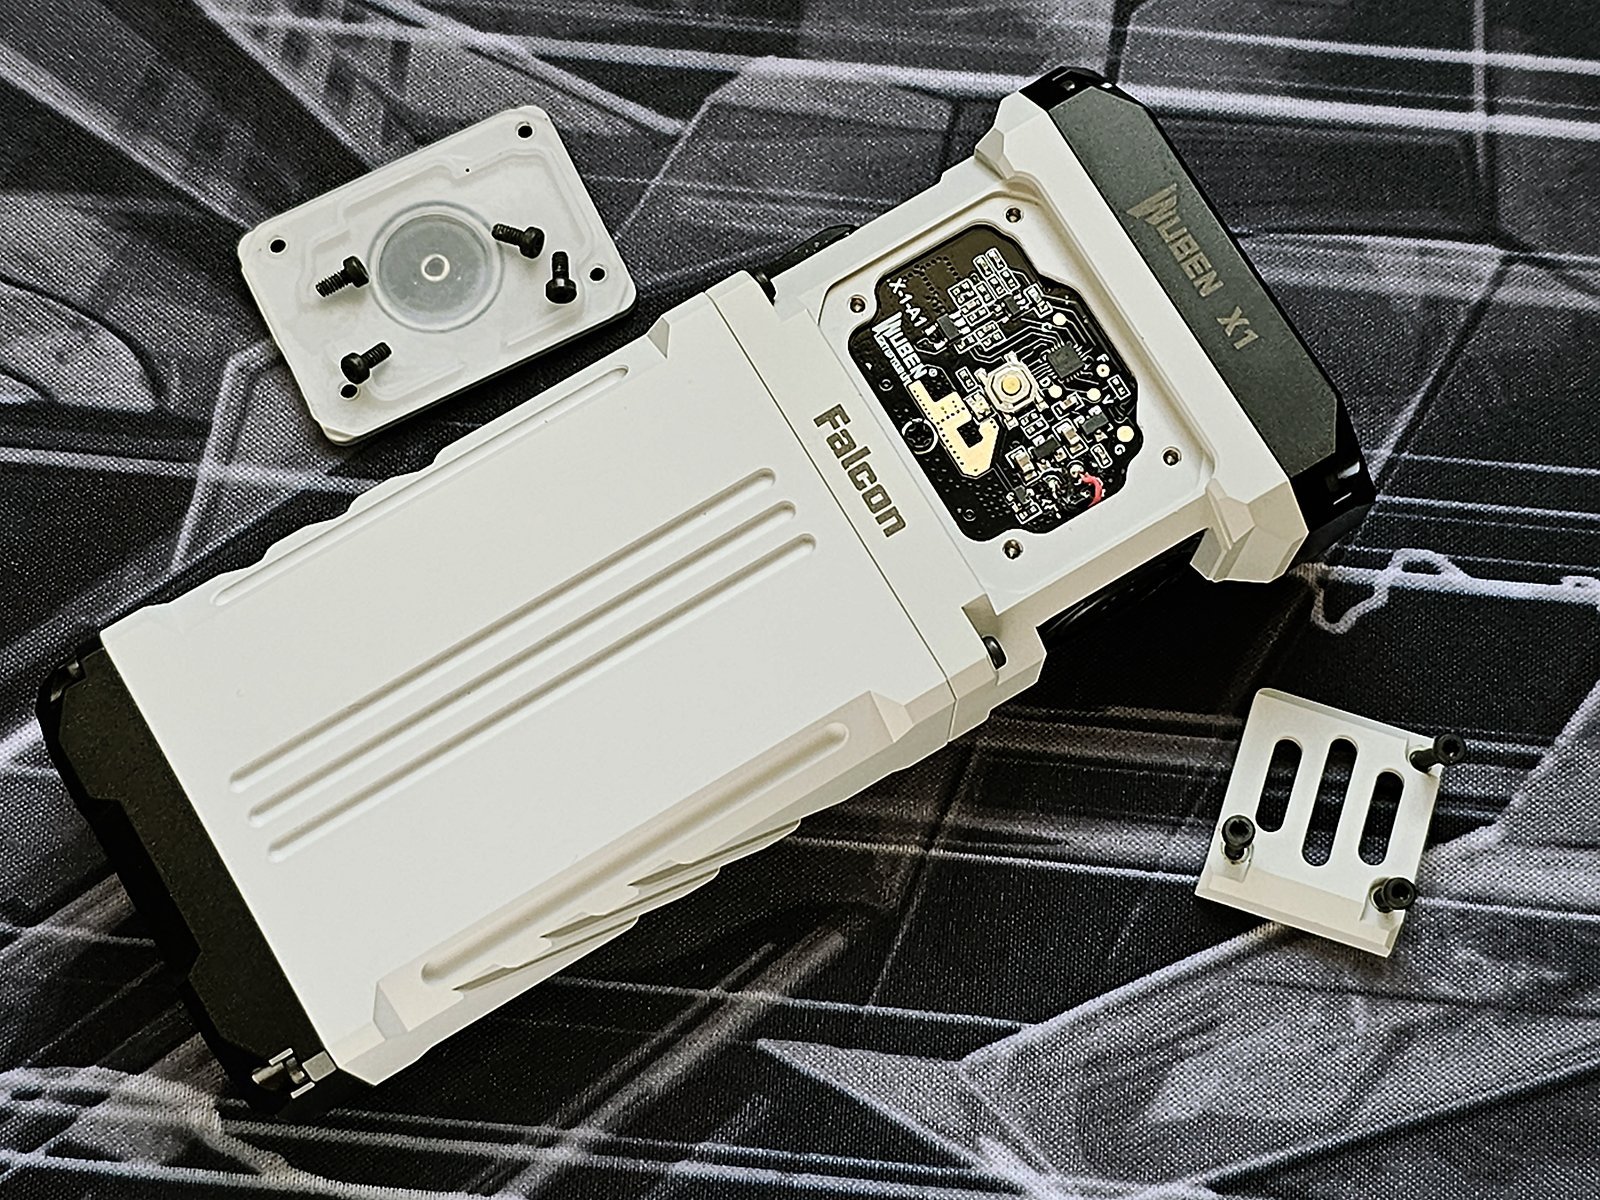
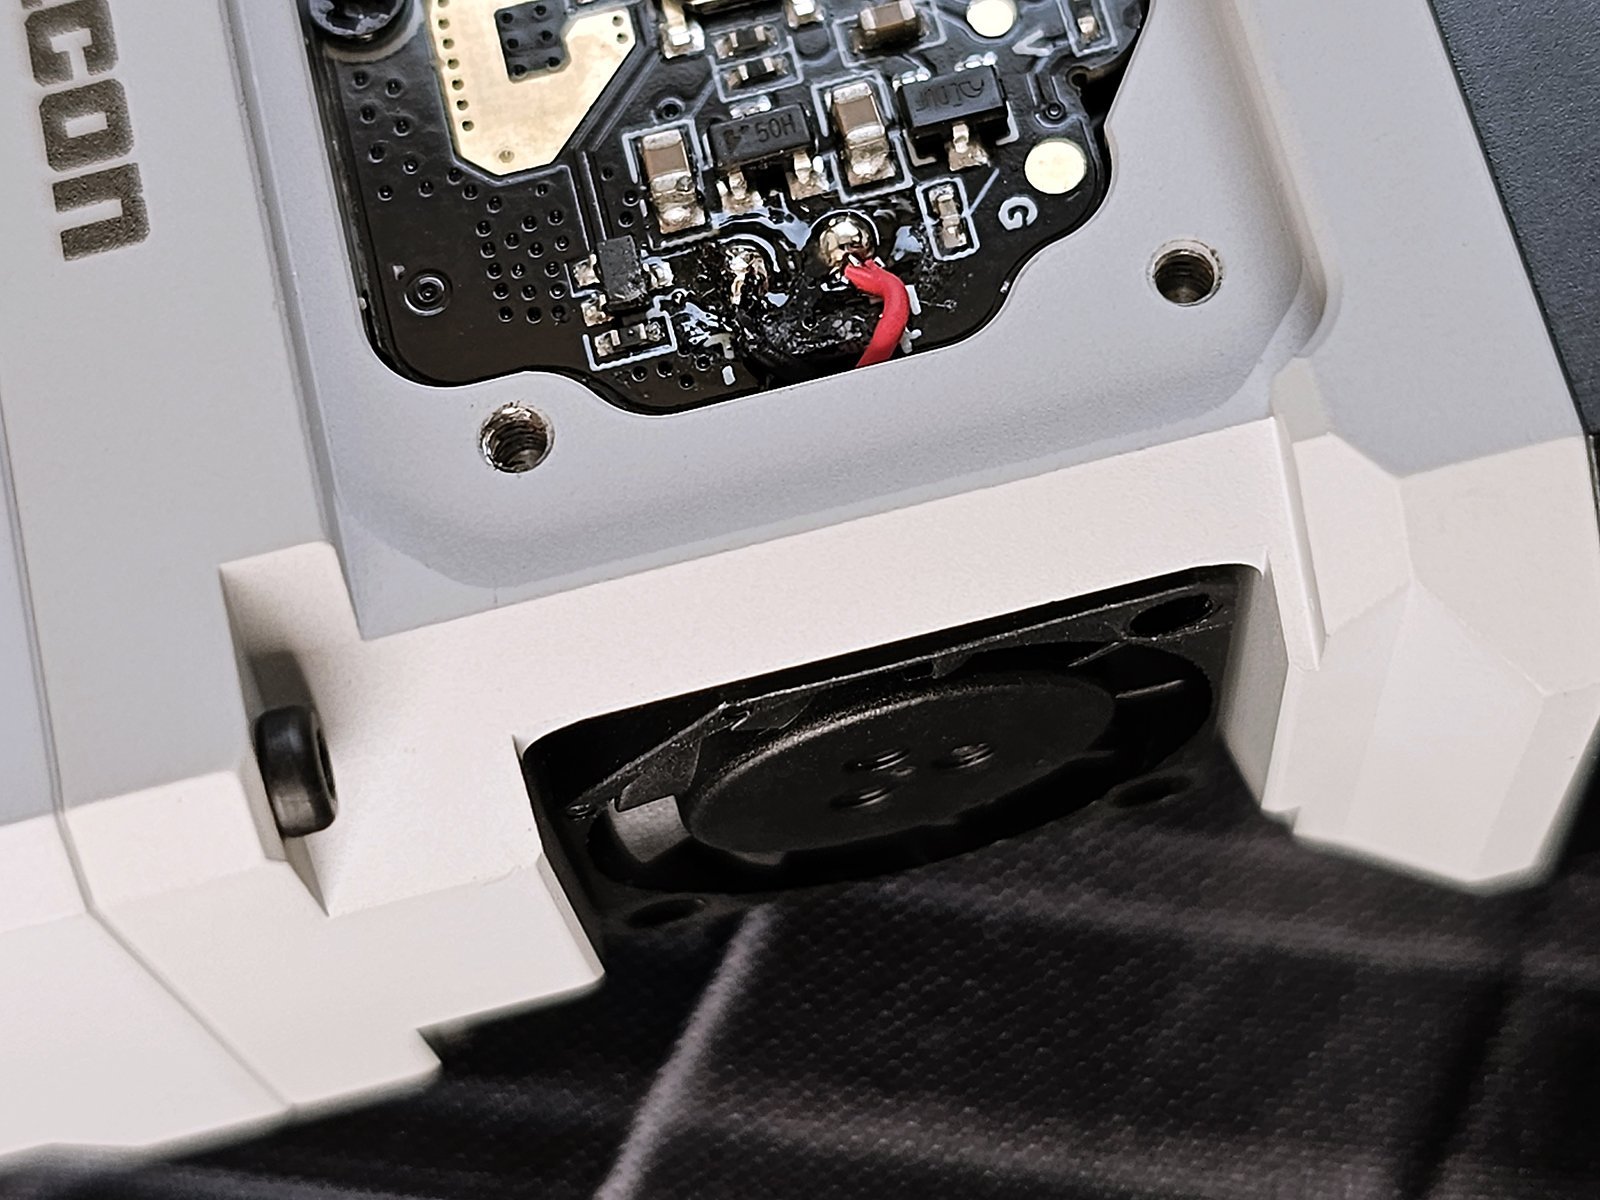
There are only 2 cables from the fan that are soldered onto the PCB that is under the button. This reveals a 2 things.
1. The fan is not speed controlled, it is either fully on or fully off.
2. The Wuben X1 cannot be IP68 waterproof (submersible) as the water can follow the cables to the PCB.
The following picture explains how the fan, blowing air through the heat sink, keeps the torch cool enough to achieve constant output. It also reveals the rather exaggerated translations from Chinese to English that Wuben uses in their marketing material. I certainly hope to not be blown away by a hurricane while testing the torch.

Build Quality and Finish
The build quality of the Wuben X1 is excellent. The fit is immaculate, the Micro-Arc Oxidation is perfect, there are no sharp edges and the product looks and feels premium in all respects.
Size Comparison
Here is the Wuben X1 next to a soda can torch with comparable output, the Sofirn Q8 Pro. It is clear that one of the 2 can be comfortably carried in a jacket pocket while the other cannot.


Specifications
The specifications of the Wuben X1, as found on the company's website, are in the following table:

The Wuben X1 comes with 3 Cree XHP 70.2 emitters with a colour temperature of 6000K that can provide a maximum output of 12000 lumens. That is a bold claim for a torch of this size.
The specifications table includes outputs, run times and beam distances for all main modes and Turbo, which is very nice to see.
As expected from our previous investigation, the Wuben X1 is not submersible but rather has a water proof rating of IP55. There are other manufacturers that have managed to put fans on IP68 rated torches, so I would have liked the Wuben X1 to have achieved the same.
The size and weight information on the specifications sheet is accurate.
User Interface
The user interface of the Wuben X1, as found in the manual, is shown in the diagram below:

From Off:
- Click to turn on.
- Hold to turn on directly to Eco mode, regardless of previous mode used.
- Double click to turn on directly to Turbo, regardless of previous mode used. Hold to cycle between Eco, Low, Medium and High.
- Triple click to turn on directly to Strobe. Triple click again for SOS and triple click again to go back to Strobe etc. Double click to go to Turbo.
- Quad click to lock the torch. The torch flashes 3 times to indicate it has been locked.
From On:
- Click to turn off.
- Hold to cycle through the main modes Eco, Low, Medium and High.
- Click and hold to programme current main mode (explained in Modes and Programming section).
- Double click to go to Turbo.
- Triple click to go to Strobe. Triple click again for SOS, triple click again to go back to Strobe etc. From there click to go to the previously used main mode (Eco, Low, Medium or High) or double click to go to Turbo.
From Locked:
- Quad click to unlock and turn on Eco mode.
- Click, wait 0.5 sec, double click, wait 0.5sec, triple click to reset torch to factory default. The torch unlocks and turns on low mode to indicate a successful factory reset.
There is mode memory for the 4 main modes.
The Wuben X1 also features an indicator LED at the centre of the button. The LED lights as follows to indicate the battery level.

Modes - Programming
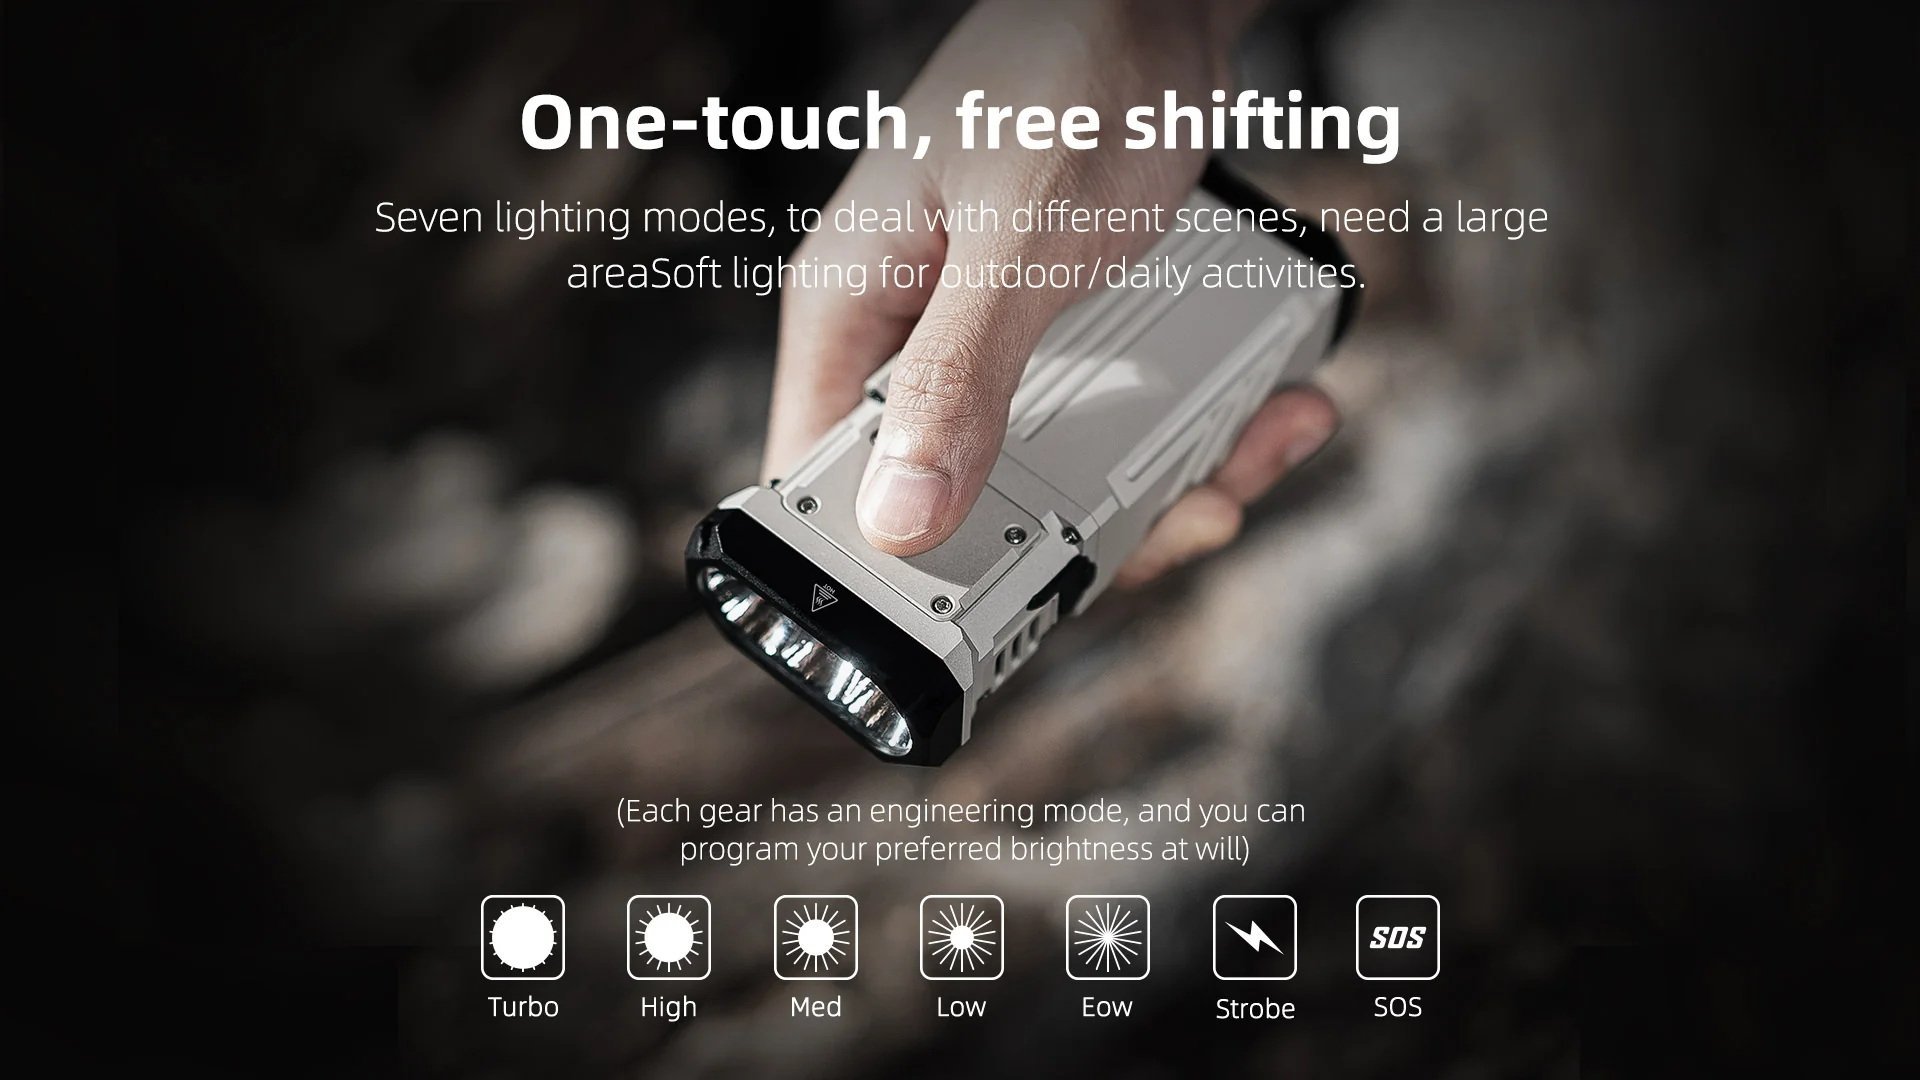
The Wuben X1 has 4 main modes (Eco, Low, Medium, High), a Turbo mode and 2 flashing modes (Strobe and SOS).
The output levels of the Wuben X1 can be seen in the following table. The numbers provided by Wuben are in black and my measurements are in orange.

I do not own a multi thousand dollar worth integrating sphere, just a logging Lumen meter and a home made integrating tube. The array is calibrated with 3 separate, professionally measured lights and gives me consistent results, but there is definitely room for error and deviations are to be expected.
My Lumen measurements show that the Wuben X1 cannot reach the advertised 12000 Lumens but can reach a very respectable and usable 10570 Lumens of maximum output, which actually surprised me for the size of this torch. All other modes exceed the specs. Unfortunately, that includes thew Eco mode, which I measured at 36 Lumens rather then 20.
The Candela and Throw I measured indicate the same, as I actually measured more throw than indicated in the specs, except for Turbo.
A very interesting feature of the Wuben X1 driver is that the 4 main modes are programmable. The torch comes with the 3 lower modes set to their lowest values and High set at 2600 Lumens out of the 2000 to 3000 Lumens range. Each mode can be separately and steplessly adjusted to the value ranges indicated in the table below:

The programming is very easy. Turn the torch on to the mode you want to programme and then click and hold. The torch will steplessly ramp up from its current output to the maximum value for the selected mode and then start ramping down to the lowest value and repeat endlessly until the button is released. The output level at the moment the button is released is saved for that mode. The top and the bottom of the ramp are indicated by a flash.
Photometry
I took some photometry readings with an Opple Light Master Pro. The results are in the following table.

As shown in the table, the Cree XHP 70.2 emitters used in my sample have a CCT of between 5118K and 5464K, depending on the output, rather than the stated 6000K. They are also 80 CRI, instead of the expected 70 CRI, which is amazing! The DUV is, as expected, on the green side, but not by much and overall the quality of the light produced by the Wuben X1 is not at all bad for such a high output torch.
Here is a comparison photo of the Wuben X1 on the right and the Sofirn Q8 Pro on the left. The white balance was locked at 5500K.

Beam Profile
The beam pattern of Wuben X1 is very floody and, similarly to the torch front, rectangular. Even though I found that strange to begin with, it is actually quite usable as the light is directed where you need it and not at the sky.

Video Comparison
I compared the Wuben X1 with the Sofirn Q8 Pro, both on Turbo, in the following video. The distance from where I am standing to the end of the lane is 70m.
Driver
The Wuben X1 uses a buck driver that provides fully regulated output regardless of the voltage of the 2 Li-Ion cells in series that power it. It also features thermal regulation low voltage and over current protection.
There is PWM detected by the Opple Light Master Pro but it is definitely in the safe range and neither my eyes nor my camera can see it.


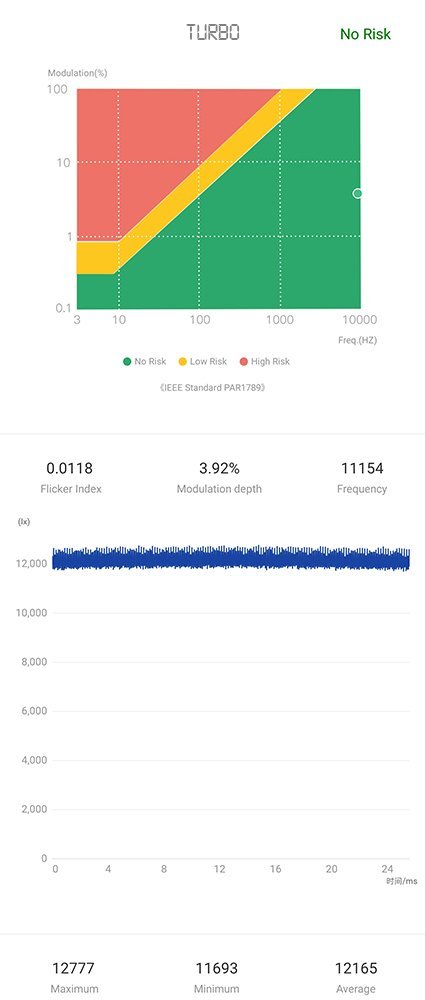
Here is what the camera saw:

Current Draw
The following table shows the current draw of the Wuben X1, using the included batteries.

Battery and Charging
The Wuben X1 utilizes 2 standard, non removable (officially), unprotected, flat top, 21700 Li-Ion batteries with a capacity rated at 4800mAh or 17.76Wh each, for a total of 35.52Wh. I measured the batteries in my charger and found one to have an internal resistance of 23mOhm and a capacity of 4862mAh and the other to have an internal resistance of 28mOhm and a capacity of 4979mAh. Clearly, the batteries included in the Wuben X1 are high quality.

The USB C to USB C cable provided is connected to the port under the rubber flap, for charging.
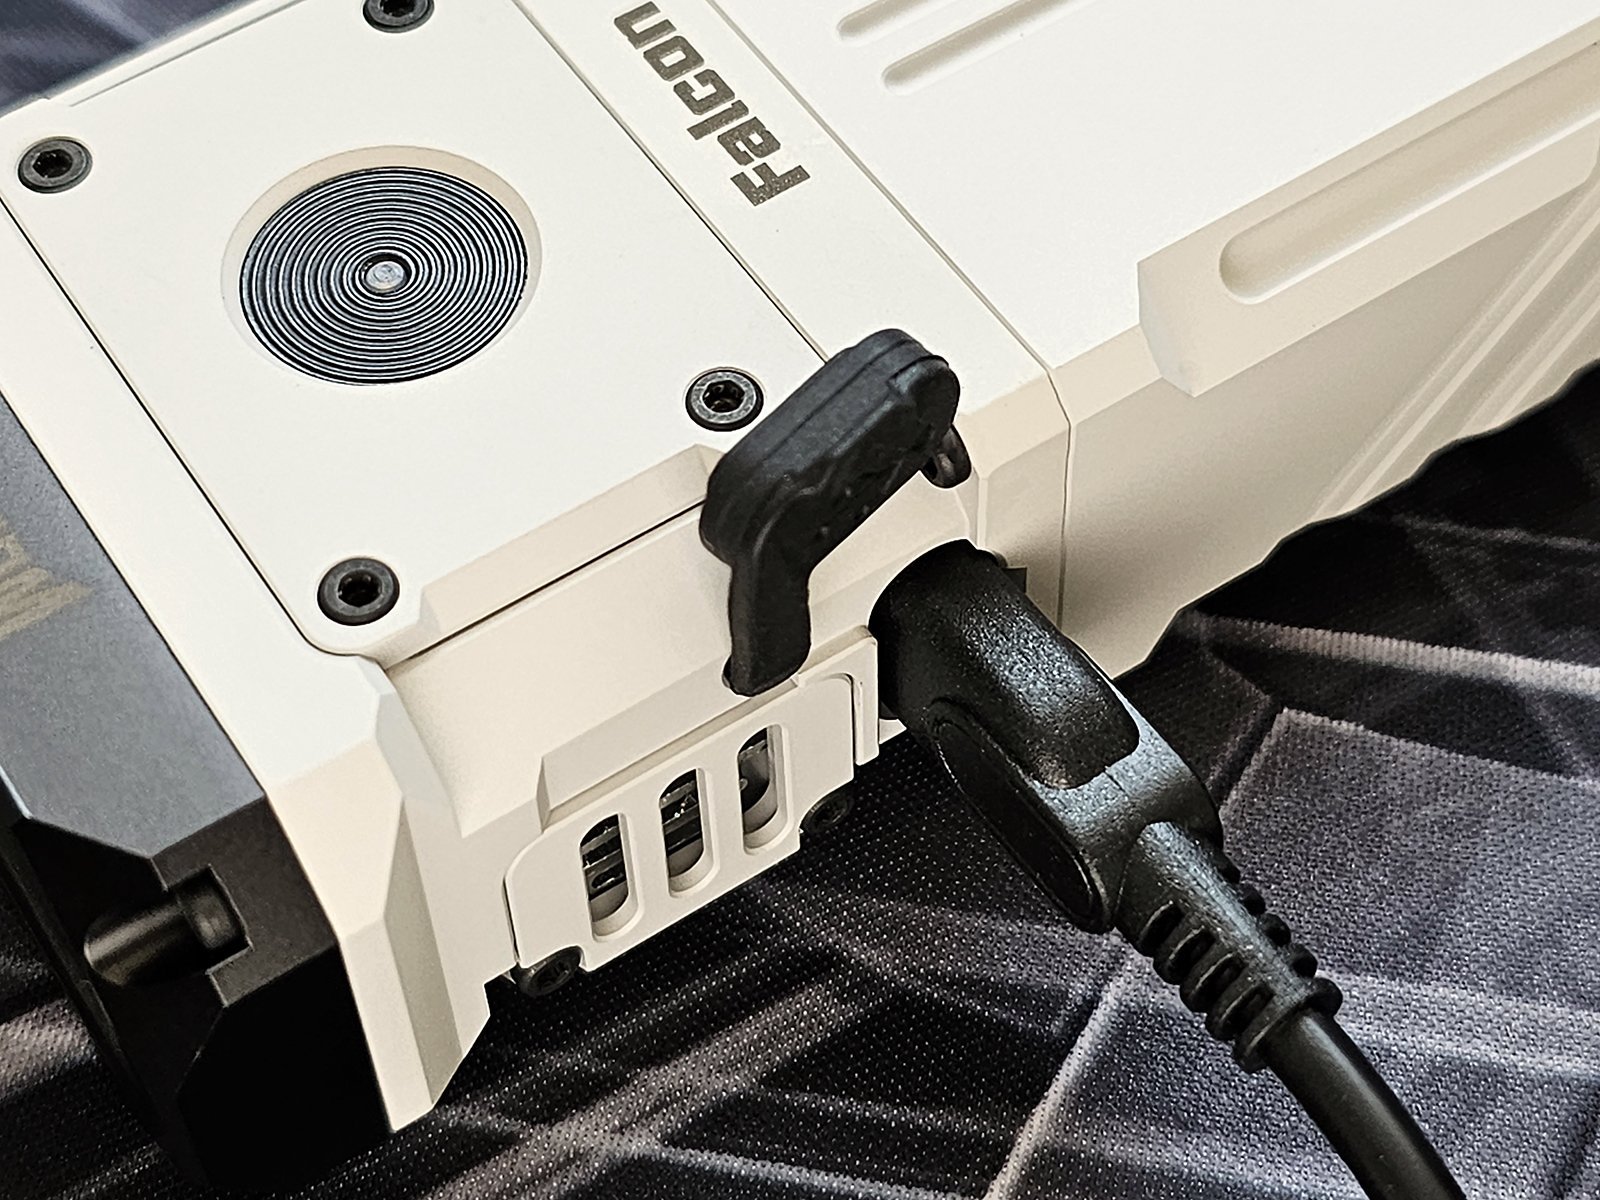
The indicator LED lights up red while charging and blue to indicate that the charging has been completed. If the charger used can support it, the Wuben X1 can charge via the Power Delivery protocol, at 9V 3A, in 2 hours.

Here is the indicator LED on the switch, while charging and when fully charged.


The following chart shows the charging of the Wuben X1 , after it had been depleted completely to the point where the torch turned itself off due to low voltage protection. Low voltage protection is triggered when the batteries in series drop to 6V, as the Wuben X1 uses a buck driver and 6V emitters. Indeed, I measured the batteries when the low voltage protection was triggered and found one at 3.02V and the other at 3.07V.
The charging lasted slightly less than the 2 hours promised and was completed in 1 hour, 57 minutes and 47 seconds. It required 40.3362Wh of energy.
The current reached a maximum of 3.042918A. At the end of the charging cycle, one battery was at 4.19V and the other at 4.17V.

Runtime Charts
I do not own a multi thousand dollar worth integrating sphere, just a logging Lumen meter and a home made integrating tube. The array is calibrated with 3 separate, professionally measured lights and gives me consistent results, but there is definitely room for error and deviations are to be expected.
The Wuben X1 is rated at a maximum of 12000 Lumens.
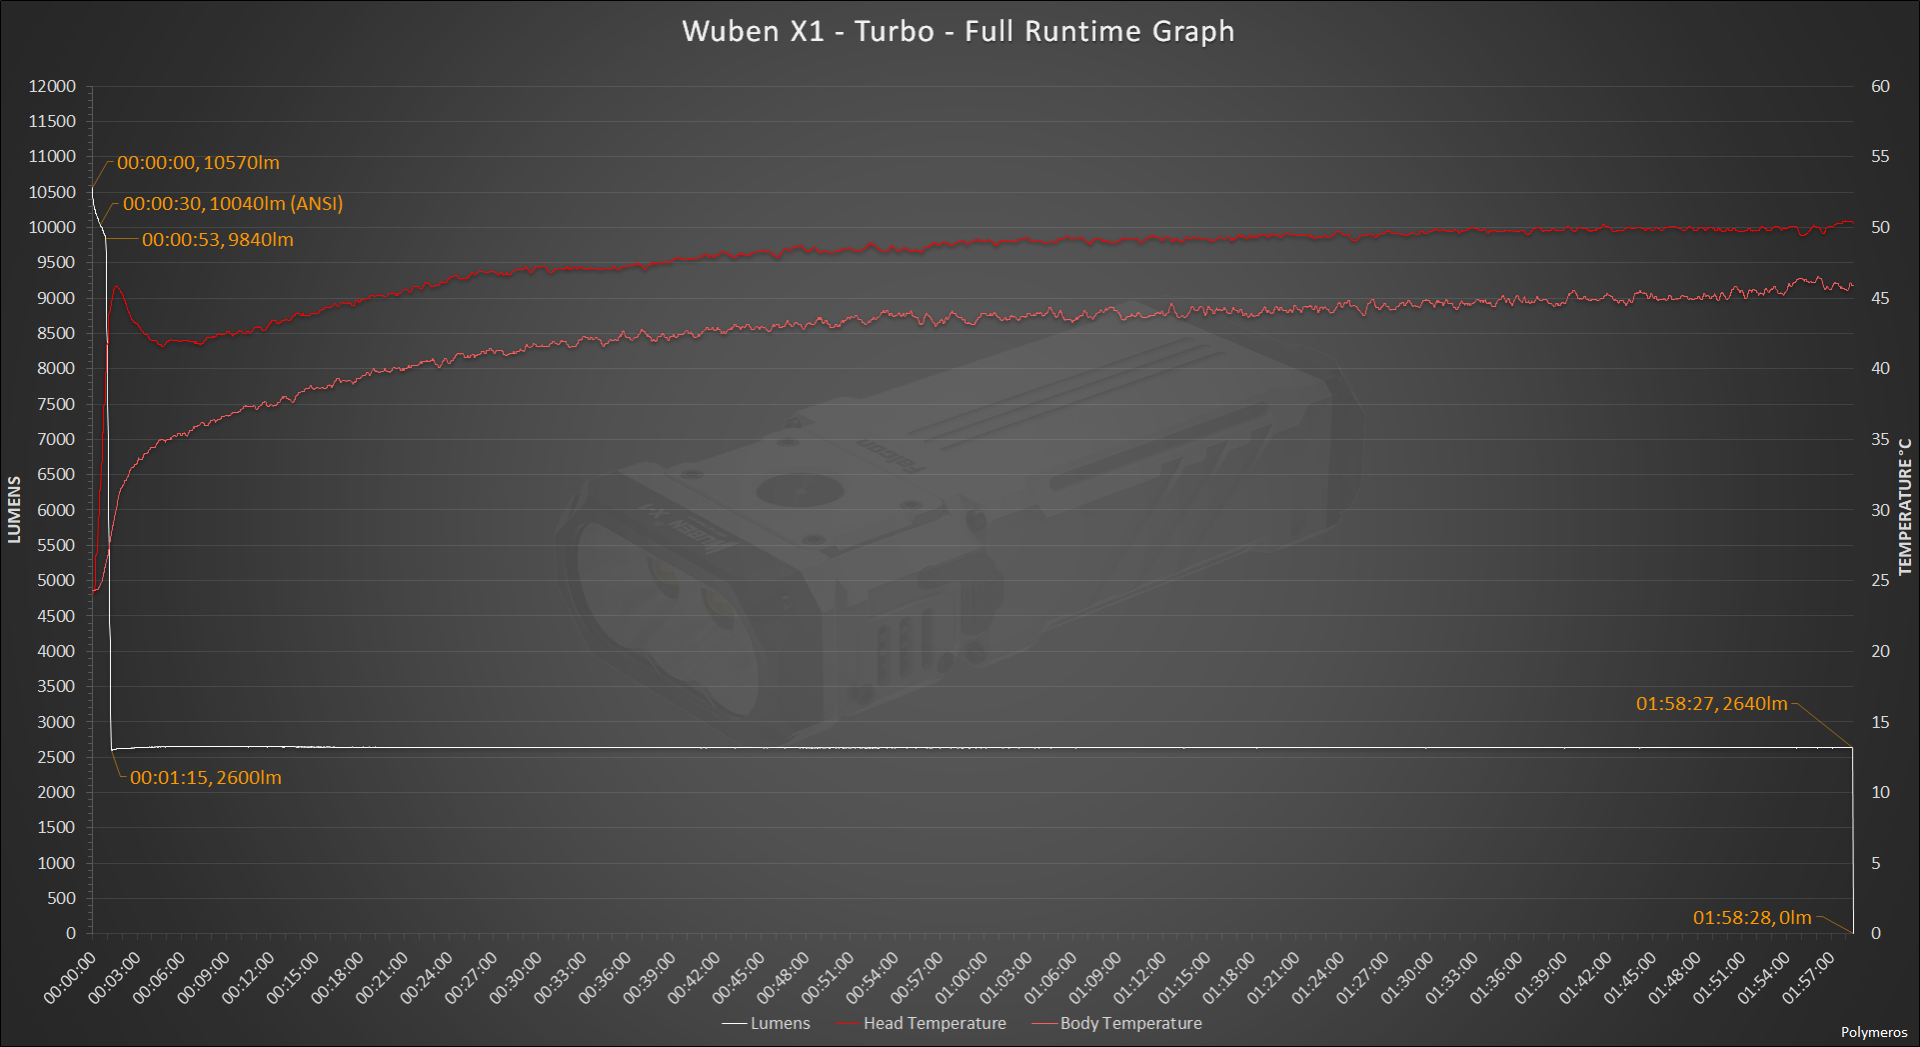
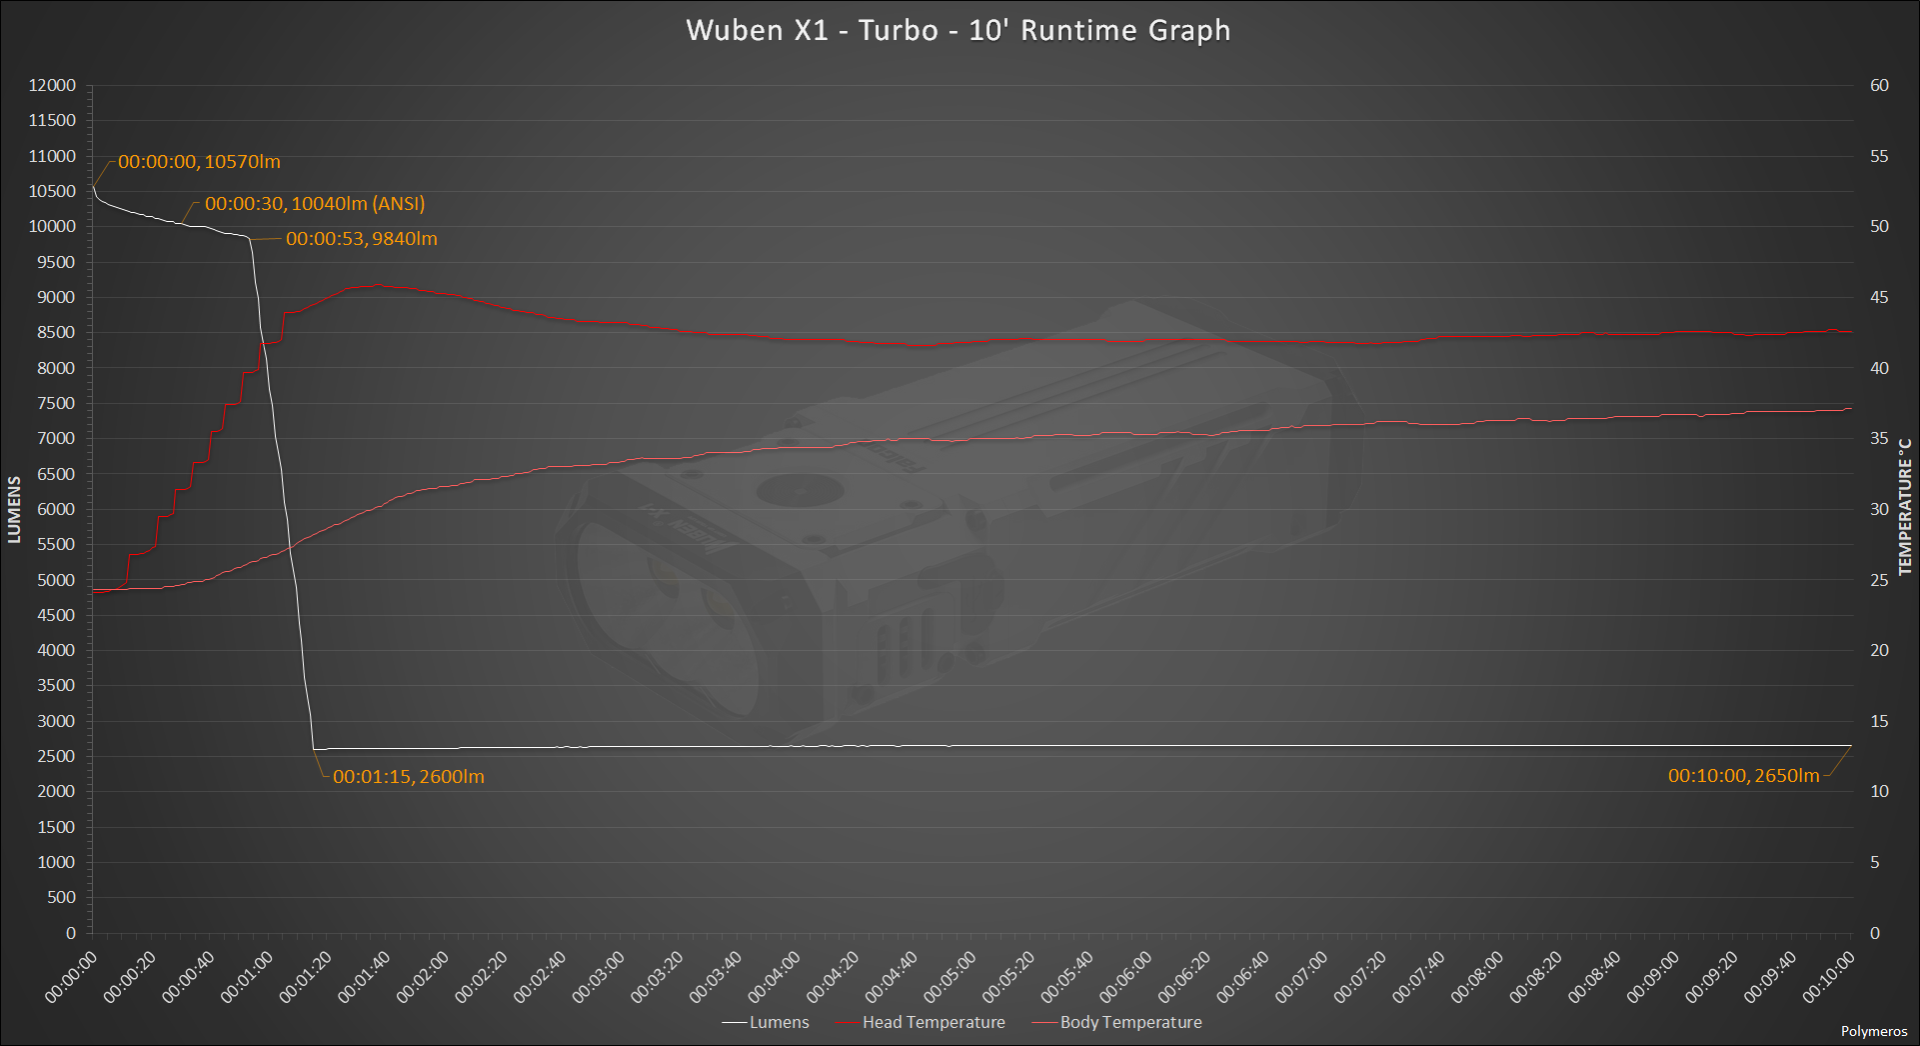
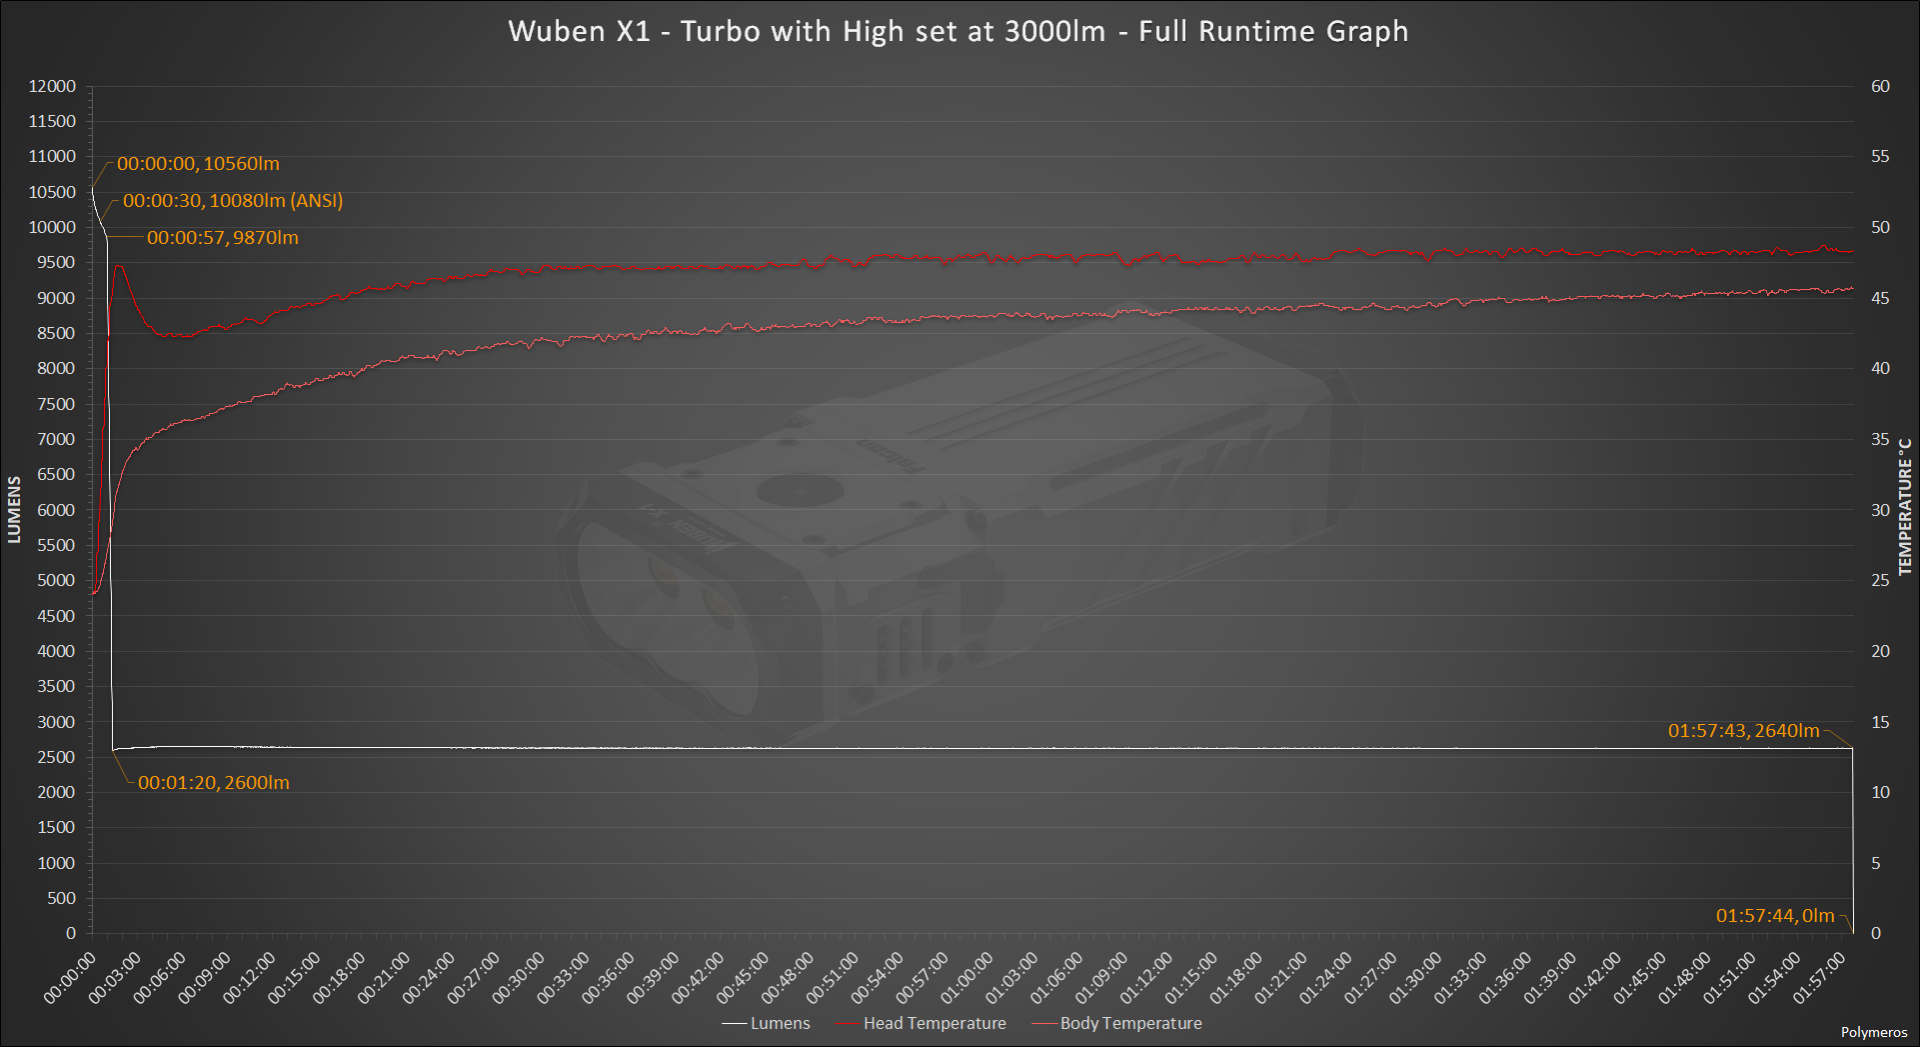
According to my measurements, the output at turn on was 10570 Lumens. It was at 10040 Lumens at 30 seconds (ANSI). The output started falling rapidly at 53 seconds, down to 2600 lumens at 1 minute and 15 seconds. It remained steady until the 1 hour, 58 minutes and 28 seconds mark, when the Wuben X1 turned off.
The temperature on the body was warm but not hard to hold without gloves.
The interesting part is that according to the specifications, the drop from turbo should have been to 3000 Lumens, which is the top value that High mode can be set at. Instead, it was 2600 Lumens, which is the default value for High mode.
Here are the first 10 minutes of the above chart, in greater detail.
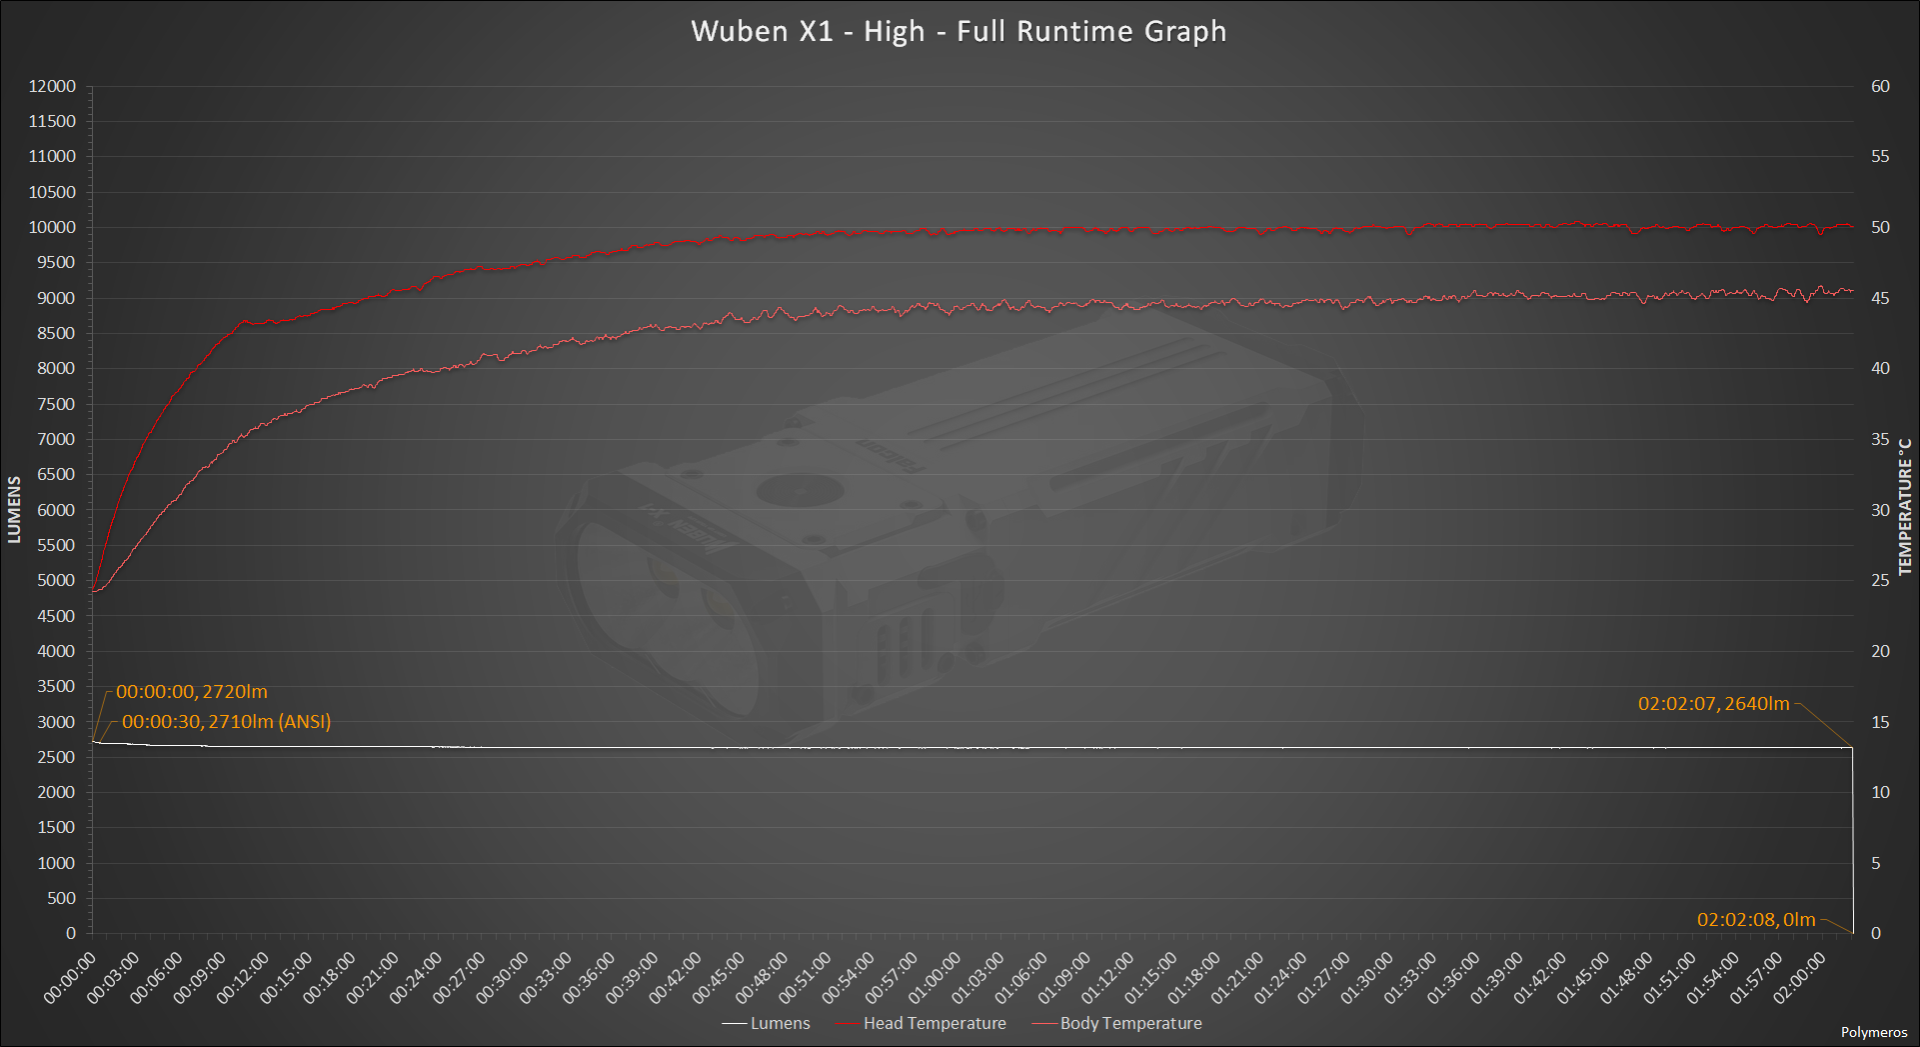
I also did the full runtime graph on High mode.
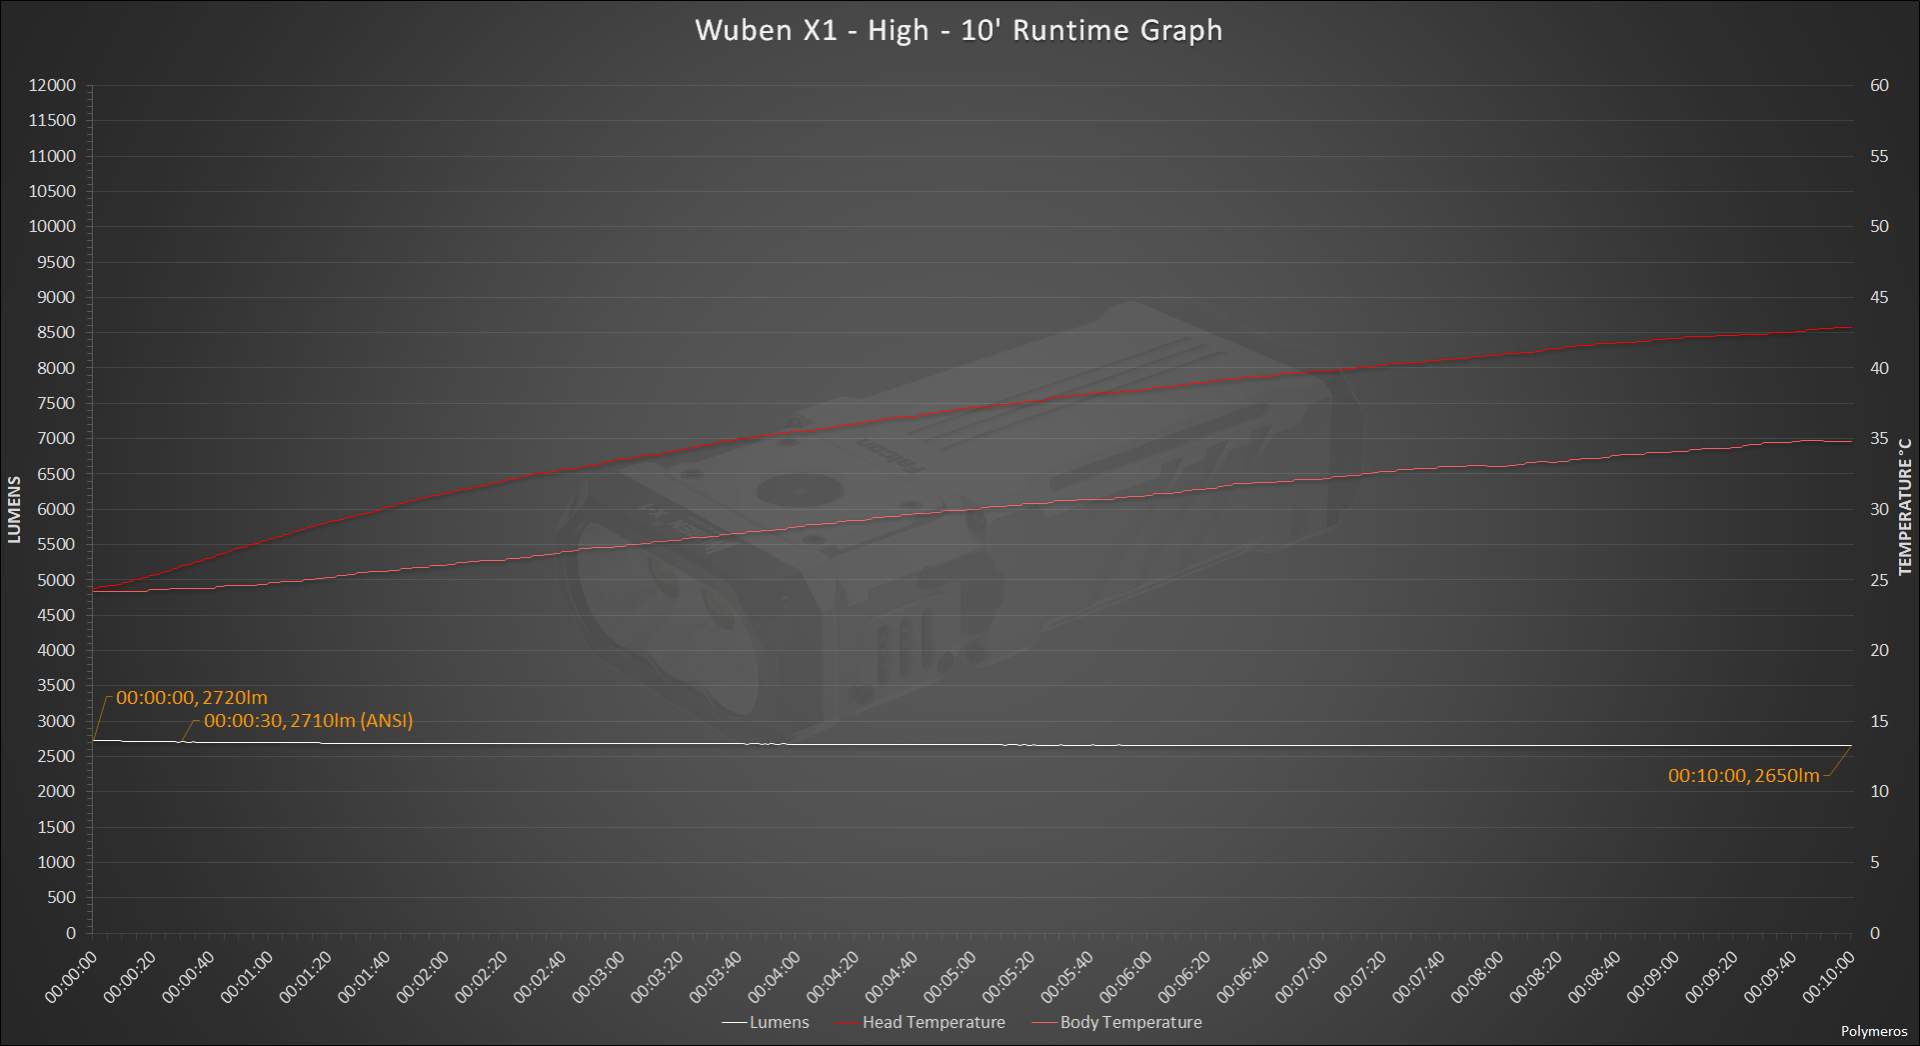
The Wuben X1 turned on at 2720 Lumens, was at 2710 Lumens at 30 seconds (ANSI) and slowly stabilized to 2640 Lumens, where it remained until the 2 hours, 2 minutes and 8 seconds mark, when it turned off.
Here are the first 10 minutes, in greater detail.
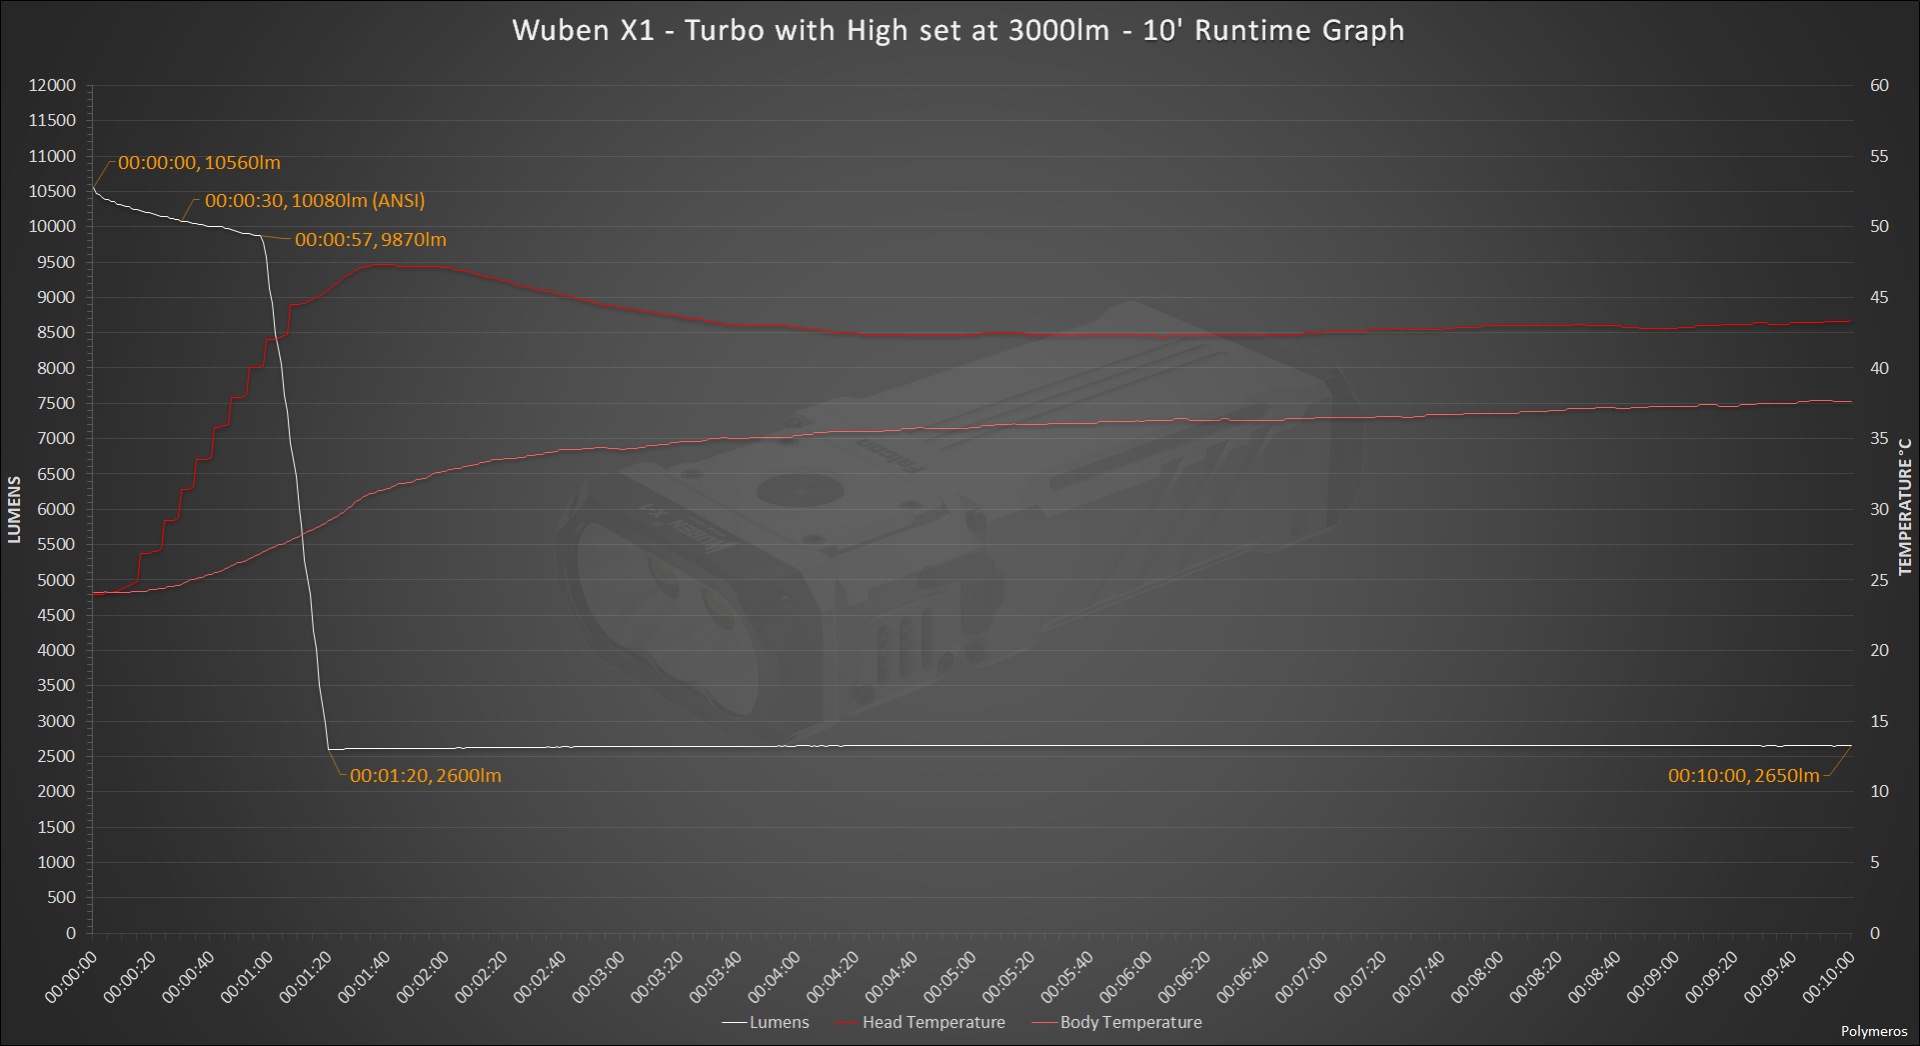
Now, as I said above, the fact that turbo dropped to 2600 Lumens instead of 3000 lumens raised some questions. So, of course, I had to investigate. I set high on its highest level of 3000 Lumens and run the test again. The results were the same. It seems that turbo will drop down to 2600 Lumens, regardless of the programming of the High mode.
Here are the first 10 minutes of the previous chart, in greater detail.
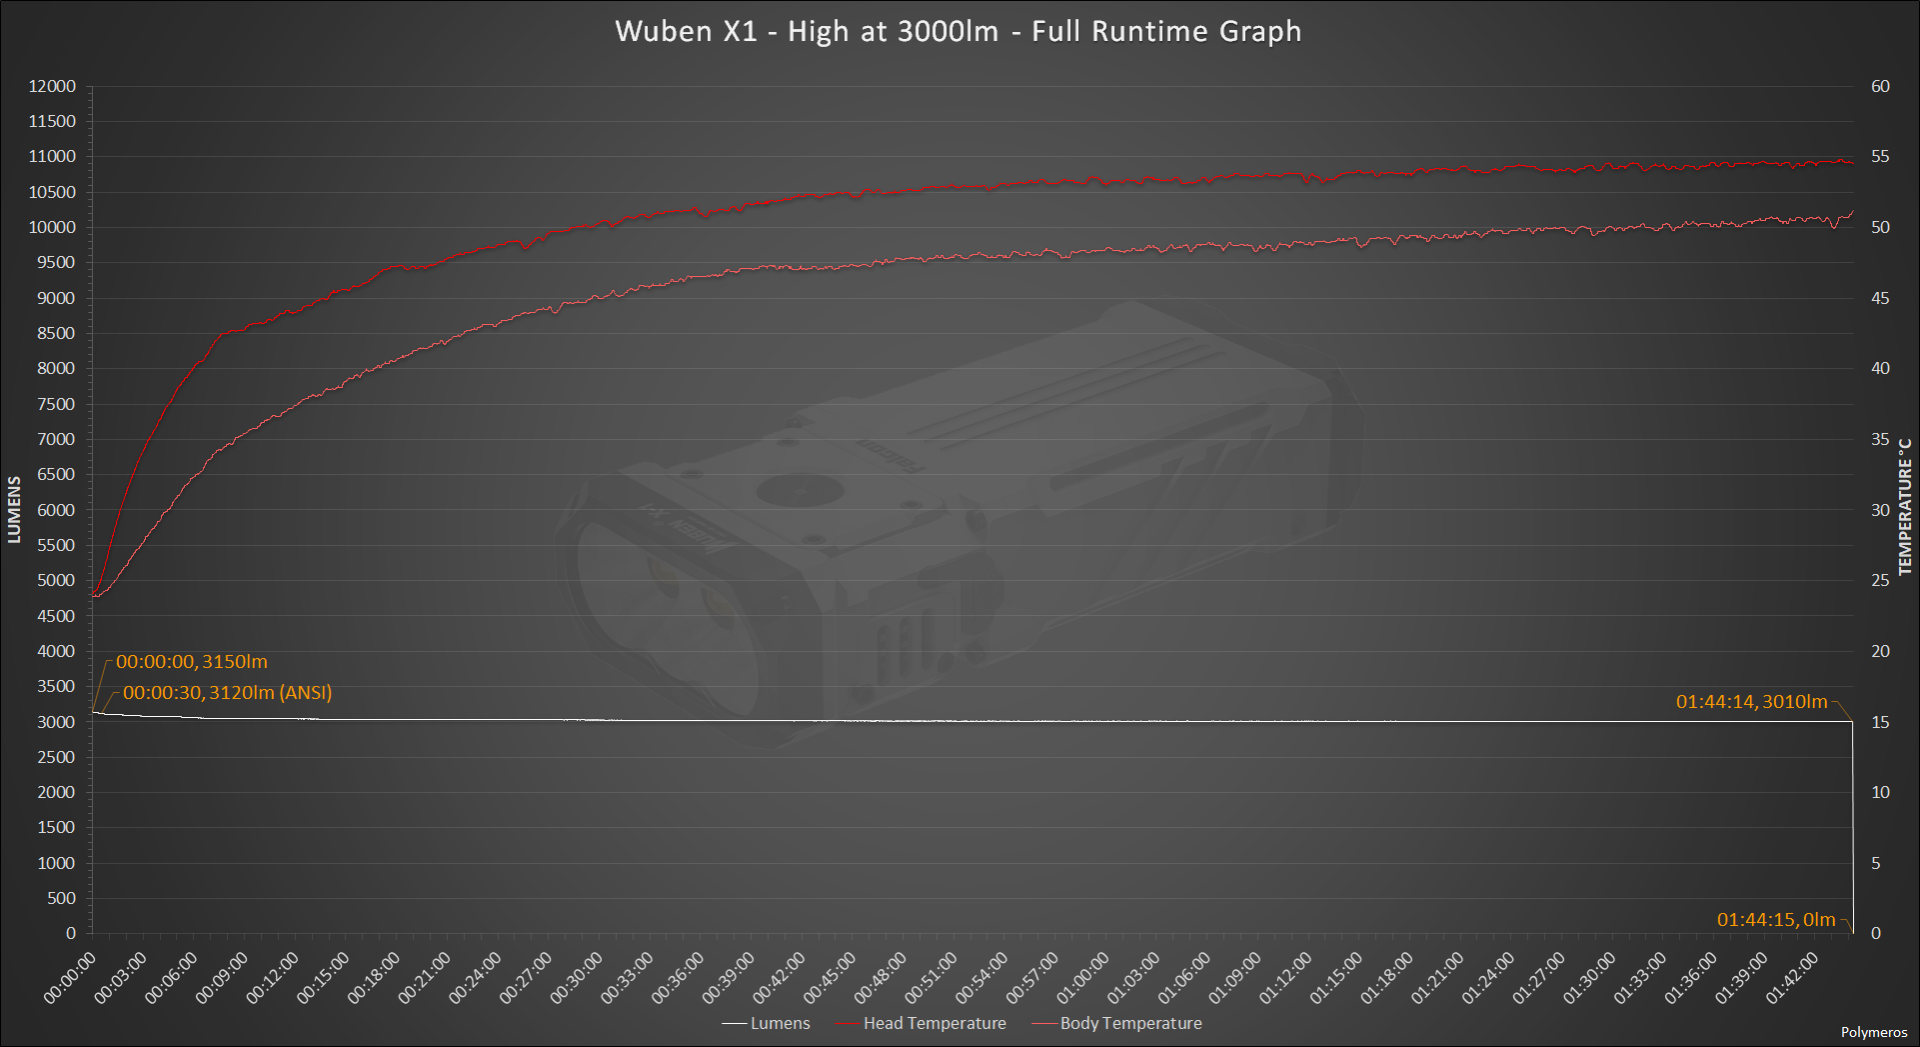
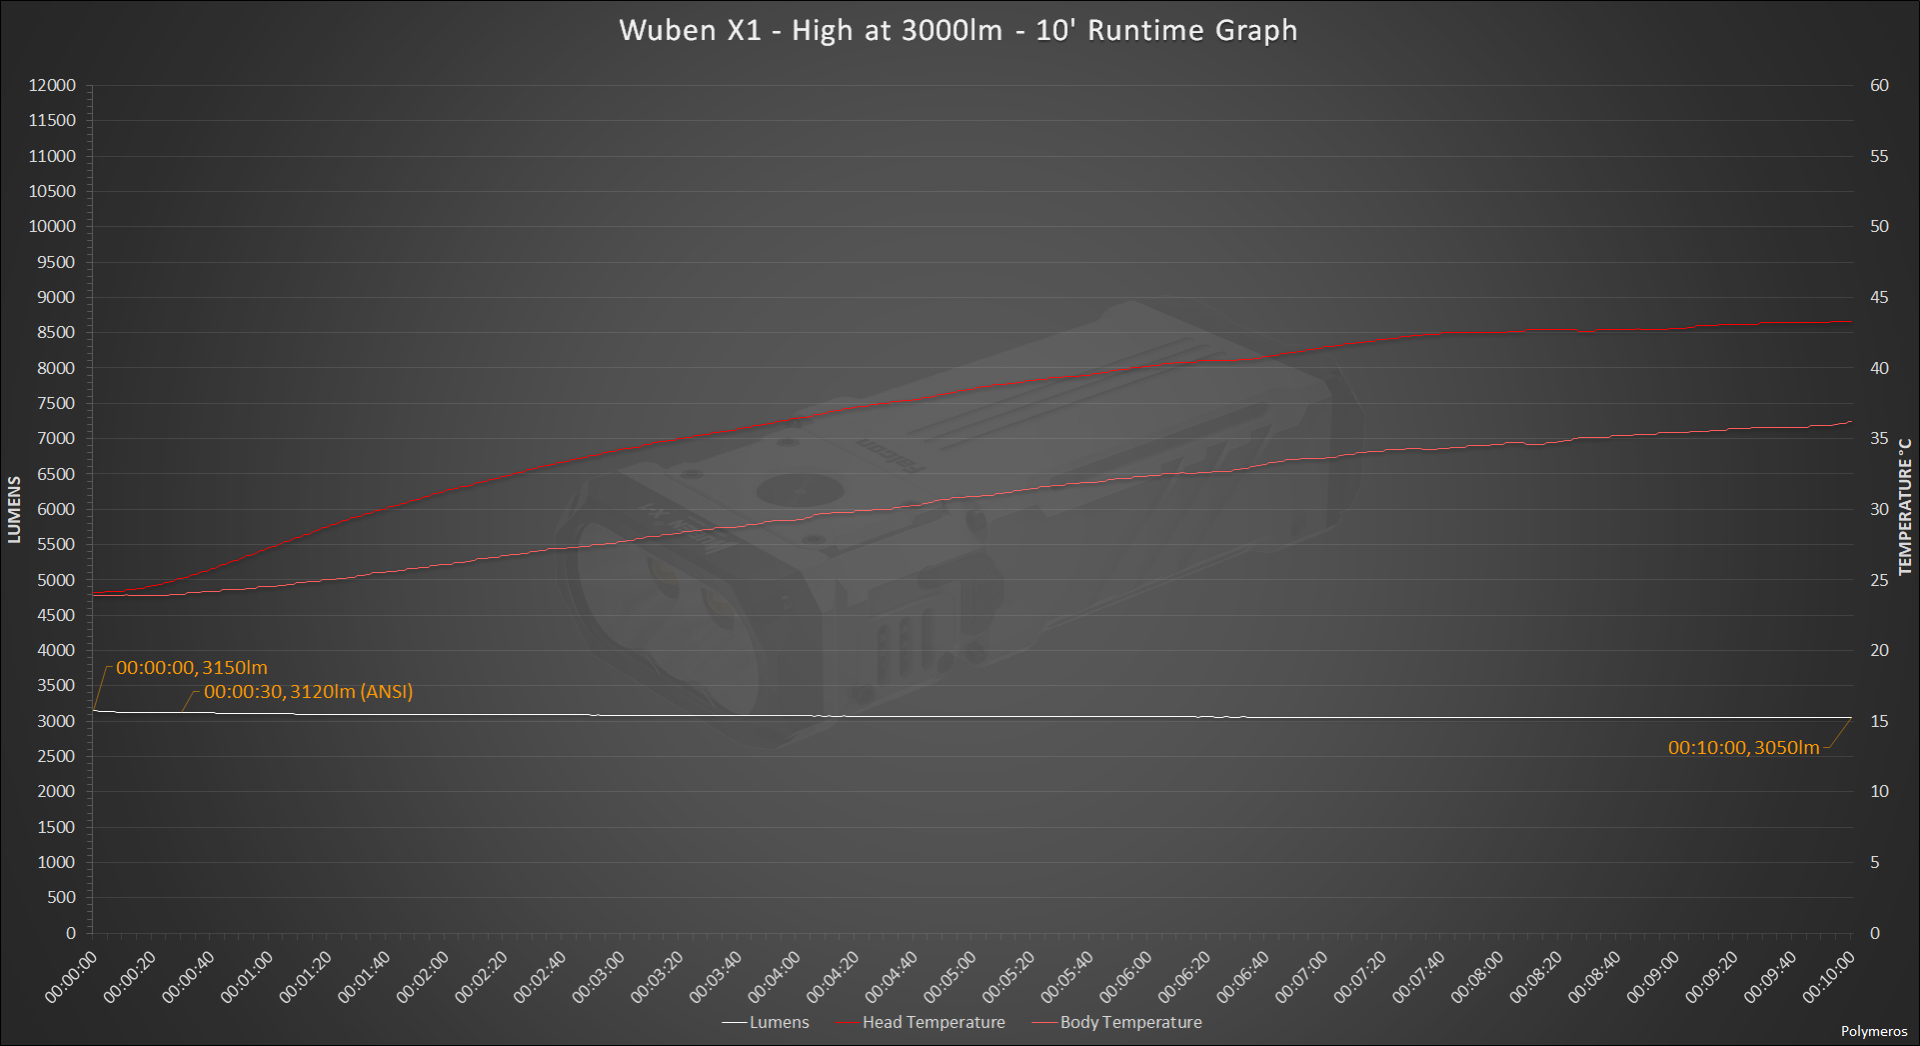
This raised a further question. Is the Wuben X1 able to sustain High at 3000 Lumens? Only one way to find out. I set High to maximum and ran a test.
The Wuben X1 turned on at 3150 Lumens, was at 3120 Lumens at 30 seconds (ANSI) and slowly declined to 3010 Lumens at 1 hour, 44 minutes and 15 seconds, when it turned off.
The temperatures were, as expected, the highest recorded in this test series, reaching about 55°C at the head and around 50°C at the body, making the torch difficult to hold with bare hands.
Therefore, it remains a mystery why Wuben chose to write in the specifications that the Wuben X1 will drop from turbo to 3000 Lumens, which, as demonstrated, it is capable of, but programmed it to drop to 2600 Lumens instead. Possibly a mistake, oversight or miscommunication between the engineers and the marketing department - we will never know.
Here are the first 10 minutes of the previous graph, in greater detail.
Conclusion
The Wuben X1 is a unique torch with an innovative design and excellent build quality. The rectangular shape makes it pocket friendly while maximizing its output capability and battery capacity. The machining is perfect, with no sharp edges, the fit is immaculate and the Micro-Arc Oxidation and Anodization are superb.
It utilizes a fully regulated buck driver with thermal regulation, over current protection and low voltage protection that provides stable output levels with no visible flickering. The driver is powered by 2 non removable (officially), high quality, unprotected, 21700 Li-Ion batteries in series.
The Wuben X1 uses 3 Cree XHP 70.2 emitters in a row. Even though the specs indicate that they should have a CCT of 6000K, the ones in my sample have a CCT of 5118K - 5464K, depending out output level, and an 80 CRI, which is amazing! The DUV was on the positive side, but not by much. Other reviewers have reported 70 CRI emitters, so not quite sure what to make of this. Maybe the emitter stock changed and I got lucky.
The torch utilizes a small fan, blowing air through the fins of an aluminium heat sink, to keep thermal under control and it seems to managing that exceptionally well, as it can sustain a stable output of over 3000 Lumens for the entire run time. The fan is audible but not annoying.
The button is slightly recessed and easy to find without gloves. It requires a force of about 500gr to press.
The charging took 01:57:47, which is slightly less than the 2 hours stated in the specifications.
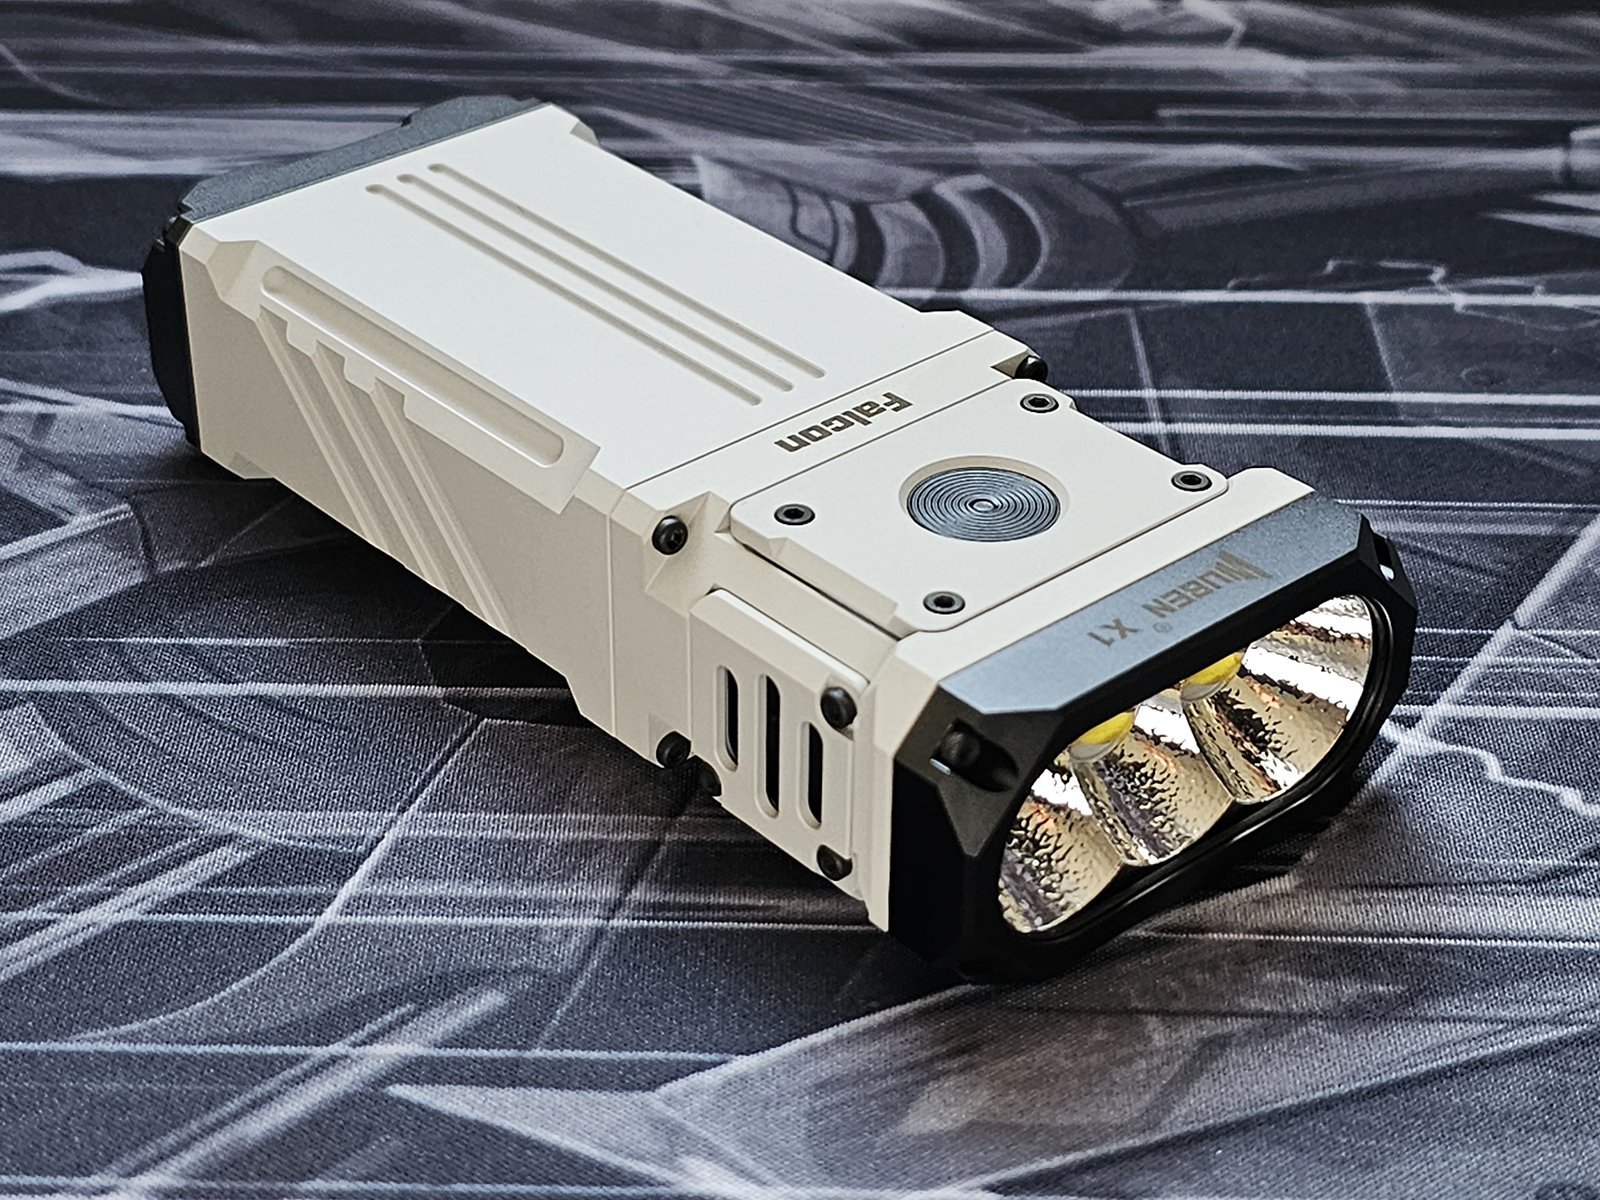
The Wuben X1 is definitely a premium torch with premium features and, also, a premium price. At the time this review is published it can be purchased directly from the company's website at $199 for the white and $178 for the black variant. Is it worth the price? For the features and build quality, but most importantly for the form factor and portability, yes!
Let's list the Pros and Cons of the Wuben X1:

Pros
+ Innovative, pocket friendly, rectangular design.
+ Intricate construction with perfect machining and no sharp edges.
+ Immaculate fit and finish.
+ Superb Anodization and Micro-Arc Oxidation.
+ Fully regulated buck driver with thermal regulation, over current protection and low voltage protection.
+ 80 CRI Cree XHP 70.2 emitters with a CCT of 5118K - 5464K.
+ Active cooling system.
+ Can sustain over 3000 Lumens for 1 hour and 45 minutes.
+ Output levels measured very close to specification, except turbo.
+ Throw and duration measured above specification, except turbo.
+ Fast USB C charging with Power Delivery.
+ Battery level and charging indicator LED.
+ 5 year warranty (even though the box erroneously states 1 year).

Cons
- The maximum output is 10570 Lumens instead of 12000 Lumens.
- Turbo drops to 2600 Lumens instead of 3000 Lumens.
- No moonlight mode.
- Only IP55 water proof rating.
- The box states a 1 year warranty even though the warranty on the website is clearly 5 years.
- Non removable (officially) batteries.
Thanks to Wuben for providing the sample for review
Polymeros Achaniotis 24/08/2023
-
 9
9





Recommended Comments
There are no comments to display.
Create an account or sign in to comment
You need to be a member in order to leave a comment
Create an account
Sign up for a new account in our community. It's easy!
Register a new accountSign in
Already have an account? Sign in here.
Sign In Now